The history of the peanut biscuit is a fascinating study in early 20th-century snack evolution, rooted in the traditional short-crust methods that British bakers perfected over centuries. Victorian-era kitchens often experimented with ground legumes to add protein and structural density to tea biscuits, a practice that preceded the industrialization of the sandwich cookie. This specific method honors that heritage by focusing on a precise fat-to-flour ratio that yields a crisp, wafer-like texture without the need for artificial stabilizers.

Recreating this iconic American treat requires a methodical approach to temperature and ingredient weight. By employing a dual-fat system and incorporating finely ground peanuts directly into the flour, we achieve a depth of flavor that commercial versions simply cannot match. This recipe focuses on technical accuracy, from the 1/8-inch thickness of the dough to the stabilized cream cheese emulsion within the filling.
The Heritage of the Perfect Peanut Snap
This recipe stands apart because it prioritizes structural integrity and authentic flavor over convenience. While modern industrial versions rely on palm oils and high-fructose corn syrup, our method uses high-quality unsalted butter and creamy peanut butter to create a rich, melt-in-the-mouth crumb. The inclusion of rice flour is a classic technical choice borrowed from traditional Scottish shortbread, providing a clean snap and preventing the cookie from becoming overly tough or bread-like.
You will find that the precision of the 1/8-inch roll is not merely a suggestion but a requirement for the perfect bite. A cookie rolled too thick will lose its crispness and overwhelm the delicate balance of the filling. By following this methodical process, you are not just baking a snack; you are practicing a refined technique that values the physics of the biscuit as much as the flavor of the peanut.
Furthermore, the ingenious use of dough scraps to create a decorative piping paste is a testament to the efficient kitchen practices of the past. This allows for a beautiful, textured finish that mimics the commercial look while maintaining the hand-crafted quality of a home kitchen. It is a triumphant example of how traditional wisdom and modern testing result in a superior bake.
Print
Nutter Butter Copycat
- Total Time: 3 hours 2 mins
- Yield: 24 cookies
- Diet: Vegetarian
Description
Master the art of the perfect peanut sandwich cookie with this technical copycat recipe. Using a blend of roasted peanuts and rice flour, these biscuits achieve a professional-grade snap and a rich, stabilized creamy filling.
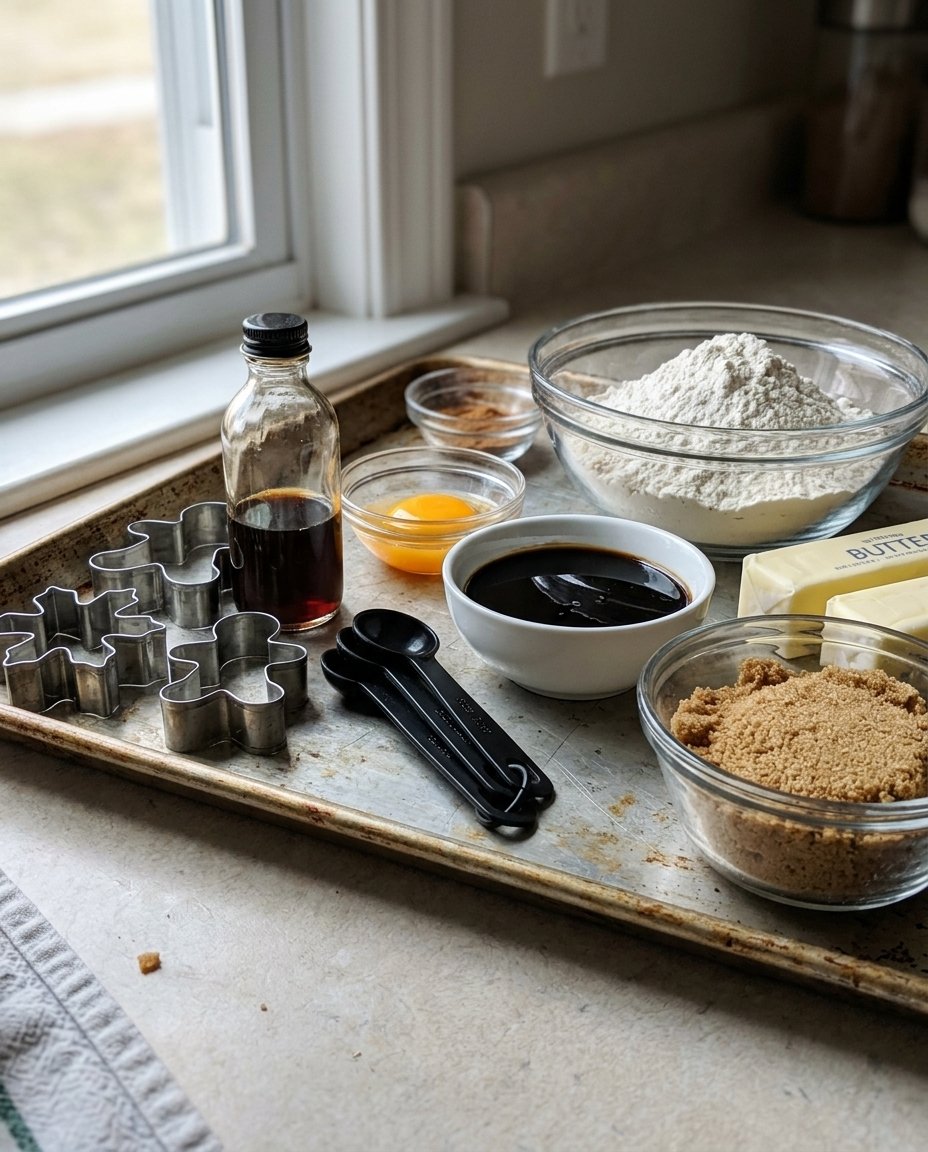
Ingredients
- 1 cup unsalted butter, softened
- 1 cup creamy peanut butter
- 1 cup granulated sugar
- 1/2 teaspoon baking soda
- 1/4 teaspoon salt
- 1 teaspoon vanilla extract
- 2 large egg yolks
- 1 1/2 cups all-purpose or rice flour
- 1/2 cup roasted peanuts
- 4 ounces cream cheese, softened
- 1/2 cup creamy peanut butter (for filling)
- 2 cups powdered sugar
- 1 teaspoon vanilla extract (for filling)
- Hot water, as needed for piping
Instructions
- Cream the butter, peanut butter, sugar, baking soda, salt, and vanilla in a stand mixer using the paddle attachment until uniform.
- Add egg yolks one at a time, allowing each to be fully absorbed before adding the next to maintain the emulsion.
- Pulse the flour and roasted peanuts in a food processor for 60 seconds, then pass the mixture through a fine-mesh sieve.
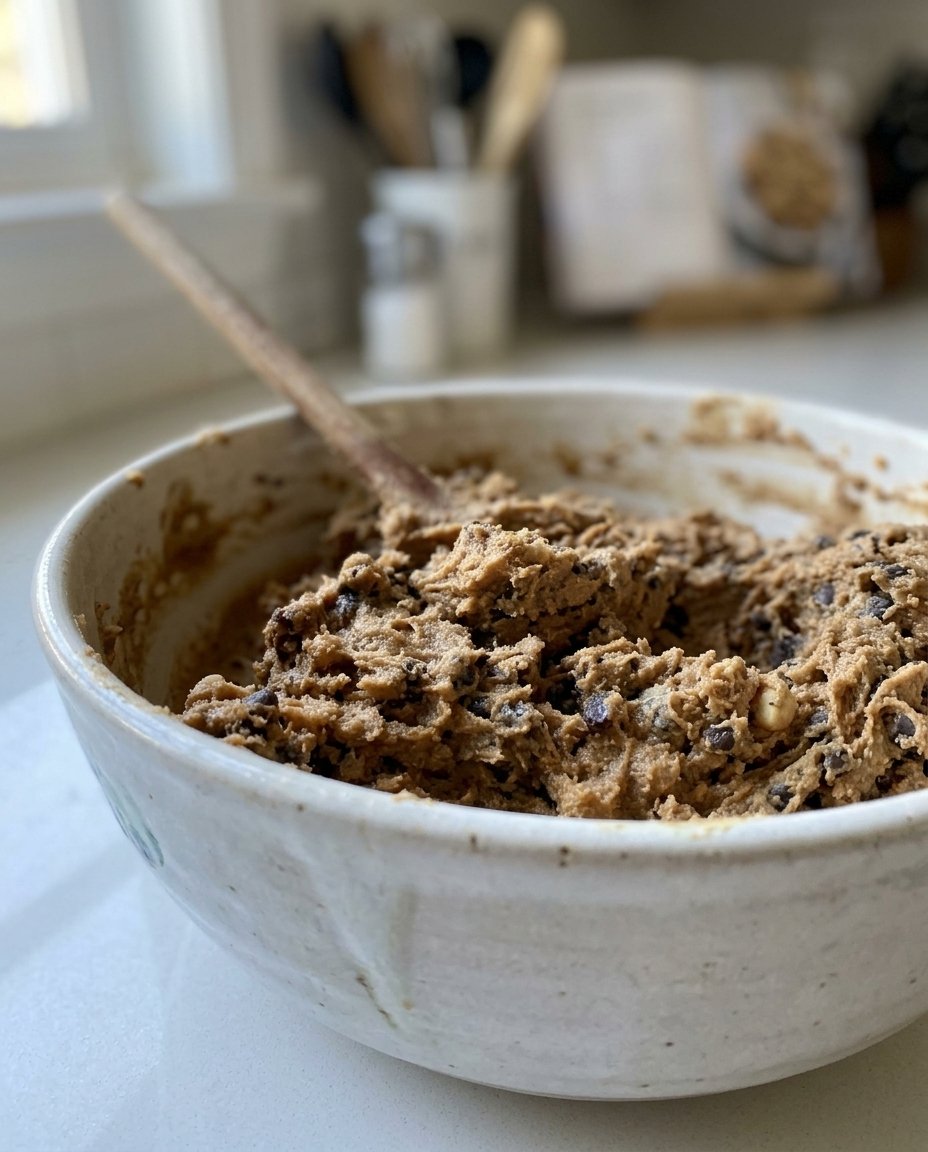
- Incorporate the dry mixture into the wet ingredients on the lowest speed until a stiff dough forms, then chill for 30 minutes.
- Roll the dough to a precise 1/8-inch thickness on a floured surface and cut into peanut-shaped ovals.
- Create a piping paste by whisking dough scraps with hot water, then pipe a cross-hatch pattern onto each biscuit.
- Bake at 350°F (180°C) for 12 minutes until edges are firm, then allow to cool completely on the baking sheet.
- Whip the filling ingredients for a full five minutes, pipe onto half the wafers, and sandwich them together before chilling for two hours.
Notes
To ensure the most accurate texture, always sift your peanut-flour blend to prevent large particles from tearing the thin dough during the rolling process. Keeping the dough chilled between batches will prevent the high fat content from melting, ensuring your decorative cross-hatch patterns remain distinct after baking.
- Prep Time: 50 mins
- Cook Time: 12 mins
- Category: Dessert
- Method: Baking
- Cuisine: American
Historical Components and Modern Formulas
To achieve the classic profile of a Nutter Butter Copycat, one must understand the role of each component within the chemical structure of the dough. We use a combination of fats and specialized flours to ensure the cookie remains stable enough to hold a filling yet tender enough to break cleanly.
- Unsalted Butter and Creamy Peanut Butter: This emulsion provides the primary fat source. Butter offers a traditional dairy finish, while peanut butter introduces essential oils that soften the gluten network.
- Granulated Sugar: Beyond sweetness, sugar acts as a tenderizer and aids in the browning process via the Maillard reaction.
- Rice Flour or All-Purpose Flour: Using rice flour is a secret of the trade for achieving maximum crispness. It lacks gluten-forming proteins, which keeps the wafer light and brittle.
- Roasted Peanuts: These are processed with the flour to ensure the flavor is deeply integrated into the biscuit’s crumb rather than just sitting on top.
- Egg Yolks: These provide the necessary lecithin for emulsification and contribute to the rich, golden hue of the finished biscuit.
- Cream Cheese (for the filling): This is a technical addition that stabilizes the peanut butter frosting, preventing it from leaking or becoming too soft at room temperature.
The Proper Method for Peanut Sandwich Biscuits
Step 1: Establish the Fat Emulsion
In the bowl of a stand mixer, combine the butter, peanut butter, sugar, baking soda, salt, and vanilla. Using the paddle attachment on medium speed, cream these ingredients just until the mixture is uniform. It is vital to avoid over-mixing here; excessive aeration will cause the cookies to puff too much in the oven, destroying the flat surface needed for a sandwich. This methodical approach to creaming was well-understood by bakers in the late 1800s who sought a dense, professional crumb.
Step 2: Incorporate the Protein
With the mixer running on a low setting, add the egg yolks one at a time. Wait until each yolk is fully absorbed before adding the next. This prevents the emulsion from breaking and ensures a smooth, workable dough. Once the yolks are in, stop the mixer and scrape the sides of the bowl with a rubber spatula to ensure no pockets of unmixed fat remain.
Step 3: Prepare the Technical Flour Blend
In a food processor, combine your flour of choice with the roasted peanuts. Process this for at least sixty seconds until the peanuts are pulverized into a fine meal. Pass this mixture through a fine-mesh sieve. This step is critical; any large peanut fragments will prevent you from rolling the dough to the necessary 1/8-inch thickness and will likely clog your piping tip during the decoration phase. Re-grind any bits that stay in the sieve until they pass through.
Step 4: Final Dough Integration
Add the sieved peanut-flour mixture to the creamed base all at once. Set the mixer to its lowest speed and mix only until a stiff dough forms. Over-working at this stage would develop the gluten, leading to a tough cookie. Once uniform, turn the dough onto a clean surface and knead lightly by hand until it forms a smooth, cohesive ball. Flatten it into a disc, wrap it tightly, and chill for thirty minutes to allow the fats to solidify and the flour to hydrate.
Step 5: Precision Rolling and Cutting
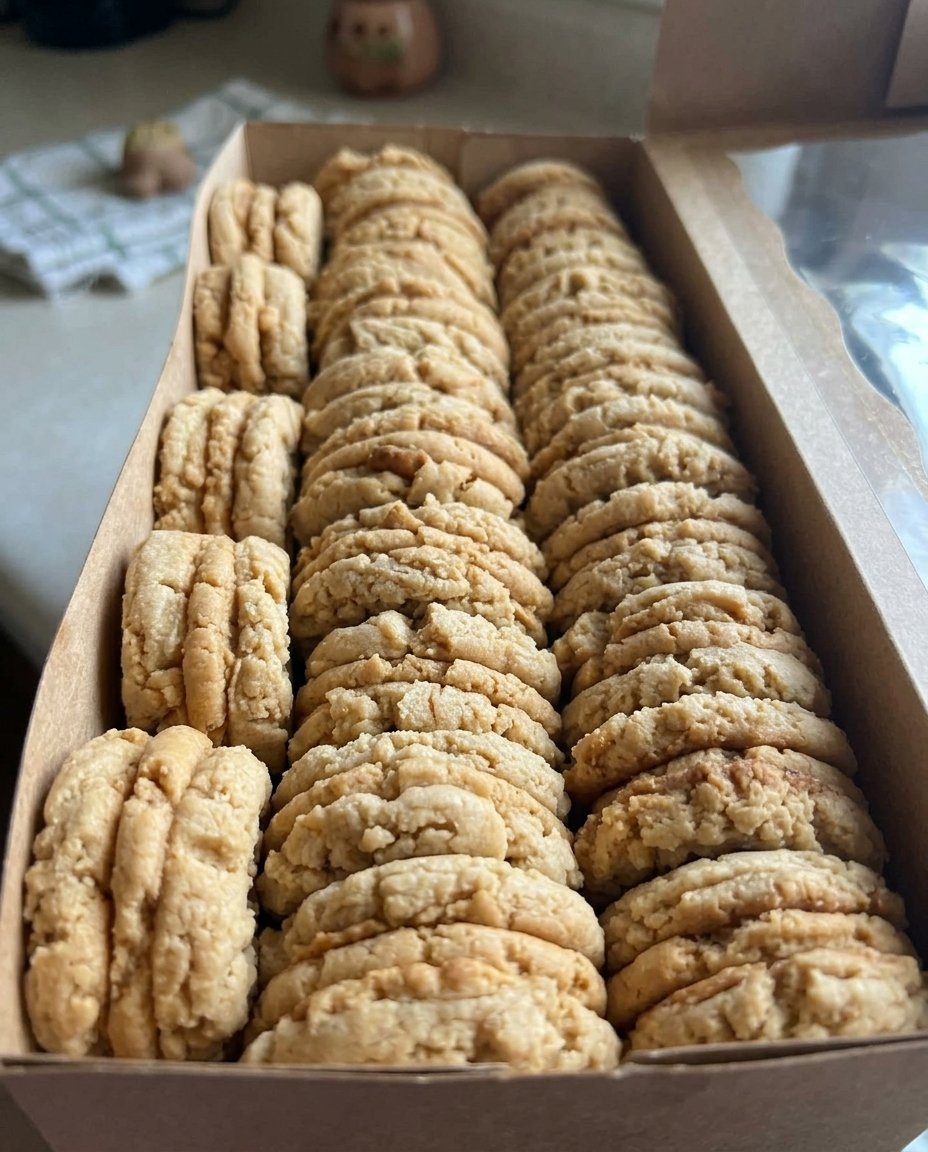
Preheat your oven to 350°F (180°C). On a lightly floured surface, roll the chilled dough to a precise thickness of 1/8 inch. If the dough is too thick, the final sandwich will be cumbersome and out of proportion. Use a metal spatula to loosen the dough from the counter before cutting. Use a peanut-shaped cutter or a slightly elongated oval to mimic the traditional look. Transfer the shapes to a parchment-lined baking sheet with care.
Step 6: The Decorative Piping Technique
Take your remaining dough scraps and place them in a small bowl. Add hot water one teaspoon at a time, whisking until the scraps turn into a smooth, pipeable paste. Transfer this to a piping bag with a tiny tip and draw a cross-hatch pattern on each cookie. This technique preserves the traditional aesthetic without requiring specialized industrial molds. Bake for 12 minutes until the edges are firm, then cool completely on the pan.
Step 7: Formulate the Filling
For the filling, cream together the butter, peanut butter, cream cheese, powdered sugar, and vanilla. The secret to a professional filling is the mixing time; beat the mixture on medium speed for a full five minutes. This creates a remarkable, smooth texture that lacks the grittiness often found in amateur frostings. The cream cheese provides a subtle tang that balances the sugar and stabilizes the filling for long-term storage.
Step 8: Final Assembly
Flip half of the cooled wafers over. Pipe a barbell-shaped portion of filling down the center of each. Press a second wafer on top firmly but gently to avoid cracking the crisp biscuit. Refrigerate the assembled sandwiches for at least two hours to allow the filling to set and the flavors to meld into a harmonious whole.
Precision Methods for Professional Results
To achieve the most consistent results, always use a digital scale to measure your ingredients. Weight-based measurements are the hallmark of a disciplined baker and prevent the structural failures common with volume-based baking. If you find your dough is sticking during the rolling process, try rolling it between two sheets of parchment paper. This method maintains a uniform thickness without the need for excess flour, which can dry out the dough. For more insights into technical excellence, you can study our guide on Efficient Cookie Methods.
Temperature control is equally important. If your kitchen is particularly warm, the high fat content in this dough will cause it to soften rapidly. Should the dough become difficult to handle or lose its shape, return it to the refrigerator for ten minutes. A cold dough produces a cleaner cut and a better-defined pattern during the baking process. Finally, ensure your oven is truly at temperature by using an internal thermometer; even a ten-degree variance can affect the final snap of the biscuit.
Historical and Regional Adaptations
While the peanut is the classic choice, this technical framework can be adapted to other nut butters for a modern twist. An almond butter variation, using finely ground blanched almonds in the flour mix, creates a more delicate, floral biscuit that pairs beautifully with Earl Grey tea. You might also consider a darker, more robust version by using roasted almond butter and a touch of molasses in the dough. For those mastering the basics, our Foundation Cookie Recipes offer a range of starting points for these experiments.
In some regional British interpretations, a similar sandwich biscuit is made using toasted hazelnut meal and a cocoa-enriched filling. This ‘Gianduja’ style cookie follows the same rolling and piping techniques but offers a completely different flavor profile. Regardless of the nut chosen, the key is to maintain the sifting process to ensure the ground nuts are fine enough to pass through the sieve, maintaining the integrity of the thin wafer.
Traditional Service and Pairing
These sandwich biscuits are best served at room temperature, though they should be stored in the refrigerator to maintain the stability of the filling. In the British tradition, they are a remarkable accompaniment to a strong black tea, such as Assam or a smoky Lapsang Souchong. The tannins in the tea cut through the richness of the peanut fats, creating a balanced palate experience. For a more festive presentation, you can find inspiration in our Holiday Cookie Science section.
For a modern dessert course, serve these cookies alongside a small glass of chilled tawny port or a nutty sherry. The oxidative notes in the wine complement the roasted peanut flavors perfectly. Always present the cookies on a pre-chilled ceramic plate if the environment is warm, as this will help the filling maintain its barbell shape during service. This attention to detail is what transforms a simple cookie into a technical triumph.
The Technical Truth of the Sandwich Biscuit
Achieving the perfect Nutter Butter Copycat is a testament to the power of precision and the value of historical baking techniques. By respecting the 1/8-inch rolling requirement and the five-minute aeration of the filling, you have produced a biscuit that is structurally sound and flavor-dense. This method proves that even the most commercial of snacks can be brought into the realm of high-level pastry through careful science and traditional wisdom. To refine your finishing touches, consider reviewing our guide on Precision Cookie Decorating. We invite you to share your results with our community of methodical bakers on Facebook, Instagram, and Pinterest. Your dedication to the craft ensures these classic methods continue to thrive in the modern kitchen.

