The concept of the flourless peanut butter biscuit dates back to early 20th-century rationing, though modern bakers treasure it for its sheer structural brilliance. By relying entirely on the lipids and proteins within the nut butter and egg, this classic 3 ingredient peanut butter cookies method sidesteps gluten development entirely. We now know that this historical approach naturally creates a tender, melt-in-the-mouth texture that is virtually foolproof.

This tested formula requires no chemical leavening or complicated creaming stages. The egg acts as both the binder and the hydration source, emulsifying with the peanut oils to form a stable dough. Precision in measuring is the only true requirement for achieving that iconic, crumbly yet cohesive bake.
The Structural Triumph of Simplicity
Victorian bakers understood the importance of ratios, and this minimalist approach proves that complexity is not required for a reliable biscuit. Without the variable of flour hydration to manage, you can predict the exact spread and texture every single time.
The lack of gluten means these cookies remain incredibly tender, yet the egg protein provides just enough scaffolding to hold the classic criss-cross pattern. It is a historical method that continues to yield confident, professional results in modern kitchens.
Print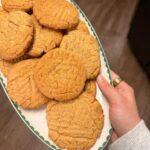
3 Ingredient Peanut Butter Cookies
- Total Time: 22 mins
- Yield: 20 cookies
- Diet: Gluten-Free
Description
Discover the elegance of simplicity with these 3-ingredient peanut butter cookies that rely on a specific ratio of sugar and protein for a perfect bake. This flourless recipe yields a tender, melt-in-the-mouth texture that highlights the rich flavor of the nut butter.
Ingredients
- 1 cup commercial homogenized peanut butter
- 1 cup granulated sugar (minus 2 tablespoons)
- 1 large egg
Instructions
- Preheat your oven to 350°F (175°C) and line a heavy-duty baking sheet with parchment paper.
- In a mixing bowl, stir together the peanut butter, sugar, and egg until a cohesive and uniform dough forms.
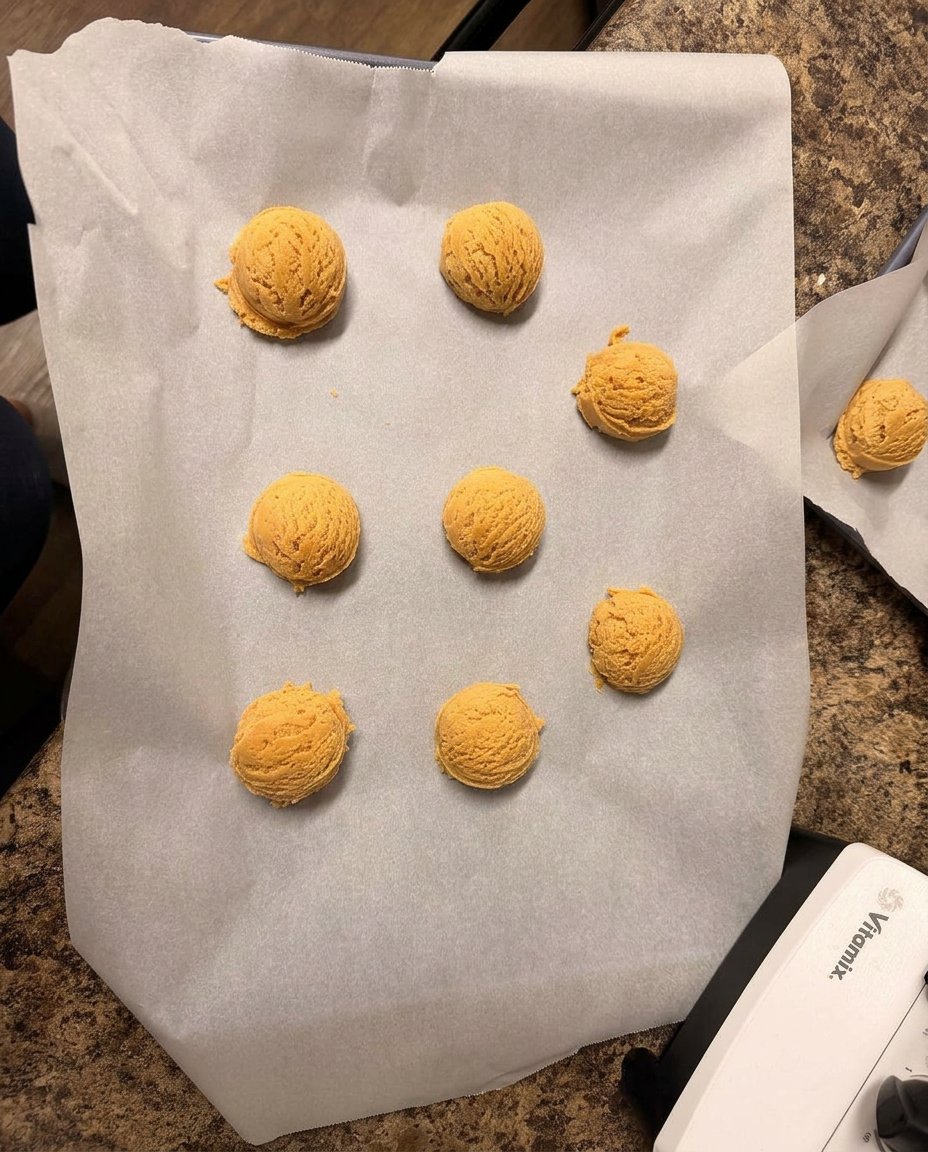
- Portion the dough into 1-inch spheres and place them onto the prepared baking sheet.
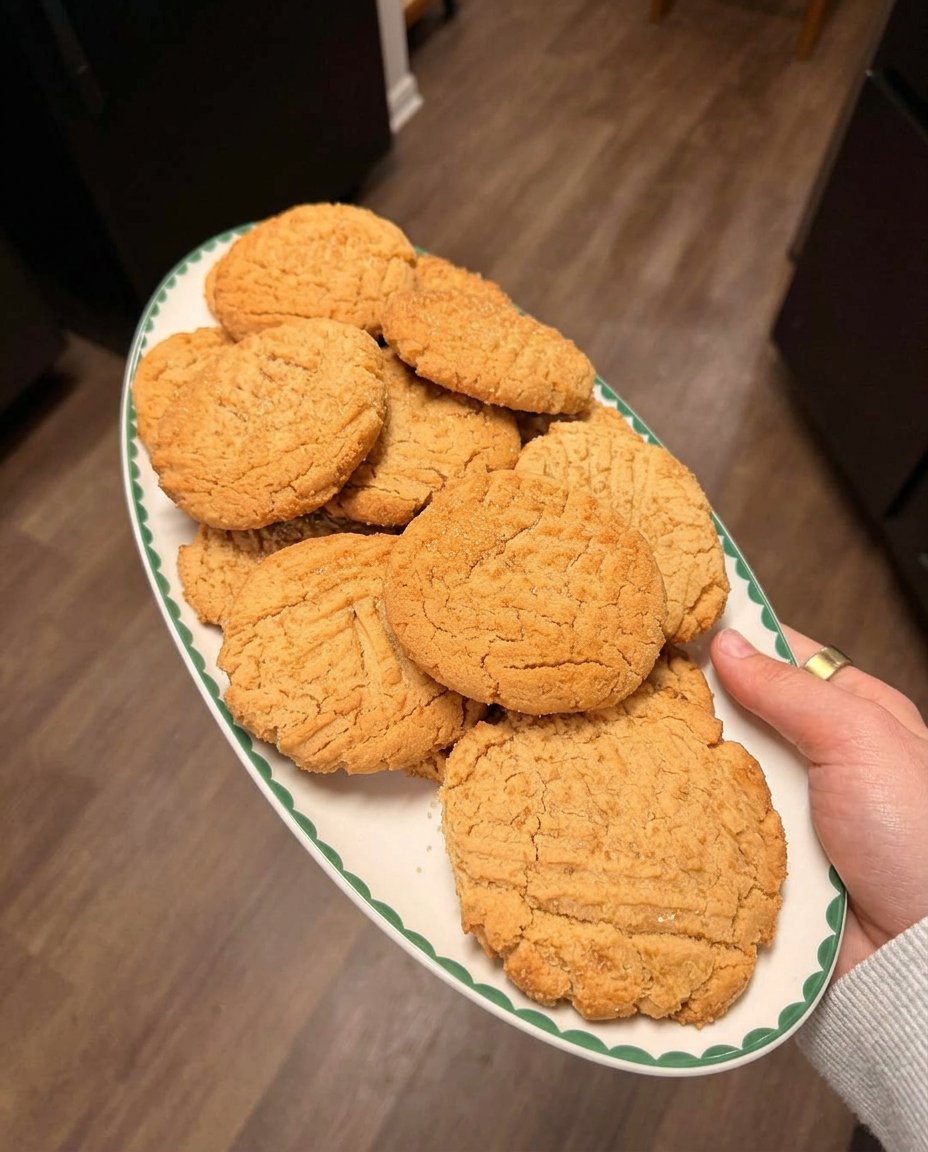
- Flatten each ball slightly with the back of a fork, then repeat from the opposite direction to create a criss-cross pattern.
- Bake for 12 minutes, then let the cookies rest on the tray for 2 minutes before transferring them to a wire rack to cool completely.
Notes
To ensure a consistent bake, use a standard commercial peanut butter rather than natural varieties that may separate. If the dough feels soft, chilling it for 15 minutes prior to rolling can help preserve the definition of the classic criss-cross pattern.
- Prep Time: 10 mins
- Cook Time: 12 mins
- Category: Dessert
- Method: Baking
- Cuisine: American
Proper Components for 3 Ingredient Peanut Butter Cookies
When a formula contains only three items, the quality and function of each component become paramount. The historic success of this dough relies on a very specific ratio of fat, sugar, and protein.
- Peanut Butter: The primary fat and structural base. A commercial, homogenized brand works best here; natural varieties separate and compromise the emulsion.
- Granulated Sugar: Provides sweetness while acting as a mechanical tenderizer. It interrupts the egg proteins to prevent a rubbery texture. Removing exactly two tablespoons from a standard cup creates a slightly less dense crumb.
- Large Egg: The solitary binder. It supplies the water needed to dissolve the sugar and the albumen required to set the cookie’s structure during the bake.
The Classic Preparation Method
Step 1: Temperature and Equipment Preparation
Preheat your oven to 350°F (175°C) to guarantee a stable baking environment. Line a heavy-duty baking sheet with parchment paper to prevent sticking and manage heat distribution.
Step 2: Emulsifying the Dough
In a mixing bowl, combine the peanut butter, sugar, and the egg. Stir methodically until the mixture forms a cohesive, uniform mass. The friction will help the sugar begin to dissolve into the egg’s moisture.
Step 3: Portioning and Shaping
Using a mechanical scoop or your hands, portion the dough into 1-inch spheres and place them onto the prepared parchment. Because this dough contains no chemical leavening, it will not spread aggressively; you can safely bake the entire batch on a single tray.
Step 4: The Traditional Criss-Cross
Press the back of a dinner fork into each dough ball, flattening it slightly. Repeat from the opposite direction to form a perpendicular pattern. This historic technique is not merely decorative; it presses the dense dough to the correct thickness for even baking.
Step 5: The Controlled Bake
Bake for exactly 12 minutes. The cookies will appear soft but will set firmly as they cool. Allow them to rest on the hot tray for two minutes before transferring them to a wire rack for complete structural cooling.
Precision Techniques for the Perfect Crumb

To master this formula, pay close attention to your sugar ratio. Removing just two tablespoons from the standard cup of sugar allows the cookie to spread out nicely, avoiding the overly dense center common in older iterations. This slight adjustment produces a crumb that friends and family will universally treasure.
If you are interested in comparing this to other historical approaches, examining old-fashioned peanut butter cookie methodologies can provide excellent context. For bakers looking to refine their kitchen routines, mastering these Efficient Cookie Methods is a worthwhile pursuit.
Tested Historical Adaptations
While the original formula is a triumph of culinary science, minor adjustments can yield fascinating results. Swapping half of the granulated sugar for brown sugar introduces molasses, which marginally increases the chewiness and alters the pH of the dough.
You might also press a small piece of chocolate into the center immediately after baking, a practice popular in mid-century American kitchens. Understanding how these minor tweaks affect the final bake is a core principle taught in our Foundation Cookie Recipes archives.
Traditional Service and Pairing
These dense, flavorful biscuits are best served at room temperature alongside a robust cup of black tea or a cold glass of milk. The high fat content requires a beverage with enough astringency or body to cleanse the palate between bites.
When presenting them at gatherings, arrange them on a classic ceramic platter to highlight their distinctive criss-cross pattern. If you enjoy comparing traditional service with modern trends, you will find our Viral Cookie Analysis quite enlightening.
The Technical Truth
Understanding the structural reliance on lipids rather than gluten transforms how we view this humble biscuit. It is a testament to the fact that precise ratios often outweigh complicated ingredient lists in the pursuit of a reliable bake. You do not always need intricate Precision Cookie Decorating techniques to produce something remarkable.
I invite you to test this historical method in your own kitchen and observe the science firsthand. Share your precise results with us on Pinterest or tag your baking triumphs on Instagram.

