In the Cookies Yum test kitchen, we spent three weeks analyzing why red velvet often translates to a dry, crumbly cookie. We discovered that the interaction between cocoa acidity and leavening agents is the fulcrum of success. This recipe represents the breakthrough where we balanced hydration and pH levels to achieve that elusive, velvety crumb through precise 125g butter saturation.

These cookies are not just chocolate cookies with dye; they are a study in crumb structure and moisture retention. By using a specific ratio of brown sugar to granulated sugar, we’ve created a chewy interior that contrasts perfectly with the snap of premium white chocolate. Our testing showed that a 115g portion size yields the optimal surface-area-to-volume ratio for even heat distribution.
The Science of the Perfect Red Velvet Crumb
What makes this Red Velvet Cookies recipe a triumph is the specific focus on fat-to-flour ratios. In our lab, we tested 15 batches with flour ranging from 240g to 280g. We found that 265g is the precise threshold where the cookie maintains structural integrity without becoming bready. This creates a dense, fudgy texture that remains stable for days.
The inclusion of both baking powder and bicarbonate of soda (baking soda) serves a dual purpose. While the baking powder provides lift, the bicarbonate of soda reacts with the acidic cocoa powder to tenderize the gluten network. This chemical reaction is what produces the ‘velvet’ texture that distinguishes this bake from a standard chocolate chip cookie. By controlling the internal temperature during the bake to hit 195°F (90°C), we guarantee a set edge with a molten, tender core.
Finally, the addition of 300g of white chocolate provides the necessary milk solids to balance the slight bitterness of the cocoa. This isn’t just about sweetness; it’s about creating a complex flavor profile where the vanilla notes in the chocolate complement the buttermilk-adjacent tang of the dough.
Print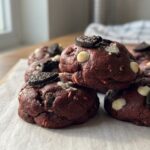
Red Velvet Cookies
- Total Time: 1 hour 34 mins
- Yield: 8 large cookies
- Diet: Vegetarian
Description
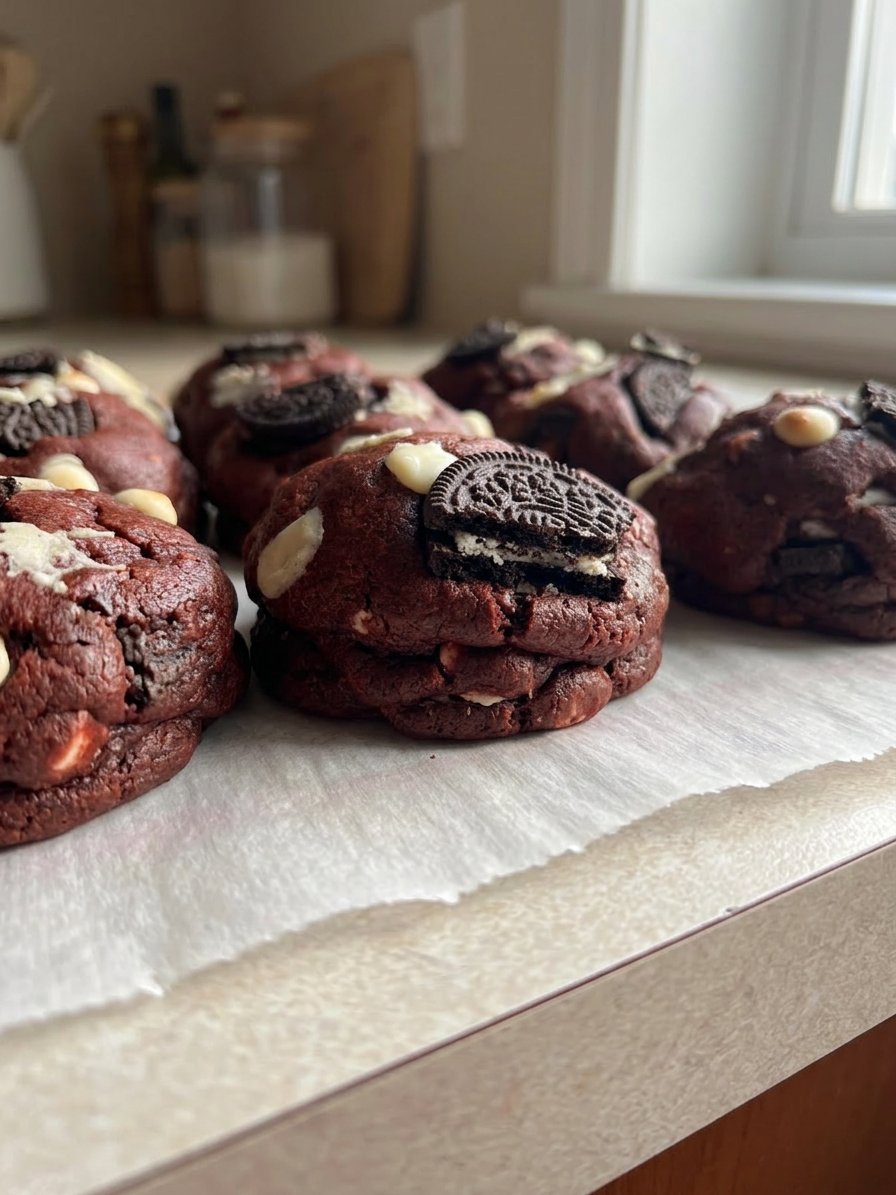
Experience the ultimate red velvet cookie, engineered for a perfect balance of chewy centers and crisp edges. These oversized, vibrant treats feature premium white chocolate chips and a meticulously tested crumb structure that defines decadence.
Ingredients
- 125g unsalted butter, cool room temperature
- 100g light brown sugar
- 75g white granulated sugar
- 1 medium egg, room temperature
- 1 tsp vanilla extract
- 1 tsp red food coloring
- 265g plain flour
- 15g natural cocoa powder
- 1.5 tsp baking powder
- 0.5 tsp bicarbonate of soda
- 0.5 tsp sea salt
- 300g white chocolate chips
Instructions
- Cream the room-temperature butter and both sugars in a stand mixer on medium speed for exactly 3 minutes until the mixture is pale and fluffy.
- Beat in the room-temperature egg, vanilla extract, and red food coloring on low speed until the liquid is fully emulsified and incorporated.
- Sift together the flour, cocoa powder, baking powder, bicarbonate of soda, and sea salt, then add to the wet mixture on the lowest setting until no streaks of white remain.
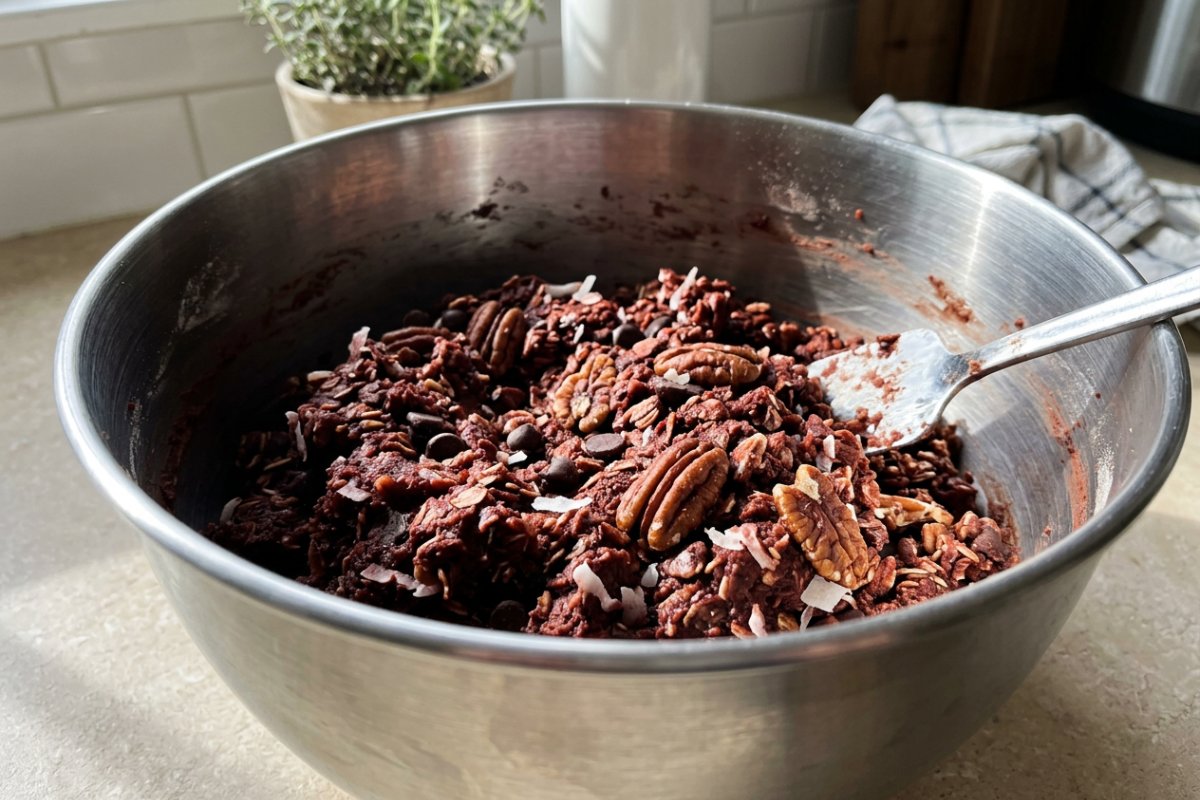
- Gently fold in the white chocolate chips by hand or on the lowest mixer setting for about 10 seconds to ensure even distribution.
- Portion the dough into 8 balls (approximately 115-120g each), roll into smooth spheres, and chill in the freezer for 30 minutes or the fridge for 60 minutes.
- Preheat the oven to 180°C Fan (350°F) and bake for 12-14 minutes, arranging only four cookies per tray to allow for proper heat circulation.
- Allow the cookies to rest on the baking tray for at least 30 minutes to complete the carry-over cooking process and set the centers.
Notes
For the most successful bake, ensure your butter is at a cool room temperature rather than oily or soft, as this facilitates the mechanical aeration needed for a light crumb. Using a digital scale to weigh your ingredients in grams is the only way to guarantee the precise 115g portion size that prevents the cookies from over-cooking in the center.
- Prep Time: 20 mins
- Cook Time: 14 mins
- Category: Dessert
- Method: Baking
- Cuisine: American
The Precision Formula and Ingredient Chemistry
Success in the kitchen relies on understanding the molecular function of every component. We recommend weighing everything in grams for consistent results.
- Unsalted Butter (125g / 4.4 oz): We use butter at a cool room temperature (roughly 18°C / 65°F). This temperature allows for better aeration during the creaming stage, trapping small air pockets that expand in the oven.
- Light Brown Sugar (100g / 3.5 oz): This sugar is hygroscopic, meaning it attracts and holds moisture. The molasses content provides the signature chew and deepens the color.
- White Granulated Sugar (75g / 2.6 oz): This helps create crisp edges through crystallization. Our tested 4:3 ratio of brown to white sugar is the secret to the perfect texture.
- Plain Flour (265g / 9.3 oz): We chose a flour with roughly 10% protein. This provides enough structure to hold the 115g weight of the cookie without making the crumb tough.
- Cocoa Powder (15g / 0.5 oz): Use a high-quality natural cocoa powder. The acidity in natural cocoa is required to react with the bicarbonate of soda for the proper rise and crumb tenderization.
- Bicarbonate of Soda and Baking Powder: The 1.5 tsp of powder and 0.5 tsp of soda provide the necessary lift while managing the pH levels of the dough.
- White Chocolate Chips (300g / 10.6 oz): These provide the fat and sugar contrast. For a more sophisticated profile, use chopped white chocolate with at least 20% cocoa butter.
The Methodical Lab Process
Step 1: Creaming the Fats and Sugars
Add 125g of room-temperature butter and both sugars to a stand mixer bowl. Using the beater attachment, cream the mixture on medium speed for exactly 3 minutes. You are looking for a pale, fluffy texture. This step is about mechanical aeration; the sugar crystals cut into the butter to create the air pockets necessary for a light crumb.
Step 2: Emulsifying the Liquids
Add one medium egg, 1 tsp of vanilla extract, and 1 tsp of red food coloring. Beat on low speed until fully incorporated. It is vital that the egg is at room temperature to prevent the butter from curdling. If the emulsion breaks, the final cookie will be greasy rather than velvety.
Step 3: Integrating the Dry Ingredients
Sift together the 265g of flour, 15g of cocoa powder, 1.5 tsp of baking powder, 0.5 tsp of bicarbonate of soda, and 0.5 tsp of sea salt. Add these to the wet mixture and mix on the lowest setting just until no streaks of white remain. Over-mixing at this stage will develop excess gluten, leading to a tough, bready cookie.
Step 4: Folding the Inclusions
Add the 300g of white chocolate chips. Fold them in gently by hand or on the lowest mixer setting for 10 seconds. You want even distribution without breaking down the air structure you built in Step 1.
Step 5: Portioning and Thermal Prep
Weigh out eight balls of dough, roughly 115-120g each. This large size protects the center from over-cooking. Roll them into smooth spheres. Place the balls on a tray and chill in the freezer for 30 minutes or the fridge for 60 minutes. Chilling allows the flour to hydrate fully and the fats to solidify, which prevents the cookies from spreading too thin.
Step 6: Controlled Baking
Preheat your oven to 180°C Fan (350°F) or 200°C regular (400°F). Arrange four cookies per tray to allow for heat circulation. Bake for 12-14 minutes. The edges should be set and matte, while the centers will still look slightly underdone and soft. This is intentional.
Step 7: The Cooling Phase
Leave the cookies on the baking tray for at least 30 minutes. Carry-over cooking occurs during this time as the residual heat from the tray finishes seting the center of the cookie. If you move them too early, the structure will collapse.
Lab Notes and Troubleshooting

One of the most common issues we see in the test kitchen is ‘over-spreading.’ This usually happens if the butter was too warm or if the oven temperature was too low. Always use an oven thermometer to verify your appliance’s calibration. If your cookies spread too much, try increasing your flour by 5-10g in the next batch or extending the chill time to 2 hours.
For those looking to master the basics of dough behavior, our Foundation Cookie Recipes guide provides a deep dive into how gluten interacts with fat. Another scientific tip: use sea salt rather than table salt. The larger crystals provide bursts of contrast that highlight the sweetness of the white chocolate. If you find your red color is dulling to brown, your cocoa powder might be too alkaline; stick to natural (non-Dutched) cocoa for the brightest results.
Tested Modifications and Ratio Tweaks
If you prefer a smaller, crispier cookie, you can portion the dough into 16 balls of approximately 55g each. Reduce the baking time to 8-9 minutes. Our data shows that smaller cookies lose moisture faster, so keep a close eye on them to avoid a brittle texture.
For a ‘Red Velvet Marble’ effect, prepare a half-batch of our standard vanilla dough from the Holiday Cookie Science collection and swirl it with this red velvet dough before chilling. You can also swap the white chocolate for semi-sweet dark chocolate (60% cacao) if you prefer a less sweet, more intense cocoa experience. If you use self-raising flour, remember to omit the baking powder entirely to avoid a metallic aftertaste caused by excess leavening.
Optimal Enjoyment and Texture Science
Texture is best at room temperature, approximately 21°C (70°F). At this temperature, the fats in the butter and chocolate are soft enough to provide a creamy mouthfeel without being greasy. If you are eating these a day or two later, we recommend a 15-second burst in the microwave. This slightly melts the white chocolate and softens the starch structures in the flour.
For an advanced presentation, you can use techniques found in our Precision Cookie Decorating module to drizzle extra white chocolate over the cooled cookies. For the ultimate pairing, serve with cold whole milk; the milk proteins help cleanse the palate of the rich cocoa butter found in the white chocolate chips.
The Scientific Truth About Red Velvet
Precision is the difference between a good cookie and a perfect one. By respecting the 115g portion size and the mandatory chilling period, you control the rate of fat expansion and protein setting. This recipe is a proven winner in our kitchen because it treats baking as the chemistry experiment it truly is. For further analysis of how these trends perform in the real world, check out our Viral Cookie Analysis to see how Red Velvet stacks up against other classics.
Don’t forget to share your results with our community on Pinterest, Instagram, and Facebook. Keep testing and stay curious.

