In the early 20th century, the advent of the domestic refrigerator—or the icebox—revolutionized the American and British kitchen, allowing bakers to move away from immediate drop cookies toward methodical, sliced biscuits. This chilling technique was a significant discovery, as it permitted the fats to solidify and the flour to hydrate fully before the dough met the heat of the oven. Modern testing confirms that this resting period is not merely a convenience but a vital step in developing complex flavors and a superior, crisp texture.

These particular icebox cookies are a testament to technical precision, featuring a high butter content and paper-thin dimensions that produce a remarkable snap. By allowing the dough to rest for at least eight hours, we encourage enzymatic activity that breaks down starches, leading to a deeper browning and a sophisticated sweetness. This method honors the heritage of the patient baker who understands that time is just as important as any physical ingredient in the pantry.
The Tradition of the Sliced Biscuit
There is a profound satisfaction in the ritual of the icebox cookie, a method that connects us to a time when kitchen efficiency was becoming a science. You will find that the high proportion of butter—a full sixteen ounces—creates a dough that is both rich and structurally sound once chilled. This allows for the precise cutting of slices so thin they are almost translucent, a feat impossible with standard room-temperature doughs.
Beyond the texture, the inclusion of slivered almonds provides a structural contrast that is deeply rooted in British biscuit traditions. Unlike soft, modern cookies that rely on chemical leavening for height, these cookies rely on the physical expansion of water vapor and the strength of the flour-fat emulsion. The result is a biscuit that remains crisp for weeks, making it a reliable staple for those who value both quality and longevity in their baking.
This recipe also serves as an excellent study in gluten management. By thoroughly chilling the dough, we ensure that the gluten network remains relaxed, preventing the cookies from becoming tough despite the significant amount of flour. It is a triumph of old-world wisdom that modern food science has only recently begun to explain in full detail.
Print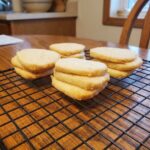
Icebox Cookies
- Total Time: 8 hours 32 mins
- Yield: 60 cookies
- Diet: Vegetarian
Description
These traditional icebox cookies are a masterclass in patience, requiring a long chill to develop a deep, buttery flavor and a signature crisp snap. Studded with slivered almonds and subtly spiced with cinnamon, they are an elegant accompaniment to tea or coffee.
Ingredients
- 16 oz unsalted butter
- 1 cup light brown sugar
- 1 cup granulated sugar
- 3 large eggs
- 5 cups all-purpose flour
- 1/2 pound slivered almonds
- 1 teaspoon baking soda
- 1 teaspoon ground cinnamon
Instructions
- Cream the butter with the light brown and granulated sugars on medium speed until the mixture is light and fluffy.
- Incorporate the eggs one at a time, mixing thoroughly after each addition to ensure a stable emulsion.
- Sift together the flour, baking soda, and cinnamon, then gradually mix into the wet ingredients on the lowest mixer setting.
- Gently fold the slivered almonds into the dough using a spatula until they are evenly distributed.
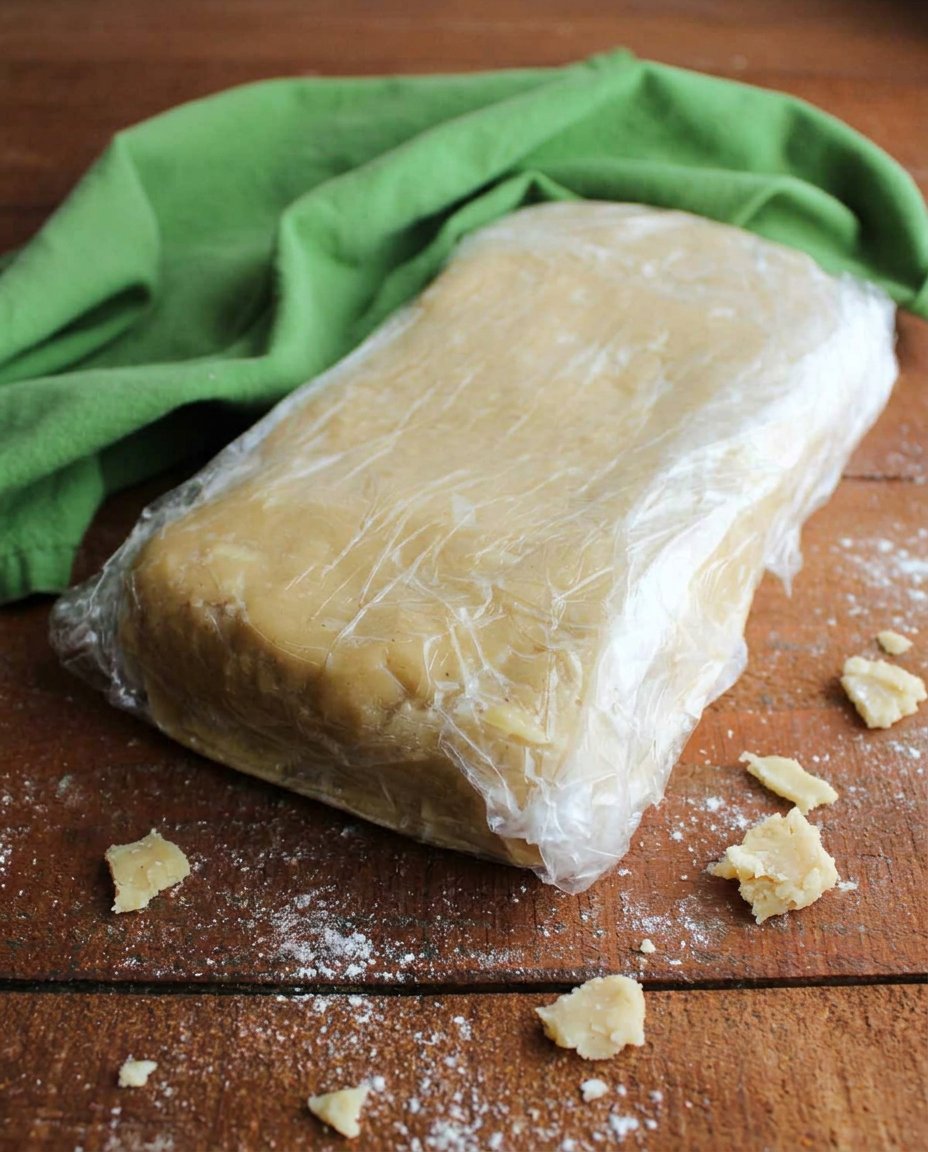
- Shape the dough into long cylindrical logs, wrap them tightly in plastic or parchment, and refrigerate for 8 to 48 hours.
- Preheat your oven to 350°F and slice the chilled dough logs into paper-thin rounds using a very sharp chef’s knife.
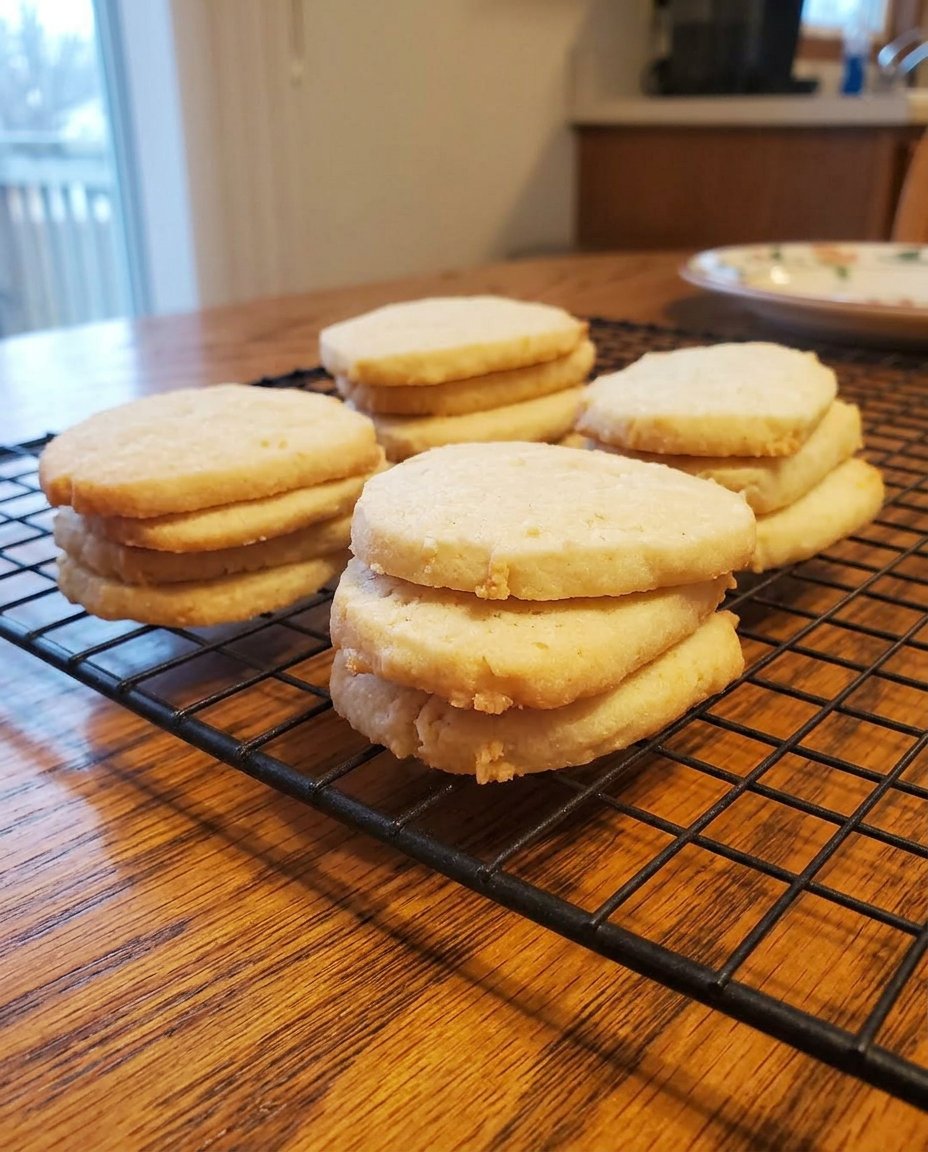
- Bake for approximately 7 minutes until the edges are golden, then let cool on the sheet for 5 minutes before transferring to a wire rack.
Notes
For the cleanest slices, ensure your knife is exceptionally sharp and chill the dough logs again if they become too soft to handle during the cutting process. To prevent the logs from flattening on one side while in the refrigerator, you can place them inside empty paper towel tubes. These cookies reach their maximum crispness once completely cooled and can be stored in an airtight container for up to two weeks.
- Prep Time: 25 mins
- Cook Time: 7 mins
- Category: Dessert
- Method: Baking
- Cuisine: American
Historical Ingredients and Proper Components

To achieve the authentic texture of a traditional icebox cookie, one must pay close attention to the quality and temperature of the components. The ratios here are calculated to provide maximum crispness while maintaining enough integrity to hold the slivered almonds in place during the slicing process.
- Butter (16 oz): Use a high-quality unsalted butter with a consistent fat percentage. This provides the primary structure and the signature melt-in-the-mouth quality.
- Light Brown and Granulated Sugars (1 cup each): The granulated sugar provides the necessary snap, while the brown sugar introduces a hint of moisture and molasses for a complex flavor profile.
- Large Eggs (3): These act as the primary emulsifier, binding the fats and sugars together into a cohesive dough.
- All-Purpose Flour (5 cups): This provides the protein structure. In British tradition, this would be similar to a plain flour, offering enough strength to hold the shape without the elasticity of bread flour.
- Slivered Almonds (1/2 pound): These must be slivered, not whole, to allow the knife to pass through the log cleanly without shattering the surrounding dough.
- Baking Soda and Cinnamon: The soda aids in browning through the Maillard reaction, while the cinnamon provides a subtle, warming aromatic note that dates back to Victorian spice imports.
The Proper Method for Sliced Cookies
Step 1: Creaming the Fats and Sugars
Begin by beating the sixteen ounces of butter with both the light brown and granulated sugars. Use a medium speed to ensure you are incorporating air without over-heating the butter. This process, known as creaming, creates a matrix of air bubbles that will expand in the oven. Continue until the mixture is light in color and noticeably fluffy, a technique Victorian bakers mastered by hand to ensure a light crumb.
Step 2: Emulsifying the Eggs
Add the three eggs one at a time. It is vital to mix thoroughly after each addition to maintain the emulsion. If the eggs are added too quickly, the fat and liquid may separate, leading to a greasy cookie. This methodical approach ensures that the protein from the eggs is evenly distributed throughout the sugar-butter matrix, providing the necessary lift during the bake.
Step 3: Integrating Dry Ingredients
Sift together the flour, baking soda, and cinnamon before slowly adding them to the wet mixture. Turn your mixer to the lowest setting or fold by hand to avoid overworking the gluten. You want to mix only until the flour streaks disappear. Over-mixing at this stage will result in a tough, bread-like texture rather than a delicate, crisp biscuit.
Step 4: Folding in the Almonds
Gently incorporate the slivered almonds. The goal is even distribution so that every slice contains a uniform amount of nut. The almonds should be folded in with a spatula, ensuring the dough remains uniform and that no large air pockets are trapped within the mass.
Step 5: Shaping and Chilling
Divide the dough and shape it into long, cylindrical loaf shapes. Wrap these tightly in plastic wrap or parchment paper. Place the logs in the refrigerator for at least eight hours, though forty-eight hours is preferred for flavor development. This rest period allows the starch granules in the flour to fully hydrate and the fats to firm up, which is the secret to a clean slice.
Step 6: Precision Slicing
Preheat your oven to 350℉. Using a very sharp chef’s knife or a serrated blade, cut the dough into paper-thin slices. The dough must be cold during this process. If the logs soften, return them to the icebox for twenty minutes. Place the slices about half an inch apart on a baking sheet; because of the high fat content and lack of heavy leavening, they will not spread significantly.
Step 7: The Short Bake
Bake for approximately seven minutes. Watch the edges closely; they should turn a light golden brown while the center remains pale. Because these are sliced so thin, the window between perfectly baked and overdone is narrow. Remove from the oven and allow them to set on the hot sheet for five minutes before transferring to a wire rack to reach their final, crisp state.
Jordan’s Technique Notes for Precision
To achieve the most uniform shape, I recommend rolling your dough logs every hour during the first three hours of chilling. This prevents the bottom of the log from flattening against the refrigerator shelf, a common issue in technical bakes. If you find the almonds are causing the dough to tear during slicing, ensure your knife is warmed slightly in hot water and wiped dry before each cut. The heat helps the blade glide through the chilled butter while the sharp edge handles the nuts.
For those interested in the underlying principles of dough stability, our guide on Foundation Cookie Recipes details how fat ratios affect structural integrity. Additionally, a helpful external resource for observing traditional visual cues can be found at Cooking with Carlee, where the heritage of these bakes is beautifully preserved.
Classic Variations and Tested Adaptations
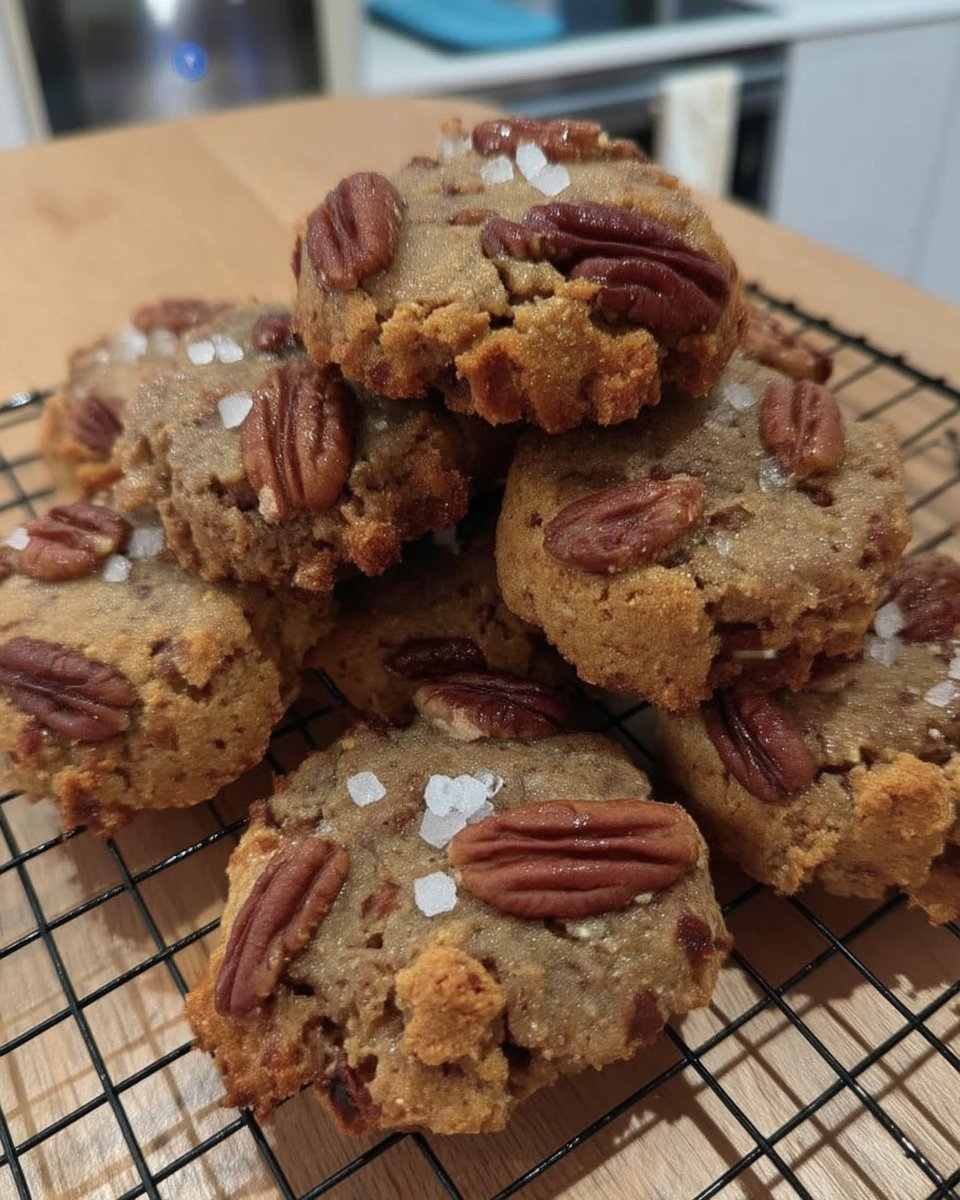
While the almond and cinnamon profile is traditional, this formula is highly adaptable to regional influences. For a more British-leaning biscuit, replace the cinnamon with a teaspoon of lemon zest and a half-teaspoon of ground ginger, reminiscent of a Shrewsbury biscuit. You may also swap the slivered almonds for pecans or walnuts, though you must ensure they are finely chopped to maintain the thinness of the slice.
Another successful adaptation is the inclusion of cocoa powder. Replace half a cup of the all-purpose flour with Dutch-processed cocoa to create a dark, rich chocolate version. To understand how these changes affect the chemical balance of your bake, refer to our research on Holiday Cookie Science, which explains how different inclusions impact the final moisture content of the dough.
Traditional Service and Classic Enjoyment
In keeping with British tradition, these biscuits are best served alongside a pot of Earl Grey or Darjeeling tea. The crispness of the cookie is designed to stand up to a brief dip in the tea without disintegrating instantly. Arrange them on a tiered porcelain stand for a proper afternoon tea service, or store them in a decorative tin to maintain their snap.
Because these cookies are so small and thin, they also serve as an excellent garnish for a classic vanilla bean custard or a simple fruit syllabub. For more advice on organizing your baking schedule to include these long-rest recipes, see our tips on Efficient Cookie Methods.
The Technical Truth of Heritage Baking
This icebox cookie recipe is more than a simple sweet; it is a lesson in the chemistry of time. By respecting the chilling process and the precision of the thin slice, you produce a biscuit that is superior in both flavor and texture to any modern shortcut. It is a method that has survived for over a century because it works, proving that the old ways often hold the most scientific merit. For a deeper look at how these traditional methods perform in modern kitchen trials, visit our Viral Cookie Analysis to see how we test heritage techniques against contemporary trends. Be sure to share your results with us on Pinterest, Instagram, and Facebook.


