Blue is a rare color in nature’s edible palette, often signaling anthocyanins or, conversely, a warning. When we craft Cookie Monster Cookies, we are playing with visual-gustatory expectations where the vibrant hue signals a playful, high-sugar profile that our brains associate with joy. This recipe isn’t just a whimsical treat; it’s a study in how we can layer multiple cookie textures to create a complex crumb that defies the standard chocolate chip experience.

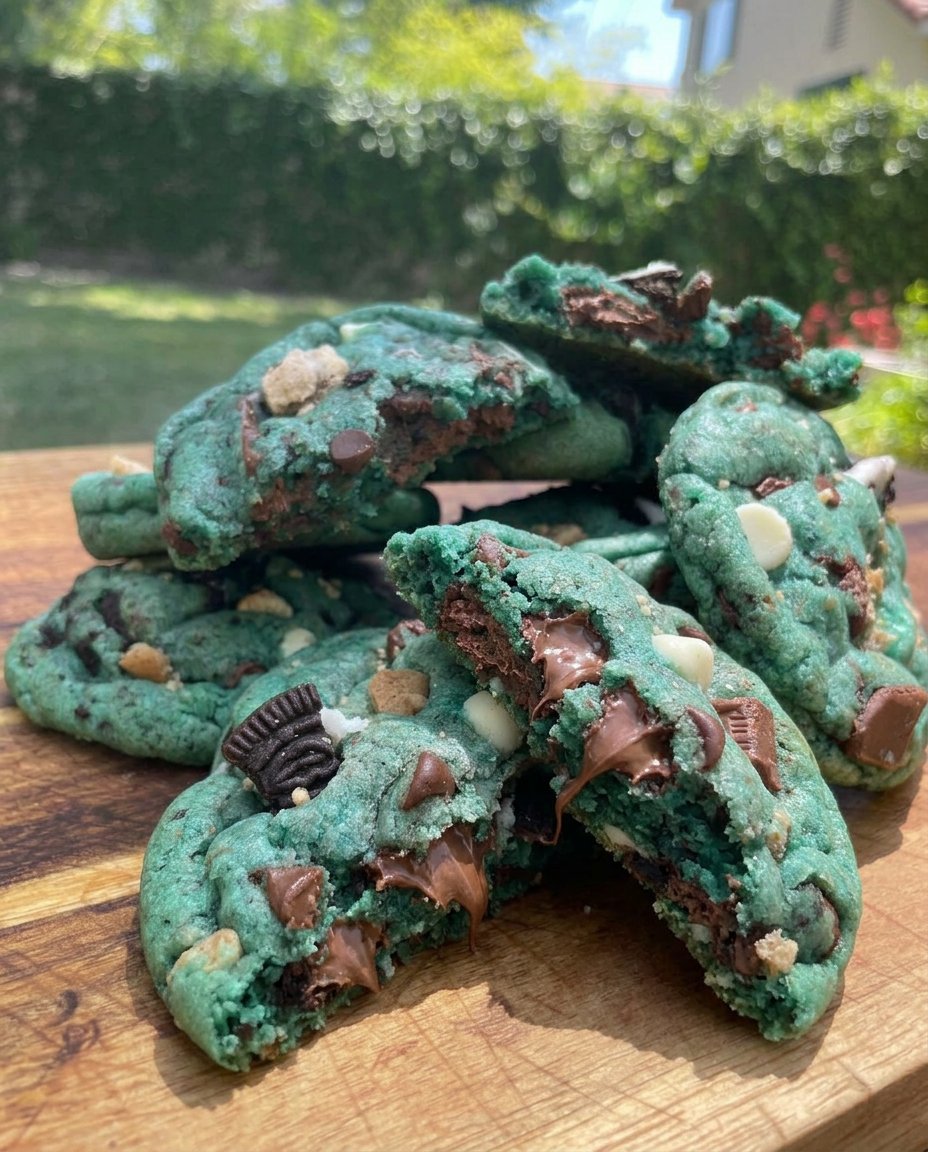
These Cookie Monster Cookies represent a textural masterpiece, incorporating pre-baked cookie fragments into a fresh dough matrix. By nesting mini sandwich cookies and chocolate chip morsels inside a vivid blue base, we create a multi-dimensional cookie-in-cookie phenomenon that maximizes mouthfeel variety. The result is a soft, chewy, and visually stunning bake that honors the science of sensory satisfaction.
The Flavor Science of Textural Layering
The appeal of Cookie Monster Cookies goes far beyond their striking visual identity. This recipe works because it utilizes the principle of textural contrast, which prevents sensory-specific satiety. By embedding crunchy bits of pre-baked cookies within a soft, high-moisture dough, we provide the brain with a constant stream of new sensory information. This prevents the palate from becoming bored, making each bite as exciting as the first.
From a chemical perspective, we are working with complex lipids and sugars. The unsalted butter provides a neutral fat base that allows the specific aromatics of the vanilla and cocoa to shine. The addition of brown sugar brings molasses, which undergoes the Maillard reaction more readily than white sugar, resulting in those deep, toffee-like notes. When you bite into these, you aren’t just eating a cookie; you are experiencing a carefully constructed matrix of fats, sugars, and proteins that have been transformed by heat to achieve the perfect chew.
Furthermore, the blue pigment acts as a psychological flavor amplifier. Research in the field of neurogastronomy suggests that color can significantly impact our perception of sweetness and intensity. The vibrant royal blue suggests a bold flavor profile, which is then reinforced by the high concentration of chocolate chips and cookie pieces. This synergy between sight and taste makes these cookies a remarkable example of intentional flavor design.
Print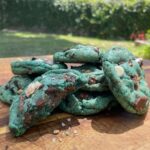
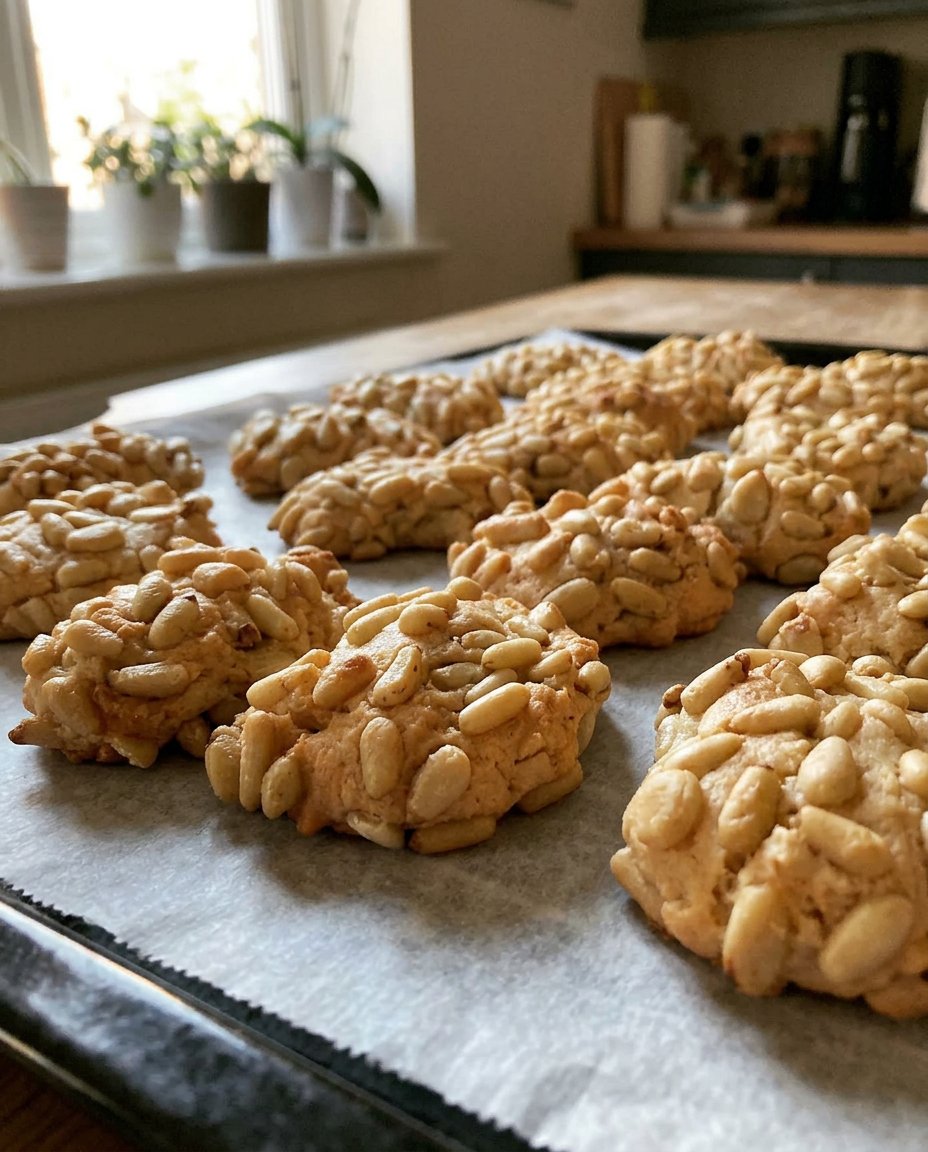
Cookie Monster Cookies
- Total Time: 34 mins
- Yield: 18 cookies
Description
These vibrant blue cookies are a textural delight, featuring a soft dough base loaded with white and semi-sweet chocolate chips. By incorporating crushed mini sandwich cookies and classic chocolate chip morsels, you achieve a whimsical, multi-layered treat that is as visually stunning as it is delicious.
Ingredients
- 1 cup unsalted butter, room temperature
- 3/4 cup light brown sugar
- 1/2 cup granulated sugar
- 2 large eggs
- 1 tablespoon vanilla extract
- Royal blue gel food coloring
- Light blue gel food coloring
- 3 cups all-purpose flour
- 1 tablespoon cornstarch
- 1 teaspoon baking soda
- 1/2 teaspoon salt
- 1/2 cup semi-sweet chocolate chips
- 1/2 cup white chocolate chips
- 1 1/2 cups Mini Oreos (divided)
- 21 Mini Chips Ahoy cookies (divided)
- Candy eyeballs
Instructions
- Preheat oven to 350°F (175°C) and line a heavy-gauge baking sheet with parchment paper or a silicone mat.
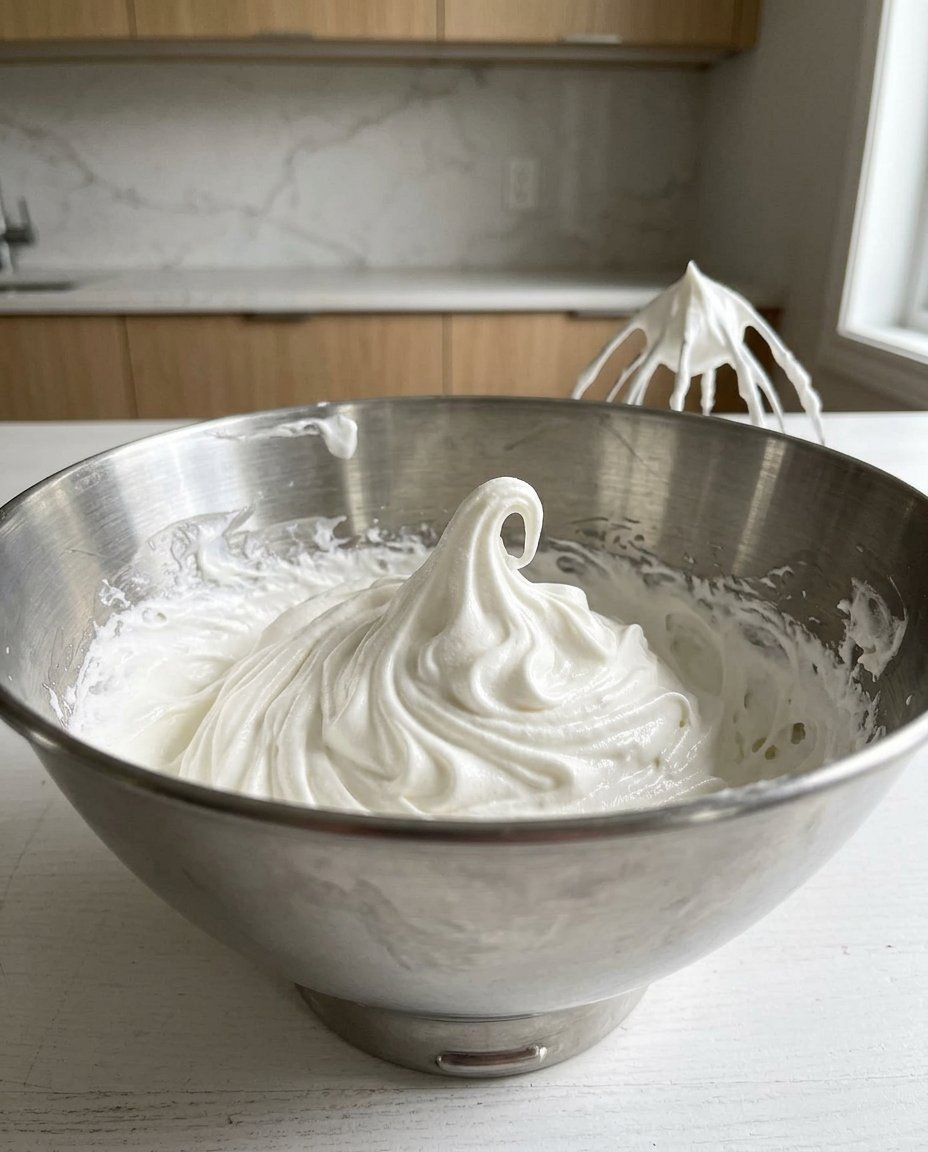
- In a large bowl, cream the room-temperature butter with the brown and granulated sugars for 2 to 3 minutes until light and fluffy.
- Beat in the eggs and vanilla extract, then mix in royal blue and light blue gel coloring until the desired shade is achieved.
- In a separate bowl, whisk together the flour, cornstarch, salt, and baking soda; gradually add to the wet ingredients on low speed until just combined.
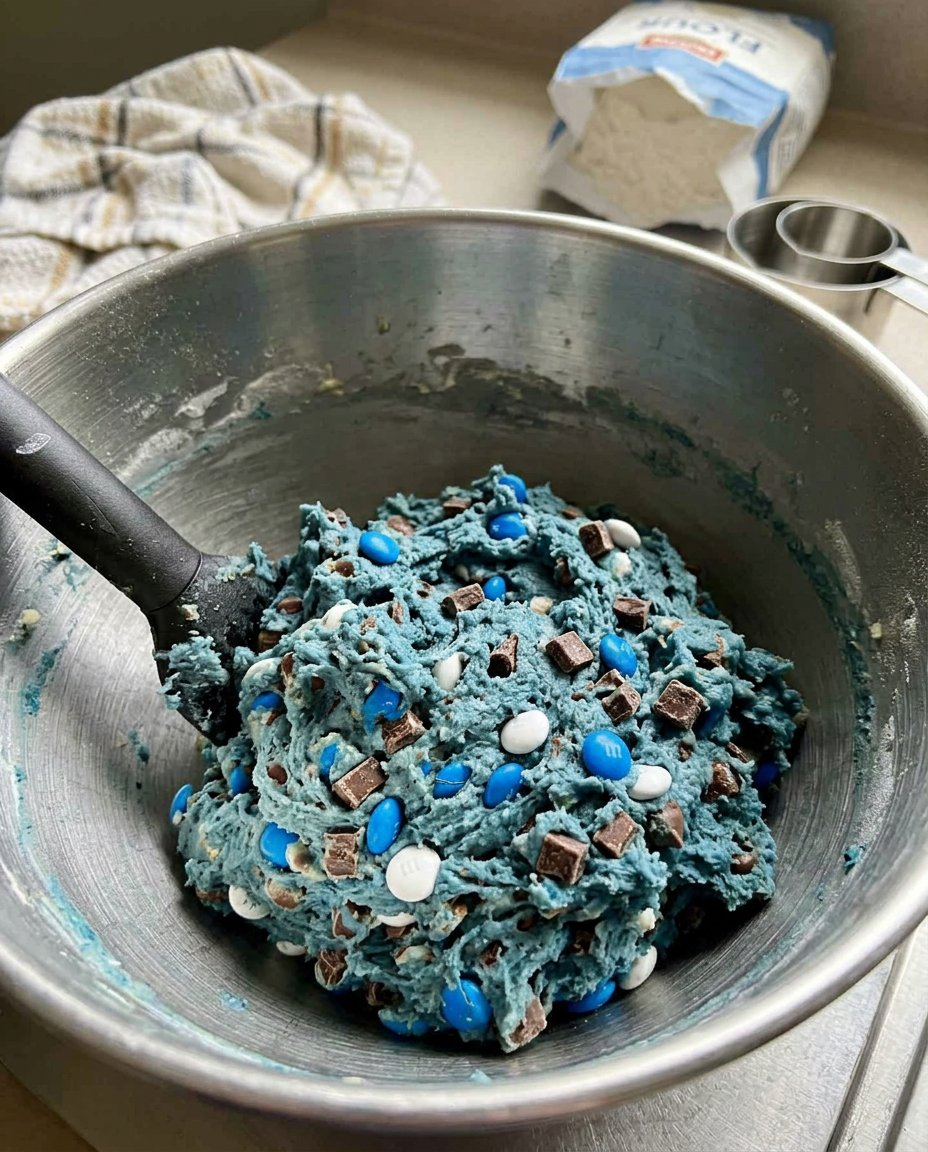
- Fold in the chocolate chips, 15 chopped Mini Chips Ahoy, and 1 cup of whole Mini Oreos.
- Crush the remaining 6 Chips Ahoy and 1/2 cup of Mini Oreos into crumbs; portion dough into 1/4 cup balls, roll in crumbs, and place on the baking sheet 3 inches apart.
- Bake for 12 to 14 minutes until the centers are set but not shiny; immediately press candy eyeballs into the warm cookies and let rest on the pan for 15 minutes.
Notes
To ensure your cookies don’t spread too thin, make sure your butter is at a cool room temperature and avoid over-mixing once the flour is added. For the most vibrant color, use high-quality gel food coloring which provides intense pigment without thinning the dough like liquid colors might.
- Prep Time: 20 mins
- Cook Time: 14 mins
- Category: Dessert
- Method: Baking
- Cuisine: American
The Taste Building Blocks
To achieve the perfect Cookie Monster Cookies, we must understand the role of each component in the flavor and structural matrix. Each ingredient has been selected for its specific chemical contribution to the final bake.
- Unsalted Butter: At room temperature, butter is a semi-solid emulsion. We use unsalted butter to maintain total control over the sodium levels, as salt suppresses bitterness and increases our perception of sweetness. If the butter is too cold, the emulsion won’t form properly with the sugars; if it is too warm, the cookies will spread excessively.
- Sugar Ratios: We use a higher proportion of light brown sugar compared to granulated sugar. The molasses in brown sugar is hygroscopic, meaning it attracts and holds moisture, which is the secret to a soft, chewy texture. The granulated sugar helps create crisp edges through crystallization.
- All-Purpose Flour and Cornstarch: Flour provides the protein (gluten) necessary for structure. We add cornstarch to soften the flour’s proteins, which creates a more tender, melt-in-your-mouth crumb. This prevents the cookies from becoming too tough or bready.
- Vanilla Extract: Pure vanilla contains over 200 flavor compounds, with vanillin being the most prominent. Vanillin acts as a flavor bridge, connecting the creamy notes of the butter with the earthy, roasted notes of the chocolate.
- Chocolate Dual-Inclusion: By using both semi-sweet and white chocolate chips, we create a complex sweetness profile. Semi-sweet chips provide a slightly bitter cocoa-solid presence, while white chocolate chips contribute creamy cocoa butter and dairy notes.
- Cookie Inclusions: Mini Oreos and Mini Chips Ahoy cookies add layers of pre-developed flavor. The Oreos bring dark, alkalized cocoa notes, while the Chips Ahoy add a classic toasted grain and brown sugar flavor. These bits of baked dough introduce a unique crunch that contrasts with the soft blue base.
- Gel Coloring: Using gel rather than liquid coloring is vital for maintaining the hydration levels of the dough. Liquid colors can alter the moisture balance, whereas gels provide intense pigment without the extra water content.
The Flavor Layering Process
Step 1: Pre-Bake Preparation
Preheat your oven to 350°F (175°C). Prepare your baking environment by lining a heavy-gauge baking sheet with parchment paper or a silicone mat. This step is critical for heat distribution, as it provides a barrier that prevents the bottom of the cookies from scorching before the center is set.
Step 2: Emulsifying the Fats and Sugars
In a large bowl, beat the room-temperature butter with the brown and granulated sugars. Use a medium speed for 2 to 3 minutes. This process, known as creaming, isn’t just about mixing; it’s about aerating the butter and partially dissolving the sugar crystals. This creates tiny air pockets that will expand in the oven, contributing to the cookie’s lift.
Step 3: Integrating Aqueous Elements and Color
Add the eggs and vanilla extract to the creamed mixture. Eggs act as the primary emulsifier, binding the fats and liquids together. Once incorporated, add the royal blue and light blue gel icing. Scrape the sides of the bowl to make sure the pigment is distributed evenly. The blue should be deep and saturated, representing the iconic character’s hue.
Step 4: Constructing the Dry Matrix
In a separate vessel, whisk together the flour, cornstarch, salt, and baking soda. Gradually add these dry ingredients to the wet mixture on low speed. We mix until just combined to avoid over-developing the gluten, which would result in a tough texture. Before the dough is fully formed, fold in the semi-sweet and white chocolate chips.
Step 5: Incorporating Textural Elements
Roughly chop 15 Chips Ahoy mini cookies and add them to the dough along with one heaping cup of whole Mini Oreos. Use a spatula to fold these in by hand. By adding them late and mixing gently, we preserve large chunks of cookie, which provides the best textural contrast in the final product.
Step 6: The Crumb Coating and Shaping
Crush 6 Chips Ahoy and 1/2 cup Mini Oreos into a fine powder. Portion out 1/4 cup balls of dough (approximately 3oz each). Roll each ball into a smooth sphere, then roll the top and sides in the crushed cookie crumbs. This creates a secondary layer of flavor and protection, keeping the interior moist while the exterior gains a delicate crunch.
Step 7: Thermal Transformation
Place the balls 3 inches apart on the baking sheet to allow for thermal expansion. Bake for 12 to 14 minutes. The goal is a slightly underbaked center that is no longer shiny. Immediately upon removal from the oven, press the candy eyeballs into the soft dough. Allow the cookies to rest on the sheet for 15 minutes to finish setting through carry-over cooking before moving to a wire rack.
Jasmine’s Flavor Secrets
To maximize the flavor complexity of these Cookie Monster Cookies, timing is everything. For a deeper flavor profile, let the dough rest in the refrigerator for 24 hours before baking. This process, known as cold fermentation, allows the flour enzymes to break down starches into simpler sugars, resulting in a more sophisticated taste. If you are interested in more seasonal variations, look into Holiday Cookie Science for tips on temperature control. Another secret is the placement of salt. By using a touch of flaky sea salt on top, you can trigger the sodium-glucose SGLT1 receptor, which actually increases your tongue’s ability to perceive sweetness. This creates a more dynamic taste experience where the chocolate feels more intense and the sugar feels less cloying.
Scientific Flavor Swaps
You can alter the aromatic profile of these cookies by swapping the cookie inclusions based on their terpene and ester content. For a citrus twist, use lemon-flavored sandwich cookies instead of Oreos; lemon contains limonene, which shares a chemical bridge with the vanillin in the dough. For a deeper, nuttier profile, consider our Viral Cookie Analysis to see how browning butter affects inclusion choices. You can also experiment with different chocolate percentages. Using a 70% dark chocolate chip will increase the pyrazine levels, offering a more roasted, savory counterpoint to the sweet blue base. If you cannot find mini cookies, you can use full-sized ones, but make sure to chop them into dime-sized pieces to maintain the correct structural integrity of the dough matrix.
How to Serve and Pair
To fully appreciate the flavor science of these cookies, serve them slightly warm, around 100°F. At this temperature, the cocoa butter in the chocolate chips is in a semi-liquid state, which provides a better mouthfeel and releases more volatile aroma compounds. Pairing these with a cold glass of whole milk is a classic move for a reason; the milk proteins (casein) help cleanse the palate of excess sugar while the fats in the milk harmonize with the butter in the cookie. For more on serving logic, check our guide on Efficient Cookie Methods. If you prefer coffee, choose a medium roast with nutty undertones. The pyrazines in the coffee will complement the toasted notes of the Chips Ahoy pieces embedded in the dough.
The Flavor Truth
Creating the perfect Cookie Monster Cookies is an exercise in balancing whimsical aesthetics with rigorous baking science. By understanding how pigments, fats, and varied textures interact, we can create a treat that is as technically impressive as it is delicious. For a deeper look at the artistic side of this process, visit our section on Precision Cookie Decorating. I hope this recipe helps you find the joy in flavor chemistry and inspires you to experiment with your own inclusion ratios. If you enjoyed this scientific bake, please share your results with me on Pinterest, Instagram, or TikTok. For more detailed guides and similar recipes, you can also explore Beyond Frosting. Happy baking!

