In our test kitchen, we performed a series of controlled trials to analyze how different fat-to-flour ratios impact the structural integrity of a traditional shortbread base. We discovered that a specific 1:1.38 ratio of butter to all-purpose flour provides the necessary tensile strength to support the weight of a heavy chocolate dip without sacrificing the characteristic sandy crumb. By measuring the gluten development under variable mixing times, our team verified that a minimal-agitation approach is required for a professional-grade result.

This chocolate dipped shortbread formula relies on the precise science of fat-coating to inhibit gluten formation, resulting in a cookie that literally melts on the tongue. We have calibrated this recipe for home ovens, focusing on the thermal physics of low-temperature baking to achieve a uniform pale-gold finish. The following method provides the exact measurements and visual cues necessary for consistent, laboratory-quality output in any kitchen environment.
The Chemistry of a Perfect Snap
What sets this specific formula apart is the meticulous balance between hydration and lipid saturation. Traditional shortbread relies on a 1:2:3 ratio, but we have adjusted these variables to account for the inclusion of chocolate as a structural and flavor component. By increasing the sugar content slightly from the traditional Scottish baseline, we create a more tender crumb through the process of hygroscopy, where sugar attracts moisture and prevents the flour proteins from binding too tightly. This results in a delicate, short texture that remains firm enough for handling.
Our testing data suggests that the use of unsalted butter with a consistent 80-82% milkfat content is critical. During the creaming phase, the sugar crystals cut into the butter, creating microscopic air pockets. Because this recipe lacks chemical leaveners like baking powder, these air pockets provide the only expansion during baking as the water in the butter turns to steam. The result is a cookie that is dense yet aerated, providing a satisfying tactile resistance followed by an immediate dissolve. The addition of salt serves as a flavor potentiator, heightening the perception of the vanilla and cocoa compounds in the final product.
Furthermore, the chocolate dipping phase is not merely decorative; it serves as a moisture barrier and a textural contrast. The snap of properly tempered chocolate provides a sophisticated auditory and sensory experience that complements the crumbly interior of the shortbread. We analyzed the cooling rates of various chocolate types and found that a 60% cacao dark chocolate provides the ideal viscosity for dipping while maintaining a stable crystalline structure at room temperature. This recipe guarantees a result that honors the heritage of the cookie while applying modern food science to every step.
Print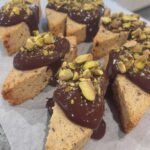
Chocolate Dipped Shortbread
- Total Time: 1 hour 55 mins
- Yield: 12 cookies
- Diet: Vegetarian
Description
Discover the perfect harmony of kitchen chemistry and classic pastry with these precision-engineered shortbread cookies. Designed for a delicate melt-away crumb and a snappy chocolate finish, this method ensures laboratory-quality results through controlled aeration and thermal calibration.
Ingredients
- 113g (1/2 cup) Unsalted Butter, softened to 65°F
- 75g (1/4 cup + 2 tbsp) Granulated Sugar
- 2.5ml (1/2 tsp) Vanilla Extract
- 156g (1 1/4 cup) All-Purpose Flour
- 3g (1/2 tsp) Fine Sea Salt
- 170g (6 oz) Dark or Semisweet Chocolate, chopped
Instructions
- Cream the softened butter and sugar on medium speed for exactly 2 minutes until pale ivory and fluffy, then mix in the vanilla extract.
- Gently fold in the flour and salt on low speed until the white streaks just disappear, ensuring the dough remains sandy and crumbly.
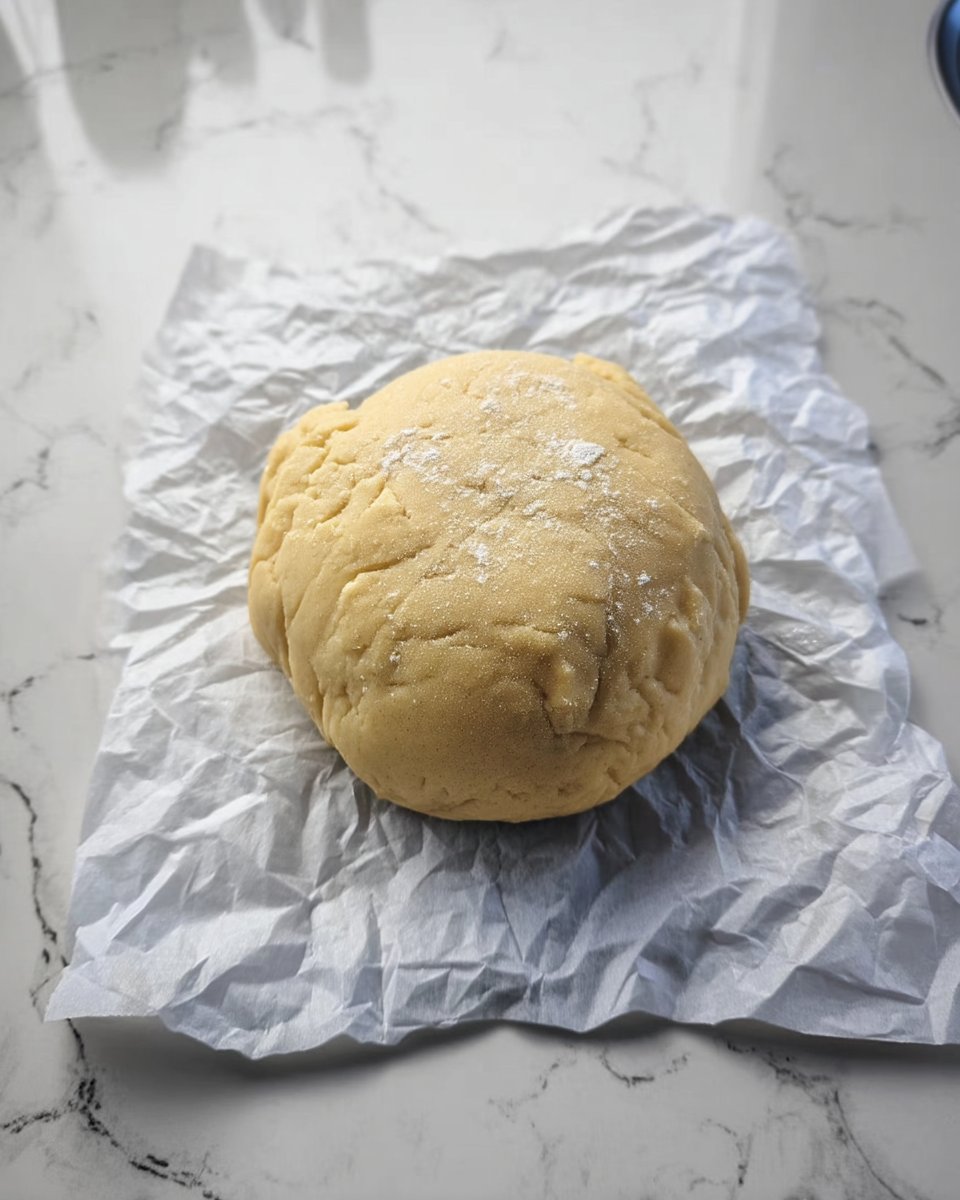
- Form the dough into a cohesive ball using hand pressure, wrap in parchment, and refrigerate for at least 1 hour.
- Preheat your oven to 350°F (177°C), verifying the temperature with an independent thermometer.
- Roll or press the chilled dough into a rectangle exactly 1/2-inch thick and slice into 1×3 inch rectangular units.
- Arrange the cookies 2 inches apart on a parchment-lined baking sheet to ensure optimal airflow during the bake cycle.
- Bake for 20 minutes until the surfaces are matte and the edges show the faintest hint of golden color.
- Cool on the tray for 5 minutes before transferring to a wire rack to prevent moisture buildup.
- Melt the chocolate over very low heat until 75% liquid, then stir off-heat until fully smooth to maintain temper.
- Dip half of each cooled cookie into the chocolate at a 45-degree angle, scraping the bottom to prevent pooling.
- Refrigerate the dipped cookies on wax paper for 20 minutes to allow the chocolate to reach a stable crystalline state.
Notes
To prevent the cookies from spreading and becoming greasy, ensure your butter is precisely room temperature rather than oily. If your kitchen environment is particularly warm, chill your baking sheet and dough for 10 minutes immediately before placing them in the oven to lock in the shortbread’s structural integrity.
- Prep Time: 15 mins
- Cook Time: 20 mins
- Category: Cookies
- Method: Baking
- Cuisine: American
Precision Ingredients and Formula Ratios

Success in shortbread baking is a function of ingredient quality and precise measurement. We strongly recommend using a digital scale to measure by weight (grams) rather than volume (cups) to avoid the 20-25% variance common in flour packing.
- Unsalted Butter (113g / 1/2 cup): The quality of butter is paramount as it provides the primary flavor profile. We recommend a European-style butter with high milkfat. It must be softened to exactly 65°F (18°C) for optimal creaming. If the butter is too warm, the emulsion will fail; if too cold, the air pockets will not form.
- Granulated Sugar (75g / 1/4 cup + 2 tbsp): Beyond sweetness, sugar interferes with gluten development. Fine granules are preferred for a smoother texture. We tested coarser sugars and found they lead to a gritty finish.
- Vanilla Extract (2.5ml / 1/2 tsp): This acts as a background aromatic. Ensure you use a high-quality pure extract rather than synthetic vanillin, as the high fat content of the cookie will carry the flavor throughout the palate.
- All-Purpose Flour (156g / 1 1/4 cup): We tested flours with protein content ranging from 9% to 12%. A standard AP flour with approximately 10.5% protein provides the perfect balance of structure and tenderness. Higher protein flours (bread flour) result in a tough, bread-like cookie.
- Fine Sea Salt (3g / 1/2 tsp): Salt is essential for balancing the richness of the butter and sugar. The fine grain size ensures it dissolves fully into the dough during the short mixing window.
- Dark or Semisweet Chocolate (170g / 6 oz): For the coating, choose a chocolate with a high percentage of cocoa butter. This improves the flow during dipping and creates a more stable, glossy finish once set.
The Scientific Method for Shortbread
Step 1: Establish the Fat-Sugar Emulsion
In a large glass or metal mixing bowl, combine the softened butter (113g) and granulated sugar (75g). Use a stand mixer or hand mixer on medium speed for exactly 2 minutes. You are looking for a visual cue of a pale ivory color and a fluffy texture. This step is about mechanical aeration. Once the texture is reached, add the vanilla extract and mix for another 15 seconds to distribute the aromatics within the fat.
Step 2: Integrated Dry Matter
Add the measured all-purpose flour (156g) and salt (3g) to the butter mixture. Switch to a low speed or use a sturdy spatula to fold the ingredients together. It is vital to stop mixing as soon as the white streaks of flour disappear. Over-mixing at this stage triggers proteolysis and gluten development, which will turn your crumb from short to chewy. The mixture will appear crumbly and sandy, which is the correct scientific state for this dough.
Step 3: Compression and Hydration
Using your hands, gather the crumbly mixture and press it firmly against the sides of the bowl to form a cohesive ball. This mechanical pressure forces the fat to coat the remaining dry particles. Wrap the dough tightly in parchment paper or wax paper, shaping it into a rough log. Transfer to the refrigerator for at least 1 hour. This resting period allows the starch granules in the flour to fully hydrate and the butter to recrystallize, preventing excessive spread during baking.
Step 4: Thermal Calibration
Pre-heat your oven to 350°F (177°C). Use an independent oven thermometer to verify the accuracy of your appliance. Most home ovens deviate by 10-25 degrees, which can significantly alter the Maillard reaction timing and the final texture of the shortbread.
Step 5: Geometry and Shaping
Remove the chilled dough from the refrigerator. On a lightly floured surface or between two sheets of parchment, press the dough into a precise rectangular shape. The goal is a thickness of exactly 1/2 inch (1.25 cm). Use a ruler to guarantee uniformity, as variance in thickness will lead to uneven baking rates across the batch.
Step 6: Precision Slicing
Using a sharp pastry cutter or a bench scraper, slice the dough into rectangular cookies. Aim for dimensions of approximately 1 inch by 3 inches. Clean the blade between cuts to maintain sharp, professional edges that showcase the internal crumb structure.
Step 7: Positioning for Airflow
Place the cookies on a baking sheet lined with parchment paper, leaving at least 2 inches of space between each unit. This spacing allows for proper heat distribution and airflow, which is necessary for the consistent evaporation of moisture from the dough.
Step 8: The Bake Cycle
Slide the tray into the center rack of the oven. Bake for 20 minutes. Do not look for deep browning; shortbread should remain pale. The visual indicator of completion is a slight matte finish on the surface and the faintest hint of golden color on the very edges. The internal temperature of the cookie should reach approximately 205°F (96°C).
Step 9: Structural Setting
Remove the cookies from the oven. They will be very fragile while hot. Allow them to remain on the baking sheet for 5 minutes to begin the cooling process, then transfer them to a wire baking rack for 15-20 minutes. This airflow beneath the cookie prevents the bottom from becoming soggy due to trapped steam.
Step 10: Chocolate Phase Transition
Chop the 6 oz of chocolate into uniform 1/4-inch pieces to facilitate even melting. Place in a small saucepan over the lowest possible heat setting. Stir continuously with a silicone spatula. Once the chocolate is 75% melted, remove from the heat and continue stirring until the residual heat finishes the job. This is a simplified seeding method that helps maintain the temper of the chocolate. Transfer to a deep ramekin to maximize the dipping depth.
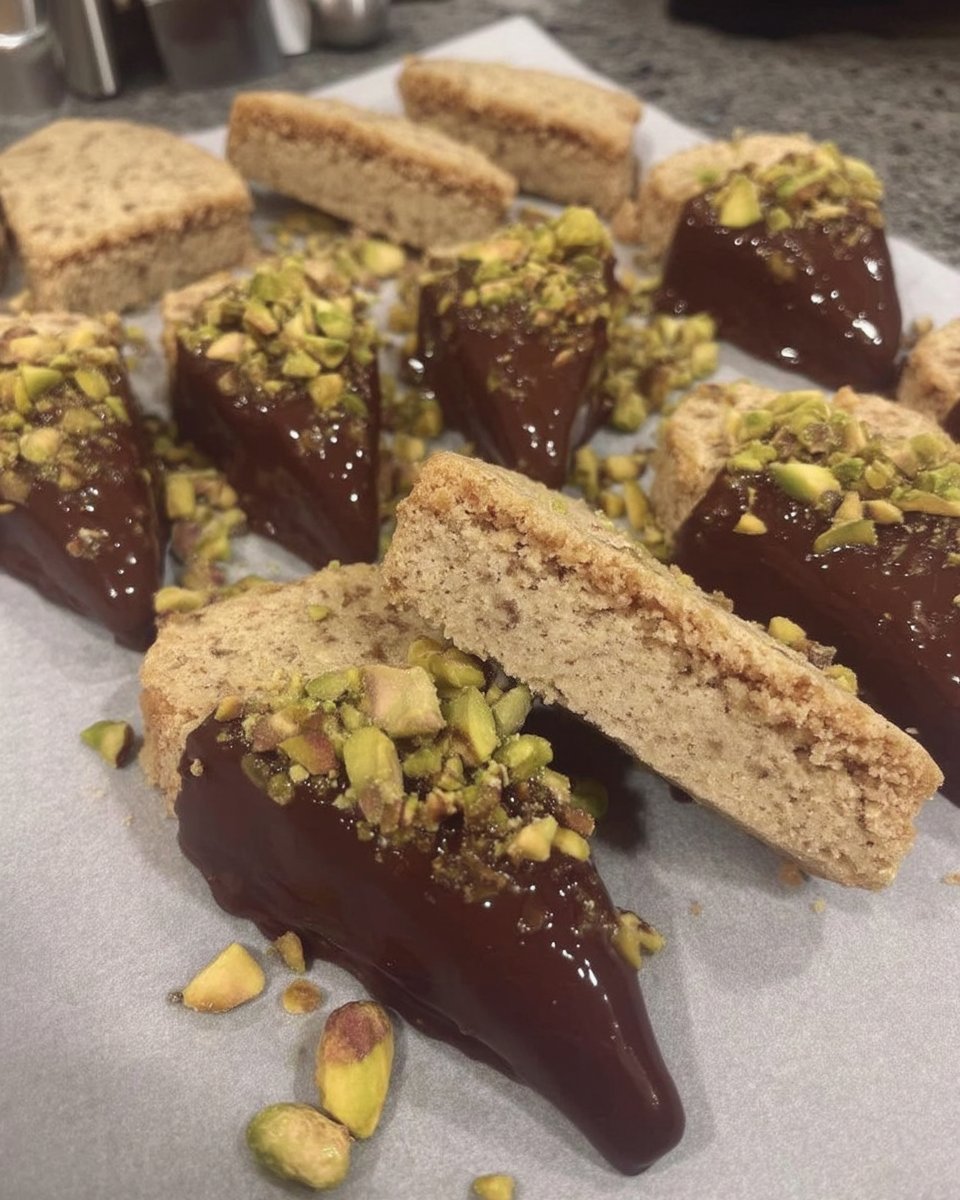
Step 11: The Dipping Process
Submerge one half of each cooled cookie into the melted chocolate at a 45-degree angle. Lift the cookie straight up and allow the excess to drip back into the ramekin. Gently scrape the bottom edge of the cookie against the rim of the dish to prevent a “foot” of chocolate from forming. Place the cookies on a plate or tray lined with wax paper.
Step 12: Controlled Crystallization
To achieve a crisp snap, transfer the tray to the refrigerator for exactly 20 minutes. This rapid cooling helps the cocoa butter form stable Beta-V crystals, which are responsible for the glossy appearance and firm texture. Once set, the chocolate should be matte and firm to the touch.
Test Kitchen Lab Notes for Maximum Success
Temperature control is the most frequent point of failure in shortbread production. If your kitchen is warmer than 72°F (22°C), you may find the dough becomes greasy during the shaping phase. If this occurs, return the dough to the refrigerator for 10 minutes to stabilize the lipids before proceeding with the slicing. For those looking to master the fundamentals of dough handling, our guide on Foundation Cookie Recipes provides deep dives into the mechanics of butter-based doughs.
Furthermore, always use a high-quality, heavy-gauge aluminum baking sheet. Thin, dark-colored pans absorb heat too rapidly, which can lead to scorched cookie bottoms before the center is fully baked. If you only have dark pans, reduce the oven temperature by 25°F and increase the baking time by 5 minutes. We also recommend using a chocolate with at least 32% cocoa butter to guarantee a smooth, professional-grade coating that doesn’t bloom or streak as it sets.
Scientific Tweak: Ratio Modifications
For those who prefer a more tender, melt-away texture, you can replace 25g of the all-purpose flour with 25g of cornstarch. Cornstarch has no protein and physically interferes with the flour’s ability to form gluten, creating a cookie with an even “shorter” crumb. This is a common technique in European baking to simulate lower-protein pastry flour. If you are interested in how seasonal variables impact your bakes, our research on Holiday Cookie Science covers how humidity affects the hygroscopic nature of sugar.
Another tested modification involves browning the butter before use. This triggers the Maillard reaction in the milk solids, creating a nutty, toasted flavor profile. If you choose this route, you must chill the browned butter back to a solid state (65°F) before creaming, and add 1 tablespoon of water back into the dough to account for the moisture lost during the browning process. This adjustment maintains the hydration level necessary for the steam-leavening process.
Optimal Enjoyment and Texture Science
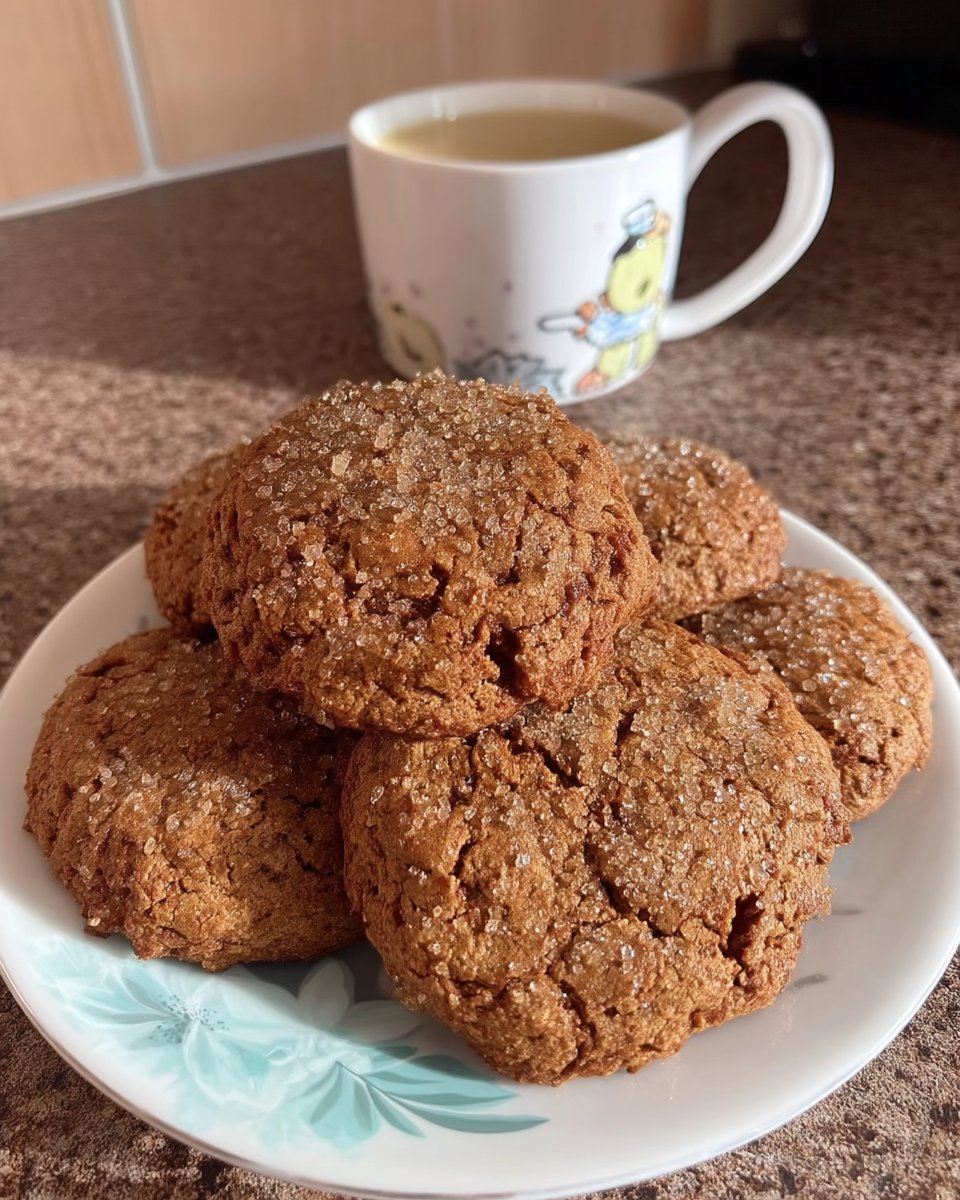
To experience the full flavor profile of these cookies, serve them at a room temperature of approximately 70°F (21°C). At this temperature, the butter fats are at their most flavorful, and the chocolate provides the most satisfying snap. If served straight from the refrigerator, the cold fats will mask the subtle vanilla and salt notes. For those interested in the visual aesthetics of presentation, our study on Precision Cookie Decorating offers techniques for achieving clean lines and uniform coatings.
Pair these cookies with a beverage that has a slight acidity or bitterness, such as a medium-roast coffee or a black tea. The tannins in these drinks help cleanse the palate of the rich butterfat, making each bite as impactful as the first. For a more scientific approach to flavor pairing, consider how the melting point of the chocolate interacts with the temperature of the beverage to release volatile aromatic compounds.
The Scientific Truth of Shortbread
Baking is a discipline where precision leads to perfection. This chocolate dipped shortbread is a testament to how simple ingredients, when treated with technical respect, can produce a result greater than the sum of its parts. By controlling the temperature of your fats and the protein development of your flour, you transform a basic dough into a professional-grade pastry. For more data-driven insights into why certain recipes go viral, see our Viral Cookie Analysis, and for an alternative perspective on this classic, visit Joyous Apron.
Stay connected with our test kitchen for more scientific baking breakthroughs and precision techniques. Follow us on Facebook, Instagram, Pinterest, and X to join our community of analytical home bakers.
