Victorian-era health advocates originally developed nut pastes as a concentrated protein source for patients with dental limitations. This Sugar Free Peanut Butter 2 method respects that historical intent while applying modern mechanical precision to achieve a superior texture. By understanding the cellular structure of the legume, we can release natural oils without the need for commercial stabilizers.

The transition from a whole peanut to a smooth, spreadable emulsion requires careful temperature management and specific grinding intervals. Historical kitchens used stone mortars, but our modern tools allow for a faster rupture of the peanut’s oil-bearing cells. This process transforms simple ingredients into a pantry staple with scientific integrity and historical resonance.
The Tradition of Pure Nut Pastes
Choosing a Sugar Free Peanut Butter 2 recipe connects your kitchen to the early twentieth-century standard of additive-free pantry staples. In an era before large-scale industrial homogenization, households relied on high-quality nuts and mechanical friction to create their own spreads. You will appreciate the profound difference in flavor when the natural sugars of the peanut are not obscured by excessive additives.
This method allows you to dictate the exact micron level of the grind, providing a custom texture that commercial brands cannot replicate. It is a methodical approach to a simple food, proving that precision in the kitchen yields a superior result. By controlling the lipid emulsion yourself, you avoid the hydrogenated oils that modern science now questions while honoring the pure techniques of the past.
Furthermore, this recipe serves as a foundational component for technical bakes that require specific moisture levels. When you make your own nut butter, you know exactly how the fat and solids will behave in a cookie dough or cake batter. It is this level of control that distinguishes a serious home baker from a casual cook, grounded in the belief that every ingredient should be understood at its most basic level.
Print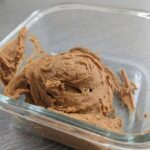
Sugar Free Peanut Butter 2
- Total Time: 15 mins
- Yield: 2 cups
- Diet: Gluten-Free, Vegan, Keto
Description
Experience the rich, authentic taste of homemade nut paste with this methodically crafted sugar-free peanut butter. By controlling the mechanical emulsion of high-quality roasted peanuts, you achieve a superior, silky texture without the need for commercial stabilizers or hidden additives.
Ingredients
- 2 cups roasted peanuts
- 2 tablespoons peanut oil
- 2 tablespoons honey or sugar-free sweetener alternative
Instructions
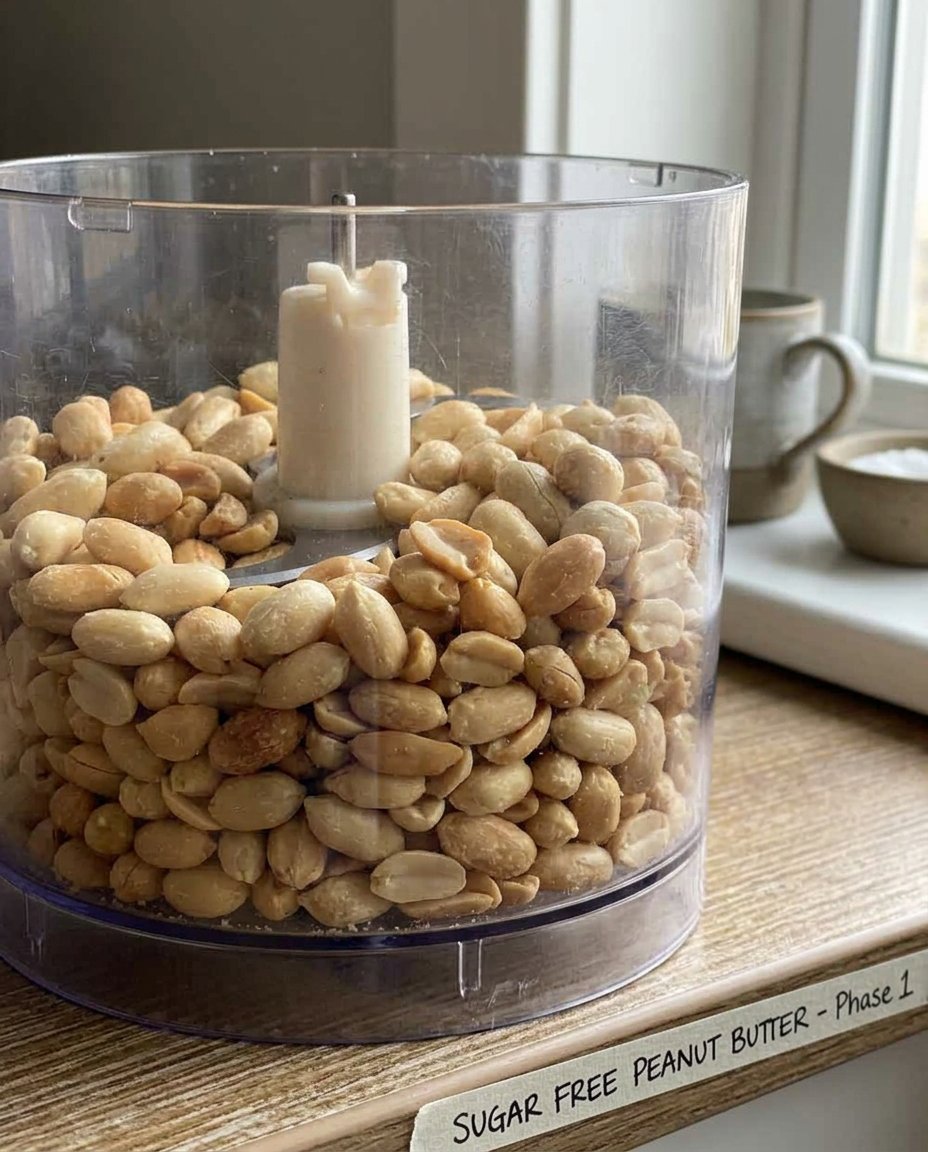
- Place room-temperature roasted peanuts into a completely dry high-speed blender or food processor.
- Process on high speed for 60 seconds until the peanuts reach a coarse, sandy meal consistency.
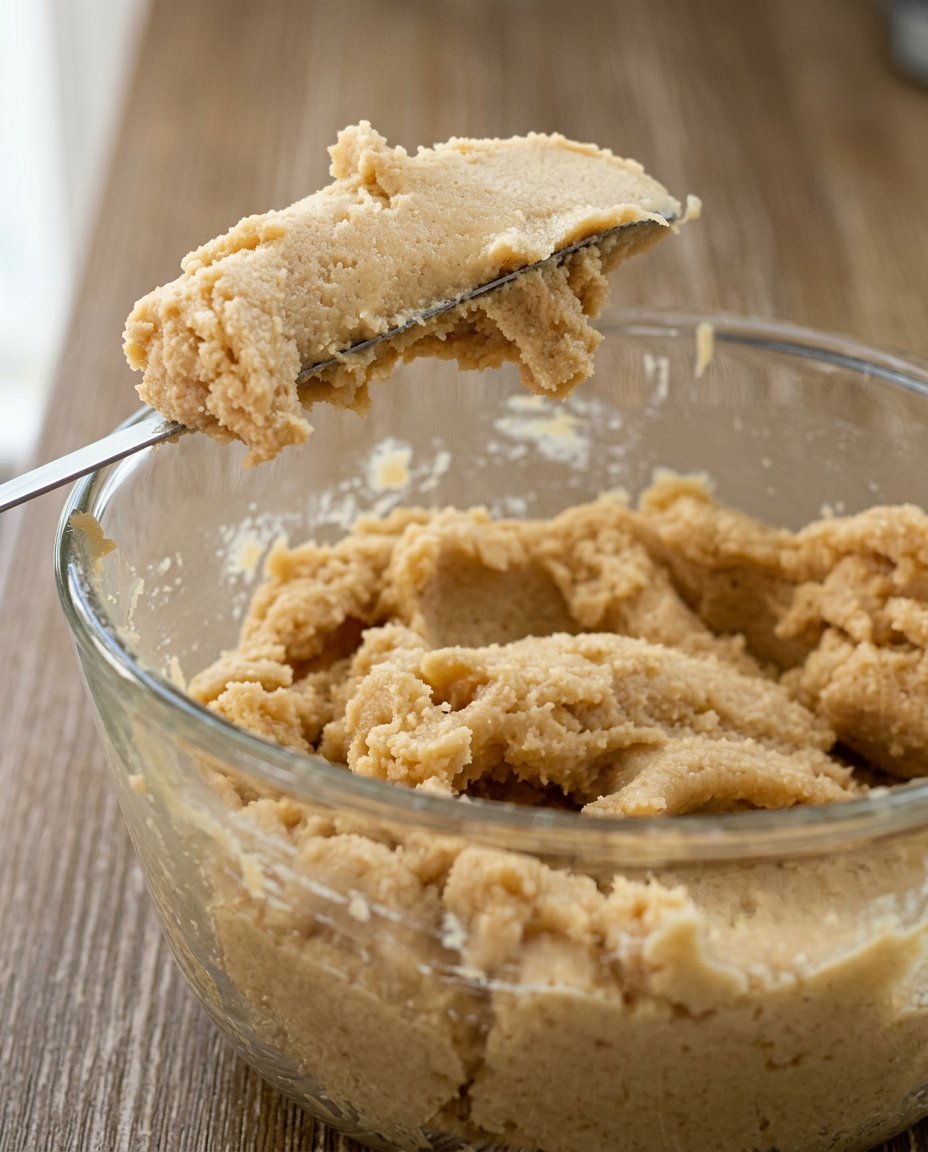
- Stop the machine, scrape down the sides with a spatula, and incorporate 1 tablespoon of peanut oil and 1 tablespoon of sweetener.
- Continue processing in 1-minute intervals, scraping the sides between each, until the mixture becomes a glossy liquid.
- Add the remaining oil and sweetener during the final minute of processing to reach your desired consistency.
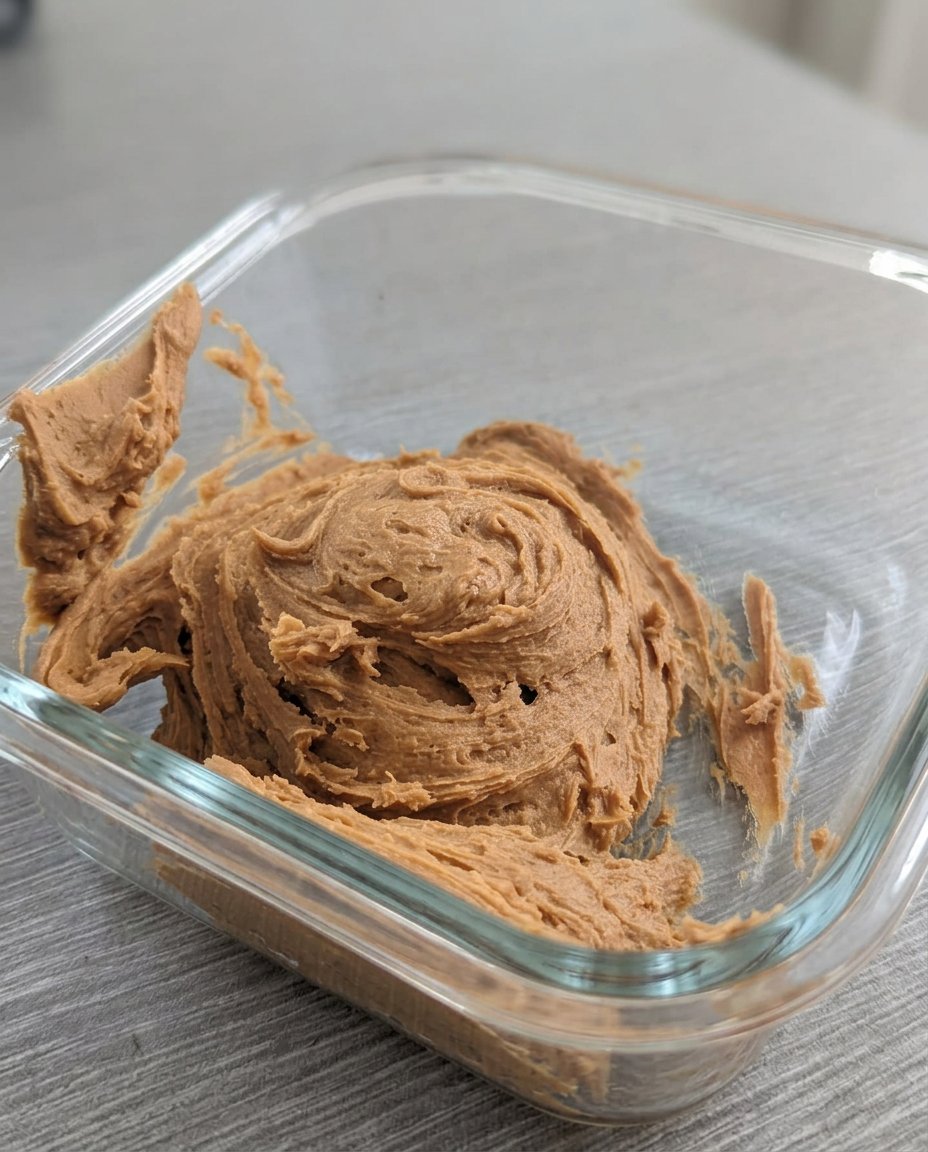
- Transfer the warm spread into a sterilized glass jar and store in the refrigerator to stabilize.
Notes
To ensure a perfectly smooth emulsion, always verify that your processing vessel is bone-dry, as even a drop of water can cause the nut proteins to seize. If the motor on your blender begins to feel overly warm, pause for a few minutes to allow it to cool, which also prevents the natural oils from reaching a bitter temperature.
- Prep Time: 5 mins
- Cook Time: 10 mins
- Category: Pantry Staple
- Method: Grinding
- Cuisine: American
Proper Components for High-Friction Emulsions
To achieve the best results with this Sugar Free Peanut Butter 2, you must start with high-quality peanuts that possess a significant oil content. Historical records suggest that the Spanish peanut, with its smaller kernel and higher oil percentage, was often preferred for a creamier finish. However, Runner peanuts are the modern standard for their consistent size and roasting reliability.
- Roasted Peanuts (2 cups): These provide the primary structure and flavor base. Roasting at approximately 350°F (177°C) for 10-15 minutes prior to grinding activates the maillard reaction, creating a deeper aromatic profile.
- Peanut Oil (2 tbsp): This acts as a supplementary lubricant to encourage the initial emulsion. Without a small amount of added liquid fat, the friction generated by the blades can cause the proteins to seize before the internal oils are fully released.
- Honey or Sugar Alternative (2 tbsp): While traditional British nut pastes were often savory, a touch of honey acts as both a humectant and a flavor balance. You may omit this entirely to maintain a strictly technical sugar-free profile or use a stable alternative that suits your dietary needs.
The Proper Method for Mechanical Grinding
Step 1: Prepare the Nuts and Equipment
Begin by ensuring your peanuts are at room temperature to facilitate oil release. If you are roasting them fresh, allow them to cool slightly; processing hot nuts can lead to a broken emulsion. Place the 2 cups of peanuts into your high-speed blender or food processor, ensuring the blades are sharp and the vessel is dry. Any moisture in the container will cause the peanut paste to clump and harden rather than liquefying into a smooth spread.
Step 2: The Initial Rupture Phase
Process the peanuts on high speed for exactly sixty seconds. During this first minute, the peanuts will transform from whole kernels into a coarse, sandy meal. This is the stage where the cell walls of the peanuts begin to rupture under the mechanical force of the blades. You will notice the mixture becoming warm to the touch as friction generates heat, which is essential for mobilizing the natural lipids contained within the nuts.
Step 3: Incorporation of Supplementary Lipids
Stop the machine and use a rubber spatula to scrape down the sides of the bowl, ensuring no dry fragments remain stuck to the perimeter. Add one tablespoon of the peanut oil and one tablespoon of your chosen sweetener or honey. The addition of oil at this stage creates a slurry that allows the blades to move more efficiently through the thickening mass, preventing the motor from overheating while continuing to break down the solid particles.
Step 4: Refinement and Polishing
Continue to process the mixture in one-minute intervals, pausing to scrape the sides between each cycle. This methodical pulsing prevents the paste from exceeding 120°F (49°C), a temperature at which the flavor profile can begin to turn slightly bitter. Repeat this process for two to three more minutes until the texture shifts from a grainy paste to a glossy, flowing liquid. Add the final tablespoon of oil and sweetener during the last minute of processing to reach your desired consistency.
Step 5: Temperature Stabilization and Storage
Transfer the warm peanut butter into a sterilized glass jar immediately. Allowing the mixture to cool in the processing vessel can lead to an uneven set as the fats begin to solidify. Because this recipe contains no chemical preservatives or stabilizers, it is best kept in the refrigerator where the cool temperature slows the oxidation of the unsaturated fats. The peanut butter will firm up significantly once chilled, so allow it to sit at room temperature for five minutes before service.
Jordan’s Technique Notes and Historical Wisdom
Precision in nut butter production relies heavily on the quality of your equipment. A high-speed blender, such as a Vitamix, creates enough centrifugal force to produce a much finer particle size than a standard food processor. If you are using a food processor, you may find that the texture remains slightly more traditional or ‘stone-ground’ in feel. For those interested in the foundational science of these textures, reviewing our Foundation Cookie Recipes can provide insight into how different nut butter viscosities affect dough spread.
Always ensure your peanuts are unsalted if you wish to control the sodium levels with precision. Victorian bakers often used a pinch of fine sea salt added at the very end of the grinding process to enhance the roasted notes without making the spread overly savory. For a more detailed look at technical nut preparation, you might consult this homemade technique guide which discusses the importance of starting with fresh, high-quality legumes. Remember that the friction of the blades is a form of energy; managing that energy is the key to preventing a gritty texture.
Regional Differences and Tested Adaptations
In British biscuit traditions, nut butters were often combined with distinct spices to create sophisticated tea-time spreads. You might consider adding a half-teaspoon of ground cinnamon or a pinch of nutmeg during the final grinding phase to create a spiced variation that mirrors Victorian flavor palettes. For those following specific seasonal profiles, our section on Holiday Cookie Science discusses how to adapt these spreads for festive applications.
Another regional adaptation involves the inclusion of different fats. While peanut oil is traditional for its neutral flavor and high smoke point, some historic recipes suggest using a small amount of clarified butter or ghee for a richer mouthfeel. This creates a more stable emulsion at room temperature but may alter the strictly vegan nature of the recipe. If you prefer a crunchy variety, simply set aside a quarter cup of the peanuts after the first thirty seconds of grinding and fold them back into the finished smooth paste at the end.
Traditional Service and Classic Enjoyment
In the grand tradition of British afternoon tea, a pure nut butter is often served on thinly sliced, toasted brown bread known as ‘soldiers.’ The contrast between the warm, crisp bread and the cool, creamy peanut butter highlights the quality of the roast. For a more modern presentation that utilizes these spreads in technical bakes, see our guide on Precision Cookie Decorating, where we use nut butters as stable bases for intricate designs.
You may also serve this as a dip for crisp apple slices, a combination that provides a perfect balance of acidity and fat. Historically, this was a common light luncheon option in the mid-twentieth century. If you are serving this at a gathering, placing the peanut butter in a small ceramic ramekin with a dedicated silver spreader honors the methodical care that went into its creation. It is a humble food elevated by the precision of its preparation.
The Technical Truth of Homemade Quality
Mastering the Sugar Free Peanut Butter 2 method is an exercise in patience and mechanical understanding. By moving away from store-bought jars, you reclaim the ability to control the integrity of your ingredients and the texture of your food. This methodical approach ensures that your pantry is stocked with staples that are as nutritionally sound as they are delicious. To continue building your repertoire of foundational kitchen skills, explore our Efficient Cookie Methods for more high-precision recipes.
We invite you to share your technical successes with us on social media. Join our community of dedicated bakers and historians as we continue to test the limits of classic techniques. You can find more inspiration and technical discussions on our Instagram, Pinterest, and Facebook pages. Your commitment to quality and history ensures these methods remain vibrant for future generations.
