The concept of “icebox cookies” emerged in the early 20th century alongside the widespread adoption of domestic refrigeration, allowing bakers to preserve dough logs for fresh baking on demand. This technique shares its DNA with traditional shortbread, relying on thoroughly chilled fat to limit spread and create a dense, tender crumb that snaps cleanly. It is a method that values preparation and patience, rewarding the baker with a consistent structure that historical kitchens would have prized.

By mastering two fundamental base doughs, you can produce four distinct flavor profiles: Chai Spiced, Dark Chocolate Cherry, Chocolate Hazelnut, and Chocolate Peppermint. This recipe prioritizes precise mixing to prevent excessive gluten development, ensuring each slice bakes into a perfectly round, short-textured cookie. It serves as an excellent study in how minor alterations to a master formula can yield vastly different results without compromising the structural integrity of the bake.
The Logic of Refrigerator Dough
The primary advantage of this method is the intersection of time management and chemical stability. Resting the dough allows the flour to hydrate fully and the fats to solidify, which is essential for obtaining that clean “slice” and controlled spread in the oven. Victorian bakers understood that cold dough yields a finer crumb, and modern science confirms that this chilling period relaxes the gluten network.
Furthermore, the versatility of the base formulas allows for efficient batch baking. Rather than measuring out four separate recipes, we use a “split-dough” technique that guarantees consistency across all variations. It is a sensible approach for the holidays or when preparing gift tins, as the dense texture of these cookies makes them robust enough for shipping.
Print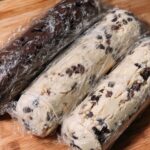
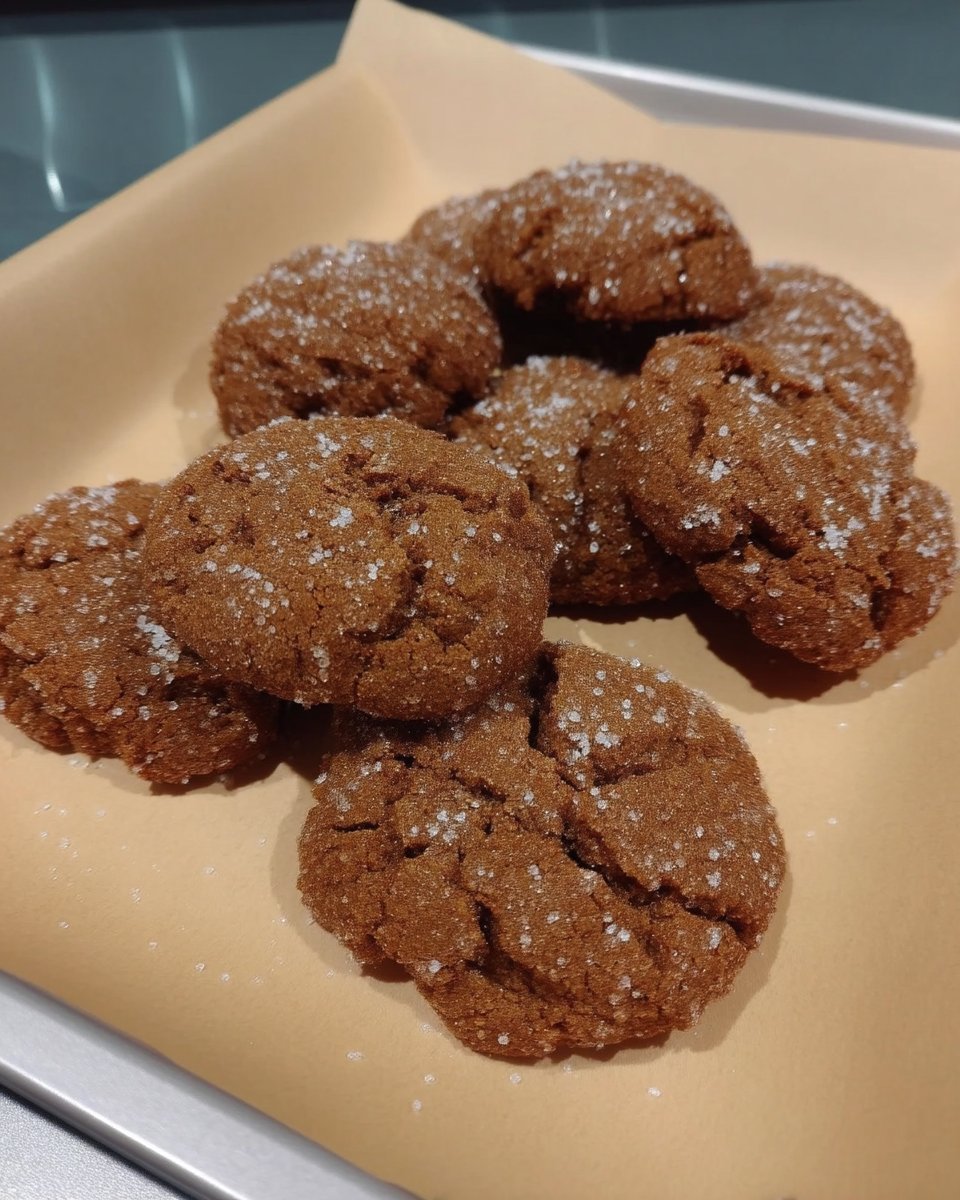
Slice And Bake Cookies
- Total Time: 3 hours
- Yield: 60 cookies
Description
Master the art of elegant refrigerator cookies with these versatile base recipes that yield four distinct, sophisticated flavors. Perfect for gifting or holiday entertaining, these crisp, shortbread-style treats offer a professional finish with minimal active preparation time.
Ingredients
- 1 cup unsalted butter, softened (for vanilla base)
- 1/2 cup light brown sugar
- 1/2 cup granulated sugar (plus extra for coating)
- 1 tablespoon vanilla bean paste
- 1/2 teaspoon salt
- 2 1/4 cups all-purpose flour
- 1 cup unsalted butter, softened (for chocolate base)
- 1 cup granulated sugar
- 1 teaspoon vanilla extract
- 1/2 teaspoon salt
- 1 3/4 cups all-purpose flour
- 1/2 cup unsweetened dark cocoa powder
- 1 teaspoon ground cinnamon
- 1/2 teaspoon ground cardamom
- 1/2 teaspoon ground ginger
- 1/4 teaspoon ground allspice
- 1/2 cup chopped dark chocolate
- 1/4 cup dried cherries, chopped
- 1/2 cup roasted hazelnuts, chopped
- 1/2 teaspoon peppermint extract
- 4 oz white chocolate, melted
- 2 tablespoons crushed candy canes
Instructions
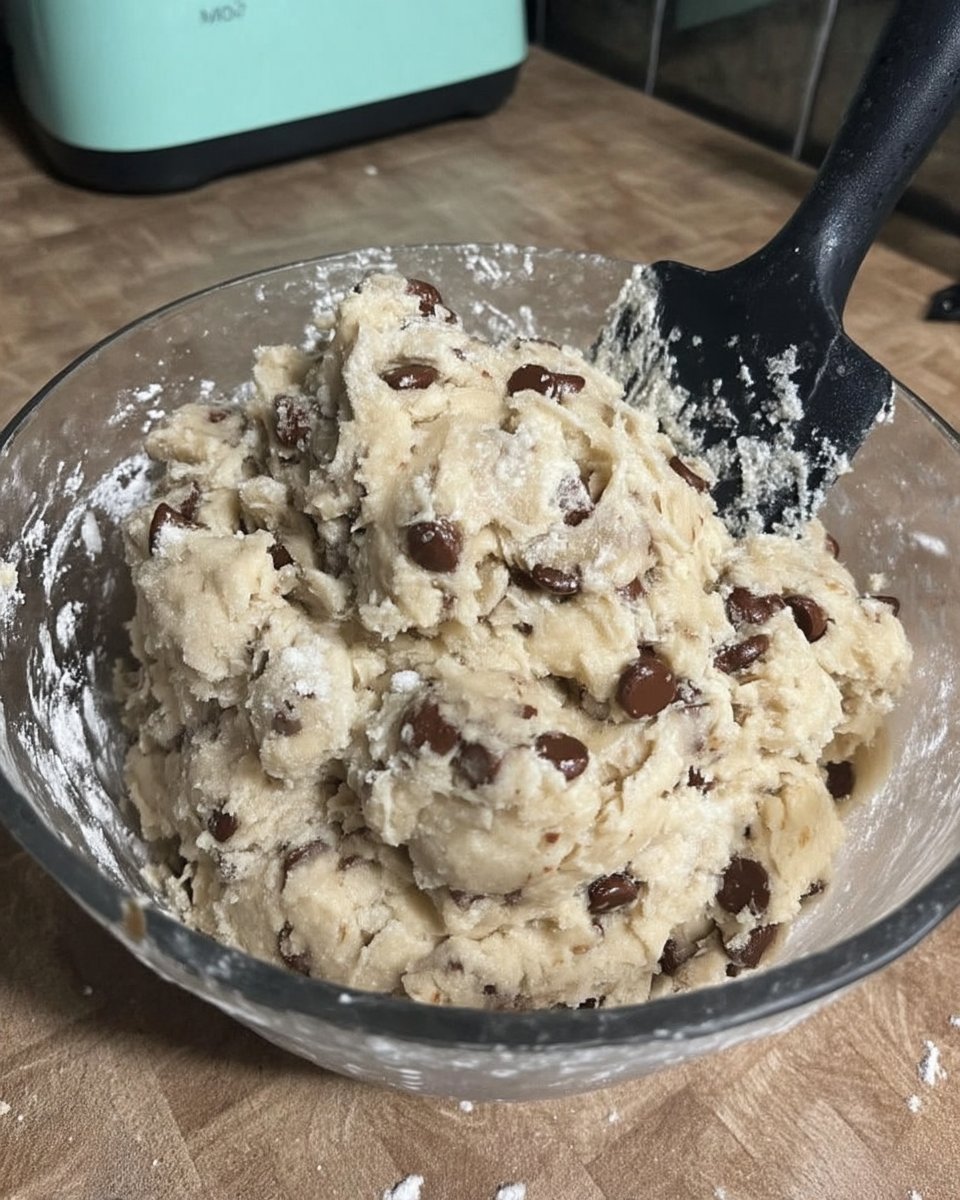
- Cream butter and sugars for the vanilla base until light and fluffy, then mix in vanilla, salt, and flour until just combined.
- Divide vanilla dough in half; fold chai spices into one portion and dark chocolate with dried cherries into the other.
- Prepare the chocolate base by creaming butter and sugar, then adding vanilla, salt, flour, and cocoa powder.
- Divide chocolate dough in half; mix hazelnuts into one portion and peppermint extract with chopped chocolate into the other.
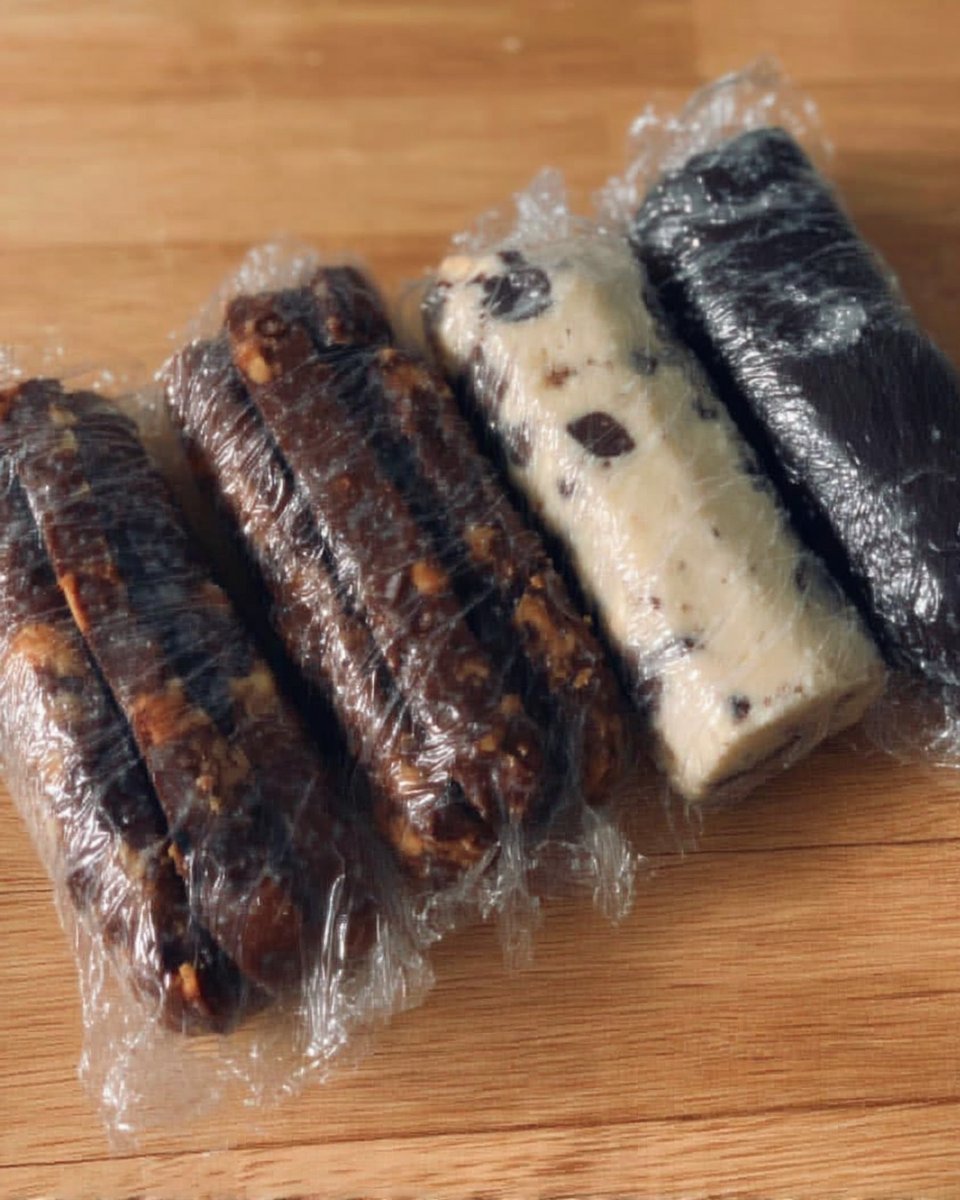
- Form dough into 8-9 inch logs, wrap in plastic, and chill for at least 2 hours or overnight.
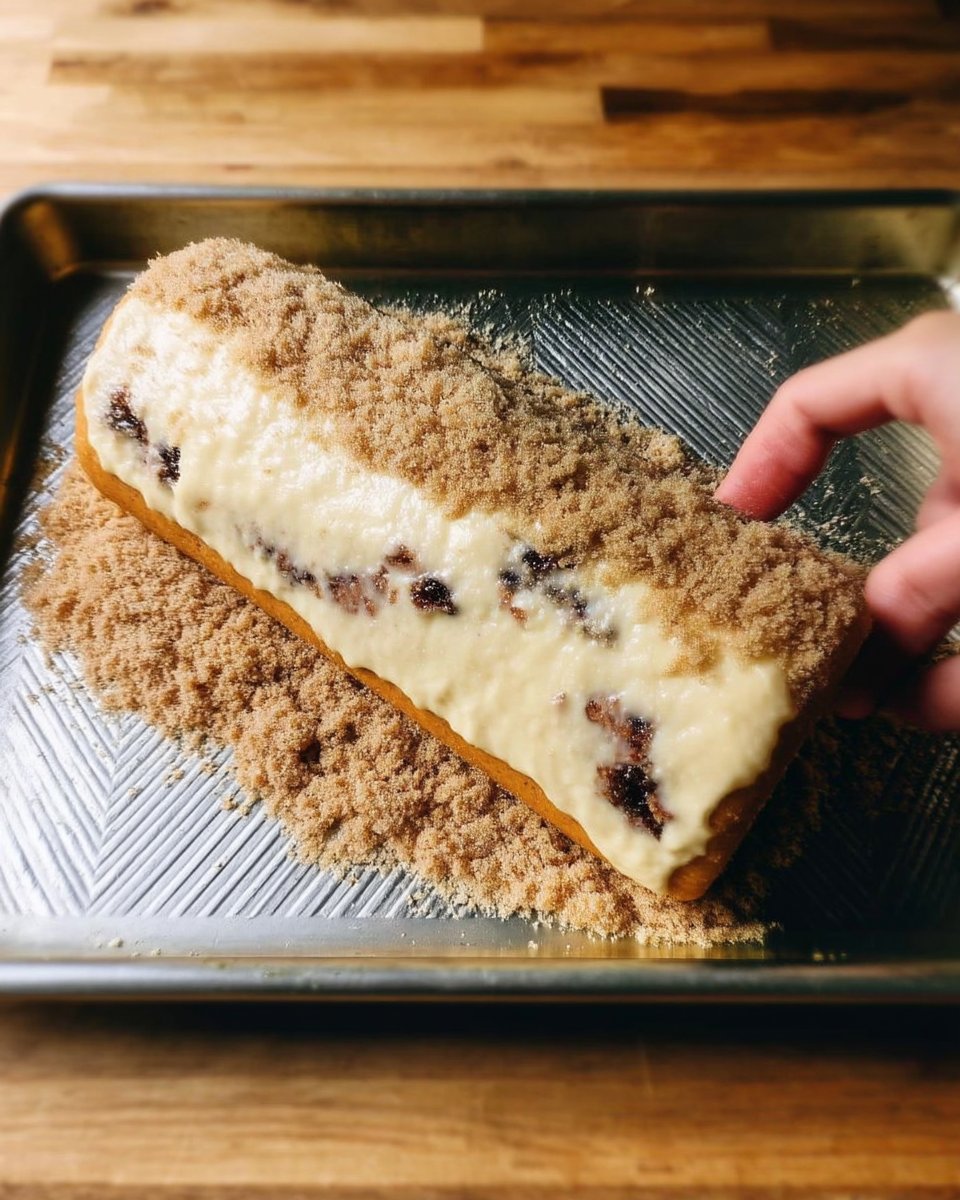
- Roll chilled logs in sugar or nut coatings as desired, then slice into rounds.
- Bake at 350°F (175°C) for 15-18 minutes until matte and firm; cool slightly before transferring to a wire rack.
- Dip cooled peppermint cookies in melted white chocolate and top with crushed candy canes.
Notes
To ensure perfectly round cookies, rotate the dough logs every 30 minutes during the first hour of chilling. If the dough crumbles while slicing, let it sit at room temperature for 5 minutes to soften slightly before continuing with a very sharp, thin-bladed knife.
- Prep Time: 45 mins
- Cook Time: 15 mins
- Category: Dessert
- Method: Baking
- Cuisine: American
Essential Components for Structure
- Unsalted Butter: We begin with butter at room temperature (approx. 20°C/68°F) to allow for proper aeration during the creaming stage. This incorporates the air bubbles necessary for a light texture before the dough is chilled solid.
- Sugars: A combination of granulated and light brown sugar is used in the vanilla base. The molasses in the brown sugar adds moisture and depth, while the granulated sugar encourages crisp edges. The chocolate base relies solely on granulated sugar to maintain a sharper snap against the cocoa.
- Flour: Standard All-Purpose flour (plain flour) provides the necessary protein structure. We avoid high-protein bread flours here, as we want a tender bite, not a chew.
- Cocoa Powder: For the chocolate base, use unsweetened dark cocoa powder. This acts as a drying agent, so the ratio of flour is adjusted down to compensate.
- Flavor Profiles:
- Chai: A warming blend of cinnamon, cardamom, ginger, and allspice.
- Cherry & Chocolate: Dried cherries provide chew, while chopped dark chocolate adds bitterness to cut the sweet.
- Hazelnut: Roasted hazelnuts offer a crunch that contrasts with the tender crumb.
- Peppermint: Pure peppermint extract and crushed candy canes create a classic finish.
Precision Execution
Step 1: Aerating the Vanilla Base
In a large mixing bowl, cream together the room temperature butter, brown sugar, and granulated sugar until the mixture is pale and fluffy. This mechanical action cuts air pockets into the fat. Mix in the vanilla bean paste and salt. Add the flour and mix just until combined; switch to a rubber spatula for the final turns to prevent overworking the gluten.
Step 2: Infusing the Vanilla Doughs
Divide the vanilla dough. To the slightly larger half, fold in the chai spice blend (cinnamon, cardamom, ginger, allspice) until swirled but not fully homogenized. To the smaller half, mix in the chopped dark chocolate and dried cherries. Handling the dough gently here preserves the tender texture.
Step 3: Constructing the Chocolate Base
Using the same bowl (scraped down), cream the butter and granulated sugar for the chocolate base until light. Add the vanilla and salt, followed by the flour and dark cocoa powder. Finish mixing by hand with a spatula to ensure no pockets of dry ingredients remain at the bottom.
Step 4: Flavoring the Chocolate Doughs
Split the chocolate dough in half. To one portion, mix in the roughly chopped hazelnuts. To the remaining dough in the bowl, incorporate the peppermint extract and chopped dark chocolate, ensuring the extract is evenly distributed.
Step 5: The Chill and Slice Technique
Form each of the four dough portions into logs approximately 8-9 inches long. Wrap them tightly in plastic wrap. Technique Note: chill these logs for at least 2 hours, or overnight. This solidifies the butter, which is critical for holding the round shape during slicing. Once firm, roll the logs in their respective coatings (sugar for Cherry, cinnamon-sugar for Chai, hazelnuts for Hazelnut). Slice into rounds.
Step 6: The Bake
Bake on a parchment-lined sheet at 350°F (175°C) for 15-18 minutes. The goal is a matte surface and edges that are barely turning golden. Cool on the pan briefly before transferring to a rack. For the peppermint cookies, dip half in melted white chocolate and sprinkle with crushed candy canes once cool.
Technical Notes for Perfect Rounds
- Maintaining Roundness: To prevent your dough logs from developing a flat bottom in the fridge, place them inside split cardboard paper towel tubes or roll them in a sushi mat while wrapping. This distributes the weight evenly.
- Temperature Management: If the dough becomes sticky while rolling, return it to the refrigerator immediately. The fat must remain solid until it hits the heat of the oven to prevent spreading.
- Visual Cues: You are looking for a matte finish on the top of the cookie. If they appear shiny or wet, they require another minute or two. Under-baking these can result in a doughy rather than sandy texture.
- Decoration: For more advanced finishing techniques, refer to our guide on Precision Cookie Decorating.
Adaptations and Regional Flavors
- Citrus Poppyseed: Use the vanilla base, omit the brown sugar for strictly white sugar (for color), and add lemon zest and poppyseeds. This mirrors traditional lemon shortbread.
- Pistachio Cranberry: Substitute hazelnuts for pistachios and cherries for dried cranberries in the respective bases for a vibrant festive look.
- Spiced Cocoa: Add a pinch of cayenne and cinnamon to the chocolate base for a warming Mexican hot chocolate profile.
- For those interested in mastering the basics before experimenting, I recommend starting with our Foundation Cookie Recipes.
Proper Presentation and Storage
These cookies are historically suited for tea time service due to their sturdy crumb, which holds up well when dunked. Serve them on a platter arranged by color for visual impact. Because of their low moisture content, they have excellent shelf life and ship remarkably well. When packaging for gifts, separate the peppermint cookies, as their volatile oils can flavor the other biscuits. For more insights on seasonal logistics, see our Holiday Cookie Science page.
A Testament to Preparation
The slice-and-bake method is a testament to the value of preparation. By investing time in the mixing and chilling phases, the actual baking day becomes a simple exercise in assembly. Whether you stick to the classic vanilla or experiment with the chocolate bases, the result is a professional-quality biscuit with minimal active effort.
For a slightly different perspective on rolling techniques, this guide on slice and bake cookies offers excellent visual cues that complement our method. If you are looking to refine your batch baking further, review our Efficient Cookie Methods. We would be delighted to see your results; tag us on Instagram and Pinterest.

