When we first analyzed the classic peanut butter blossom in the test kitchen, the primary failure point wasn’t flavor—it was structure. We found that using natural peanut butter caused the dough’s emulsion to break during the bake, leading to a greasy, flat cookie that couldn’t support the chocolate kiss. By switching to a stabilized commercial peanut butter and nailing the flour hydration to exactly 180g, we achieved a base that is tender yet sturdy enough to hold its iconic shape without crumbling.

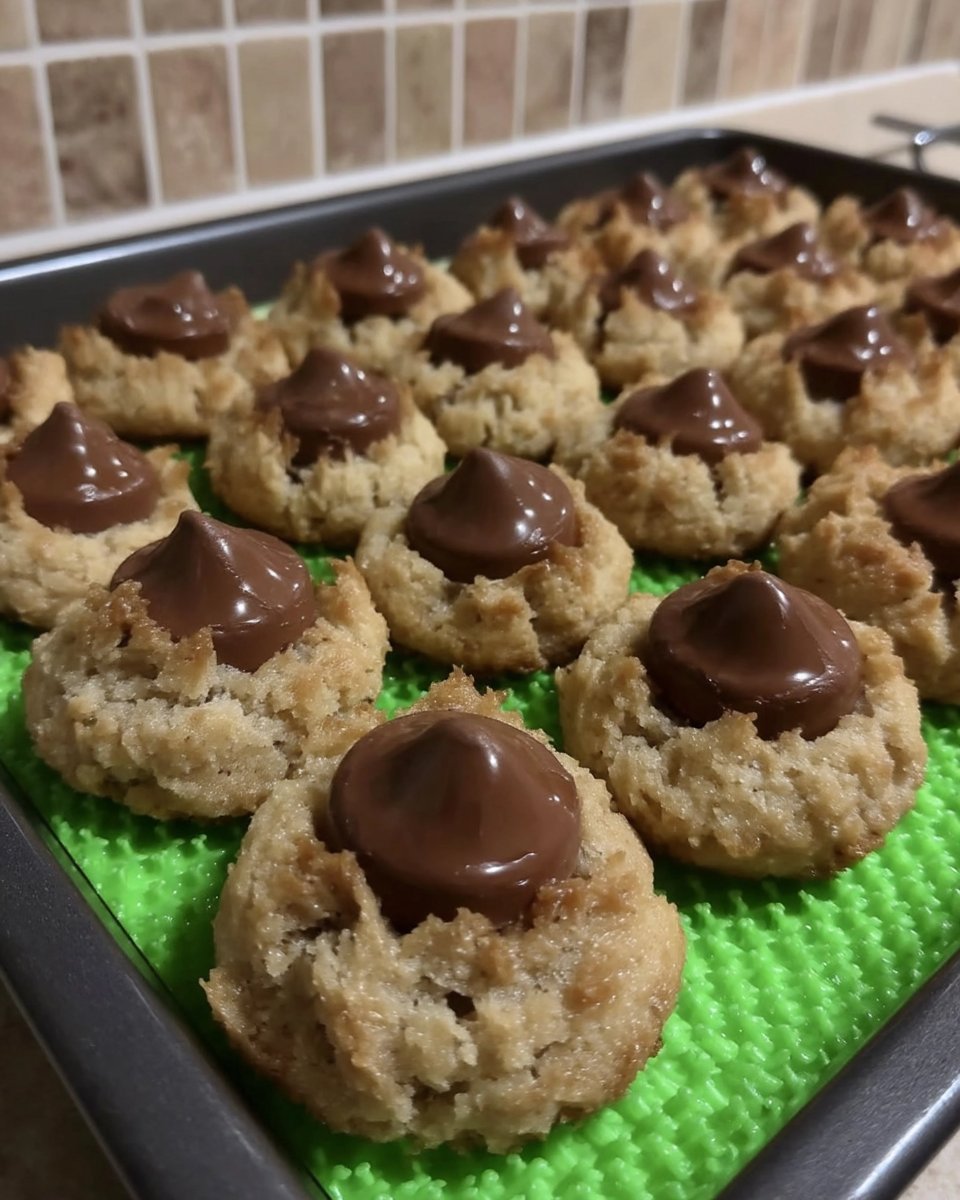
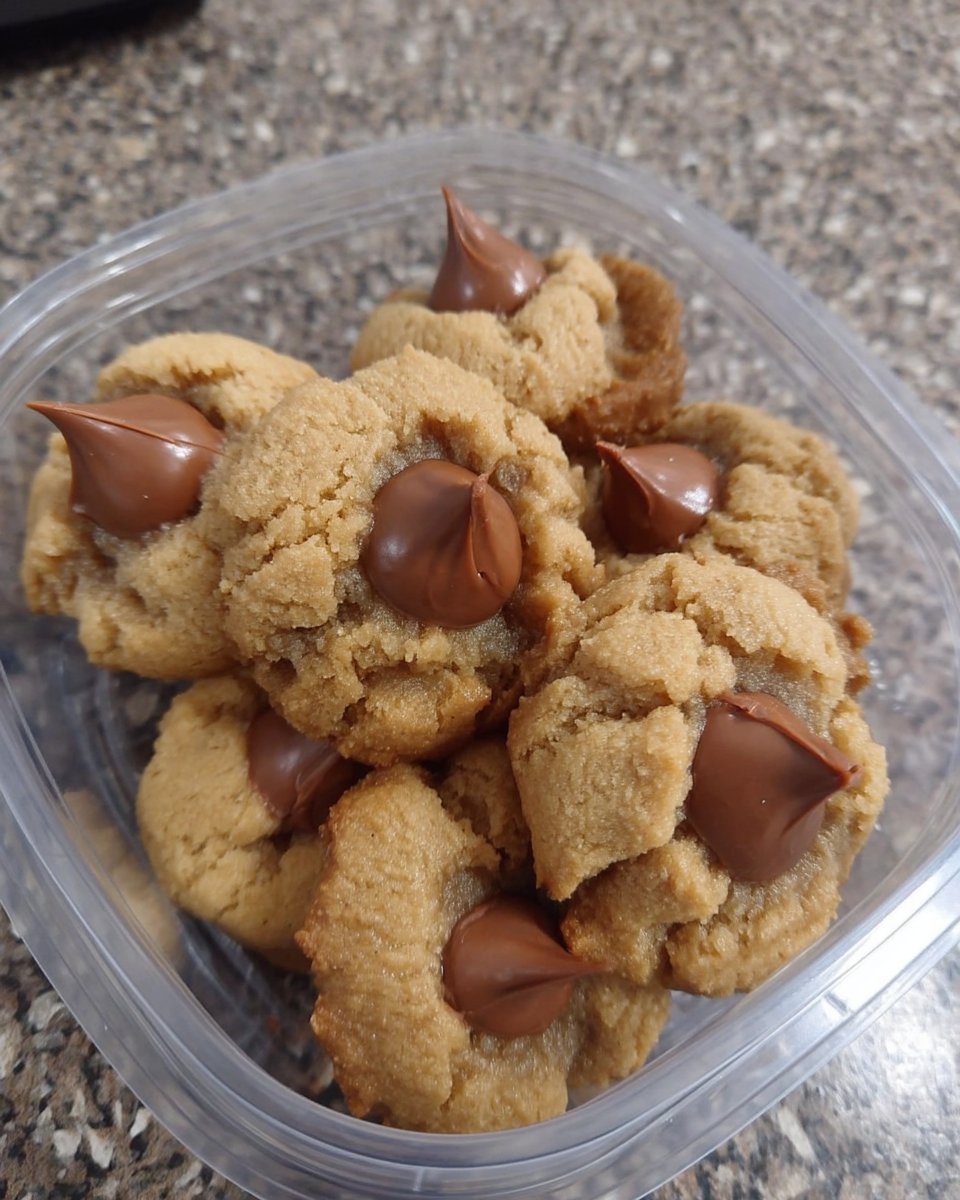
These peanut butter blossom cookies are a study in textural contrast: the sandy, sugar-coated exterior gives way to a soft, dense peanut butter interior, capped with firm milk chocolate. It is a precise balance of salt, sugar, and fat that makes this recipe a permanent fixture in our lab standards. The key lies in the thermal shock of pressing the chocolate into the hot dough.
The Science of the Blossom
Why does this specific recipe work where others yield dry, crumbly pucks? It comes down to the sugar ratio and protein content. We use a balance of 110g light brown sugar to 100g granulated sugar. The brown sugar contains molasses, which is hygroscopic (attracts water), ensuring the cookie stays chewy and moist for days.
Furthermore, the interaction between the commercial peanut butter’s stabilizers and the flour’s gluten network creates a ‘short’ dough—one that is tender rather than elastic. This precise chemical structure allows the cookie to crack beautifully when the kiss is pressed in, without falling apart completely.
Print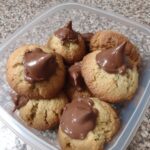
Peanut Butter Blossom Cookies
- Total Time: 25 mins
- Yield: 24 cookies
- Diet: Vegetarian
Description
These classic holiday cookies feature a soft, sugar-coated peanut butter base topped with a signature milk chocolate kiss. Using precise measurements and stabilized peanut butter ensures a perfect texture that balances salty and sweet in every bite.
Ingredients
- 180g All-Purpose Flour
- 188g Creamy Peanut Butter (processed brand like Jif or Skippy)
- 113g Unsalted Butter, softened to 65°F-68°F
- 100g Granulated Sugar, plus extra for rolling
- 110g Light Brown Sugar
- 1 Large Egg
- 1 tsp Vanilla Extract
- 1/2 tsp Baking Soda
- 1/2 tsp Salt
- 24–30 Hershey’s Kisses, unwrapped
Instructions
- Preheat your oven to 375°F (190°C) and line your baking sheets with parchment paper.
- In a stand mixer fitted with the paddle attachment, cream the peanut butter, softened butter, granulated sugar, brown sugar, and salt on medium speed for 2–3 minutes until pale and fluffy.
- Add the egg and vanilla, beating until the emulsion is smooth and stable.
- Stop the mixer, scrape down the bowl, and add the flour and baking soda; pulse on low speed only until the flour streaks disappear.
- Scoop the dough into 1-inch balls (approx. 20g each) and roll each ball in additional granulated sugar.
- Place the balls 2 inches apart on the baking sheets.
- Bake for 8 to 10 minutes until the cookies look puffy and slightly cracked.
- Remove from the oven and immediately press an unwrapped Hershey’s kiss into the center of each cookie, allowing them to cool completely on the pan.
Notes
For the best structural integrity, always use a kitchen scale to measure your ingredients by weight rather than volume. If your kitchen is particularly warm, chilling the dough for 15 minutes before rolling can help prevent excessive spreading during the bake.
- Prep Time: 15 mins
- Cook Time: 10 mins
- Category: Dessert
- Method: Baking
- Cuisine: American
Precision Ingredients & Ratios

To replicate our test kitchen results, accuracy is paramount. Here is the formula we developed:
- All-Purpose Flour (180g): This is the control variable. We tested batches with 170g (too spread) and 190g (too dry). 180g is the sweet spot. Weighing is superior to volume measurements here.
- Creamy Peanut Butter (188g): You must use a processed brand like Jif or Skippy. The added hydrogenated vegetable oils stabilize the emulsion at 375°F. Natural peanut butter lacks this structural support and will separate.
- Butter (113g): Unsalted, softened to exactly 65°F-68°F. If it is too warm, the air bubbles created during creaming will collapse.
- Sugars (100g White / 110g Brown): The white sugar provides crisp edges and aids in the rolling coating, while the brown sugar provides the necessary moisture content.
- Leavening: We rely on baking soda (sodium bicarbonate) to encourage spreading and browning via the Maillard reaction.
The Method
Step 1: Thermal Preparation
Preheat your oven to 375°F (190°C). This higher temperature is crucial for setting the edges quickly before the fat fully melts. Line your baking sheets with parchment paper to modulate the heat transfer to the bottom of the cookies.
Step 2: Creating the Emulsion
In a stand mixer fitted with the paddle attachment, cream the peanut butter, softened butter, sugars, and salt on medium speed. We are looking for mechanical aeration—trapping air bubbles in the fat. Beat until the mixture is pale and fluffy, about 2–3 minutes. Add the egg and vanilla, beating until the emulsion is smooth and stable.
Step 3: Dry Ingredient Integration
Stop the mixer and scrape down the bowl. Add the flour and baking soda. Pulse on low speed only until the flour streaks disappear. Over-mixing at this stage generates excessive gluten development, which results in a tough, rubbery cookie rather than a tender one.
Step 4: Shaping and Coating
Scoop the dough into 1-inch balls (approx. 20g each). Roll each ball in the additional granulated sugar. This sugar coating isn’t just for looks; it creates a crystalline barrier that adds a necessary textural crunch to the soft cookie. Place them 2 inches apart on the baking sheet.
Step 5: The Bake and Press
Bake for 8 to 10 minutes. Visual cue: The cookies should look puffy and slightly cracked, with bottoms just starting to brown. Do not overbake. Remove from the oven and immediately press an unwrapped Hershey’s kiss into the center. The residual heat will melt the bottom of the chocolate, fusing it to the cookie as it cools.
Lauren’s Lab Notes
- The Freezer Trick: To keep the chocolate kisses from losing their shape or turning into a puddle, we recommend unwrapping them and placing them in the freezer for 10 minutes while the cookies bake. The chilled chocolate resists the residual heat of the cookie just enough to maintain that sharp, iconic point.
- Weigh Your Flour: If you scoop with a cup, you might accidentally pack 150g of flour into a 120g cup space. This 25% error is why cookies turn out dry. Use a scale to hit exactly 180g.
- Storage Chemistry: Store these in an airtight container. If you want to keep them soft, add a slice of white bread to the container; the sugar in the cookies will draw moisture from the bread. This is a classic trick we discuss in our Foundation Cookie Recipes guide.
- Cooling is Critical: As noted by other baking experts like Preppy Kitchen, allow the cookies to cool completely on the pan. Moving them too soon will disrupt the setting structure.
Tested Modifications
- Dark Chocolate: For a less sweet profile, swap the standard milk chocolate kiss for a dark chocolate variety. The higher cocoa solids content adds a bitterness that cuts through the sugar.
- Sea Salt Finish: If you enjoy a savory edge, sprinkle a few flakes of Maldon sea salt on the chocolate immediately after pressing it in. This heightens the peanut flavor.
- Miniature Format: We tested making 10g dough balls with mini chocolate chips for a bite-sized version. Bake time reduces to 6 minutes.
For more experiments with dough bases, review our data on Holiday Cookie Science, where we test how different fats affect spread.
Optimal Texture & Serving
Temperature plays a massive role in how we perceive the flavor of these cookies.
- Warm: When served slightly warm, the chocolate is molten and the peanut butter flavor is more volatile and aromatic. However, the structure is fragile.
- Room Temperature: This is the ideal state for the intended texture—a snap from the sugar coating and a chewy interior.
If you are interested in how temperature affects chocolate structure, read our Viral Cookie Analysis on chocolate bloom and crystallization.
The Scientific Truth
Peanut Butter Blossom Cookies are a testament to the importance of ratios. A slight deviation in flour or the wrong type of peanut butter changes the chemical outcome entirely. By following the gram measurements and respecting the temperature variables, you guarantee a perfect result every time.
Keep testing and refining your technique. For more insights into precision baking, explore our Efficient Cookie Methods. We love seeing your data points—tag us in your results on Instagram, Pinterest, or Facebook.
