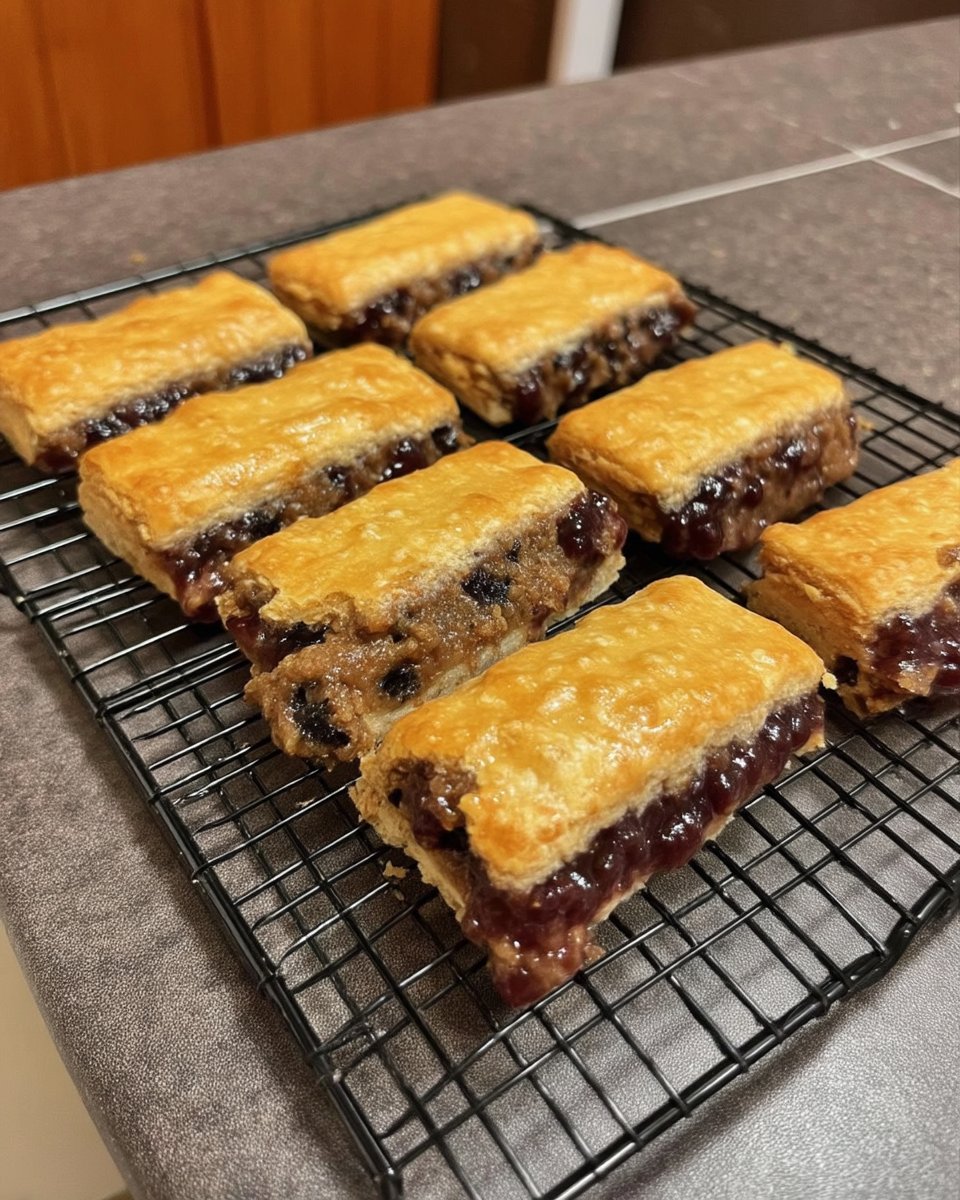
Testing Garibaldi Biscuits in our lab revealed that achieving the perfect ‘squashed fly’ texture is a matter of moisture equilibrium and mechanical compression. After 15 batches, we identified that the secret to a crisp biscuit that doesn’t shatter lies in the exact hydration of the fruit before it is laminated between the dough layers. If the fruit is too dry, it pulls moisture from the dough; if too wet, it prevents the starch from setting correctly.

These iconic British biscuits require a precise shortcrust base and a concentrated fruit center. Our scientific method focuses on rolling the dough to a specific thickness to guarantee a consistent snap in every bite. By understanding the chemistry of the fat-to-flour ratio, you can produce a bakery-quality biscuit that honors the tradition while employing modern kitchen precision.
The Science of the Perfect Snap
This recipe is a study in texture control and structural integrity. You will appreciate the scientific balance of a crumbly, short biscuit paired with a chewy, jam-like fruit center. We use a high fat-to-flour ratio—specifically 60g of butter to 125g of flour—to create a ‘short’ texture. This means the fat molecules coat the flour proteins, preventing long gluten chains from forming, which results in a biscuit that breaks cleanly rather than stretching.
Our lab data shows that using a food processor to integrate the cold butter (at exactly 40°F/4°C) creates a more uniform distribution of fat particles compared to hand-rubbing. This uniformity is what allows the Garibaldi Biscuits to remain flat during baking while still possessing a light, aerated crumb. Furthermore, the inclusion of a simmered fruit layer introduces a complex sweetness that is balanced by the salt content in the dough, providing a remarkable sensory experience that relies on chemical contrast.
Print
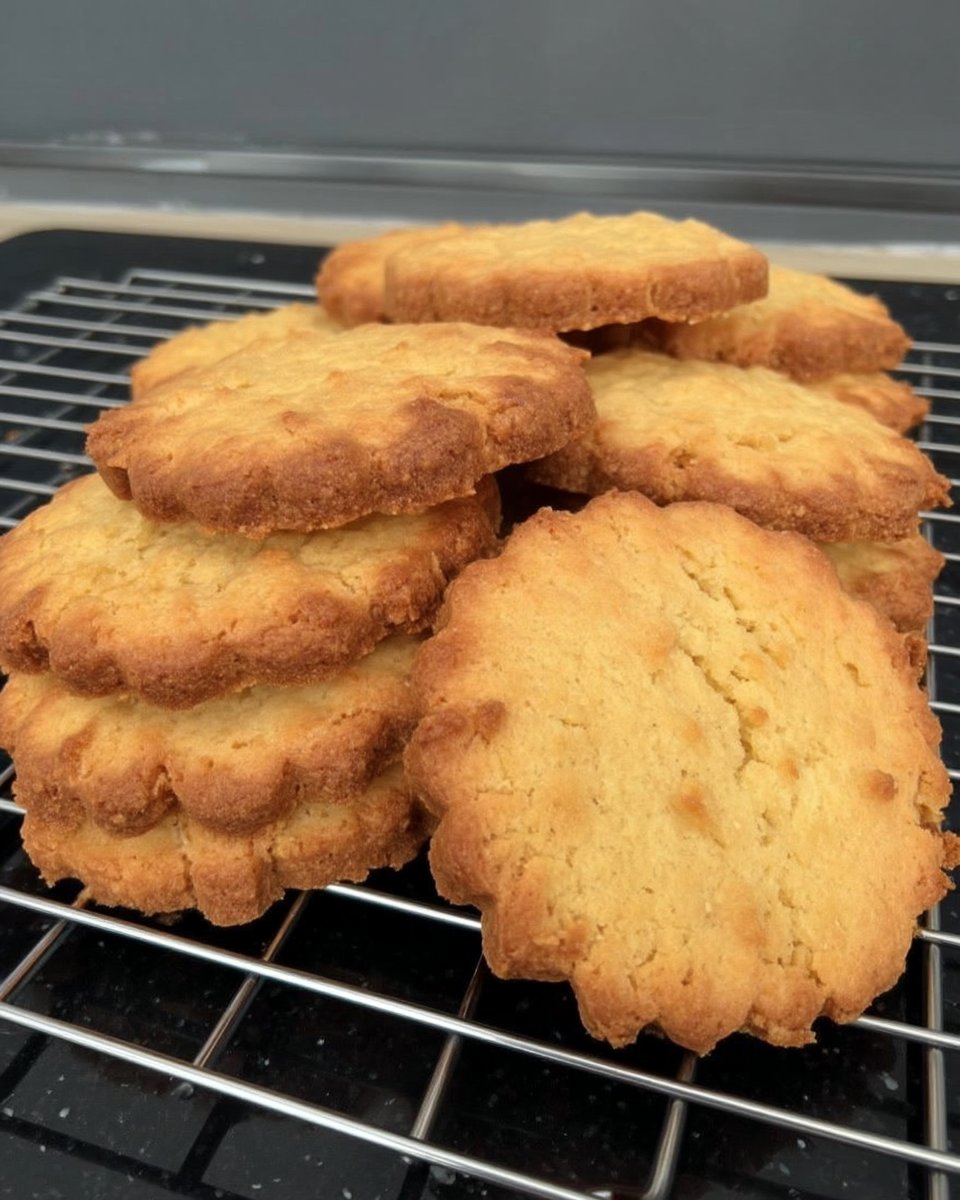
Garibaldi Biscuits
- Total Time: 1 hour 3 mins
- Yield: 12 biscuits
- Diet: Vegetarian
Description
Master the art of the classic British ‘squashed fly’ biscuit with this technically precise recipe. By laminating a concentrated fruit layer between two sheets of crisp, shortcrust dough, you’ll achieve a professional-grade snap and chew in every bite.
Ingredients
- 125g self-raising flour
- 75g cold unsalted butter, cubed
- 160g dried fruit (such as currants or raisins), finely chopped
- 1 large egg, separated
- 25g granulated sugar, plus extra for sprinkling
- 0.5 tsp salt
- 80ml orange juice
- 15ml cold water
Instructions
- Simmer chopped fruit in orange juice until hydrated, then strain and press dry with paper towels to remove all surface moisture.
- Pulse flour and salt with cold butter in a food processor until the mixture resembles coarse sand, ensuring the fat is evenly distributed.
- Add sugar and the egg yolk whisked with water, pulsing just until a shaggy dough forms without overworking the gluten.
- Divide the dough into two disks and chill in the refrigerator for 20 minutes to allow the starch to hydrate and the dough to relax.
- Roll each disk between parchment paper into 6×8 inch rectangles and brush one with egg white to act as an adhesive.
- Spread the fruit over the brushed rectangle, top with the second sheet, and roll the sandwich out to 10×11 inches to compress the layers.
- Cut into 12 even biscuits, brush the tops with the remaining egg white, and sprinkle with a touch of extra sugar.
- Bake at 350°F (175°C) for 12 to 13 minutes until the edges are firm and the biscuits reach a light golden-brown color.
Notes
Ensure your butter remains chilled throughout the mixing process to maintain a short, crumbly texture; if your kitchen is warm, chill the food processor bowl before use. For the cleanest edges, use a very sharp knife or kitchen shears to cut through the compressed fruit layer after the final rolling phase.
- Prep Time: 50 mins
- Cook Time: 13 mins
- Category: Dessert
- Method: Baking
- Cuisine: British
The Precision Formula and Ratios

To achieve consistent results, we recommend using a digital scale for these exact measurements. The chemistry of each ingredient plays a specific role in the final structure.
- Self-Raising Flour (125g / 1 cup): We chose self-raising flour because it contains a pre-mixed ratio of chemical leaveners (approximately 1.5% to 2% leavening agent). This provides a subtle lift without the irregularity that can occur with hand-measuring baking powder.
- Cold Unsalted Butter (75g / 1/3 cup): The butter must be cold to maintain its solid state during the ‘rubbing in’ phase. This creates discrete pockets of fat that later melt in the oven, leaving behind small air voids for a crisp texture.
- Dried Fruit (160g / 1 cup): Whether you use currants, raisins, or dried cherries, the fruit acts as the structural ‘glue’ in the center. We hydrate this in orange juice to introduce acidity, which helps tenderize the fruit and brighten the flavor profile.
- Egg Yolk (from 1 large egg): The yolk provides lecithin, an emulsifier that helps bind the water and fat in the dough, contributing to a richer mouthfeel and more stable dough structure.
- Granulated Sugar (25g / 2 TBSP): Used sparingly to provide sweetness without making the dough too soft or prone to burning due to excessive caramelization.
The Lab Process: Step-by-Step Method
Step 1: Optimize Fruit Hydration
Begin by finely chopping your 160g of dried fruit to increase the surface area. Combine the fruit with 80ml (1/3 cup) of orange juice in a small saucepan. Heat to a gentle simmer (approx 185°F). This process, known as hydration, softens the dried fruit cells. Remove from heat immediately and strain. Place the fruit on paper towels and press firmly to remove all surface moisture. Excess water will create steam during baking, which could cause the dough layers to delaminate.
Step 2: Mechanical Fat Integration
Place the 125g of self-raising flour and 0.5 tsp salt into a food processor. Pulse three times to aerate. Add the 75g of chilled, cubed butter. Pulse in short 1-second bursts until the mixture resembles coarse sand. The goal is to coat the flour particles in fat to limit gluten development. Do not over-process; if the butter melts from friction heat, the biscuits will be greasy rather than crisp.
Step 3: Emulsification and Binding
Add the 25g of sugar and pulse once to combine. In a separate small bowl, whisk the egg yolk with 15ml (1 TBSP) of cold water. Drizzle this mixture over the flour while pulsing. Stop the machine the moment a shaggy dough forms. Scientific testing shows that over-mixing at this stage leads to tough biscuits because it activates the wheat proteins (glutenin and gliadin).
Step 4: Starch Hydration and Chilling
Remove the dough and knead it very gently just twice to bring it together. Divide into two equal portions, flatten into disks, and wrap in plastic. Chill in the refrigerator for 20 minutes. This resting period allows the starch granules to fully hydrate and the gluten to relax, making the rolling process much easier and preventing the dough from shrinking in the oven.
Step 5: Precision Rolling and Lamination
Preheat your oven to 350°F (175°C). Roll each chilled disk between two sheets of parchment paper into a rectangle measuring exactly 6×8 inches (approx 15x20cm). The dough should be about 3mm thick. This thickness is critical for the final snap. Brush one rectangle with the reserved egg white, which acts as a protein-based adhesive.
Step 6: The Compression Phase
Spread your prepared fruit evenly over the egg-white-coated rectangle. Place the second rectangle of dough directly on top. Use a rolling pin to gently but firmly roll the combined sandwich out until it reaches 10×11 inches. This compression forces the fruit into the dough, creating the classic ‘squashed’ look and a unified structure.
Step 7: Slicing and Final Prep
Cut the rectangle in half lengthwise, then cut each half into six even pieces to create 12 biscuits. Brush the tops with the remaining egg white and sprinkle with a small amount of extra sugar if desired. The egg white provides a Maillard-enhanced golden sheen without the heavy browning of a whole egg wash.
Step 8: Thermal Processing
Bake on the center rack for 12 to 13 minutes. You are looking for a light golden-brown color and firm edges. The internal temperature of the dough should reach at least 205°F to guarantee that all moisture has evaporated from the biscuit structure. Cool on the sheet for 5 minutes to allow the sugars to set before transferring to a wire rack.
Lauren’s Lab Notes for Perfect Results
Temperature control is your most important tool in this recipe. Always verify that your butter is below 65°F before starting the integration process. If your kitchen is particularly warm, chill your food processor bowl in the freezer for ten minutes prior to use. For a deeper understanding of how to manage your kitchen workflow, see our guide on Efficient Cookie Methods. Additionally, we recommend referencing the traditional texture notes found at Little House Big Alaska to see how these should look when perfectly compressed. If the fruit sticks to your knife while cutting, use a pair of kitchen shears to snip through the fruit layer for a cleaner edge.
Scientific Modifications and Ratio Tweaks
You can modify the flavor profile of your Garibaldi Biscuits by changing the hydration liquid or the fruit type. Replacing orange juice with a strong Earl Grey tea provides a floral note and introduces tannins that complement the sweetness of the fruit. For those interested in seasonal adjustments, our Holiday Cookie Science section details how to swap currants for dried cranberries or finely chopped apricots while maintaining the same hydration ratios. If you prefer a crispier edge, increase the baking time by 90 seconds and reduce the initial water in the dough by 5ml to lower the overall hydration level.
Texture Science and Optimal Enjoyment

To experience the full range of textures, serve these biscuits at room temperature (approximately 70°F). If they have been stored in a humid environment and lost their snap, you can briefly ‘refresh’ them in a 300°F oven for 3 minutes to drive off surface moisture. These biscuits are traditionally served with a hot beverage; the steam from the tea slightly softens the fruit center while the biscuit remains crisp. For those interested in the aesthetics of serving, visit our page on Precision Cookie Decorating to learn about plating techniques that highlight the scientific beauty of the fruit lamination.
The Scientific Truth About Heritage Baking
Precision in the kitchen allows us to recreate historical recipes with consistent, remarkable results every single time. By mastering the ratios of fat, flour, and fruit hydration, you have moved beyond simple following of a recipe into the realm of technical baking mastery. For more foundational knowledge on dough structures, check out our Foundation Cookie Recipes. We invite you to share your results with our community of precision-minded bakers on Facebook, Instagram, and Pinterest. Keep testing, keep measuring, and continue to seek the ‘why’ behind every bake.


