While the chocolate chip cookie is a relatively modern American invention—dating back to Ruth Wakefield’s 1930s discovery—the mechanics of a true “bakery style” cookie rely on principles Victorian biscuit makers knew well. The secret to that thick, substantial texture lies not just in the ingredients, but in the patience of the process, specifically the hydration of the flour during a long rest. By allowing the dough to mature, we achieve a depth of flavor and structural integrity that immediate baking simply cannot provide.

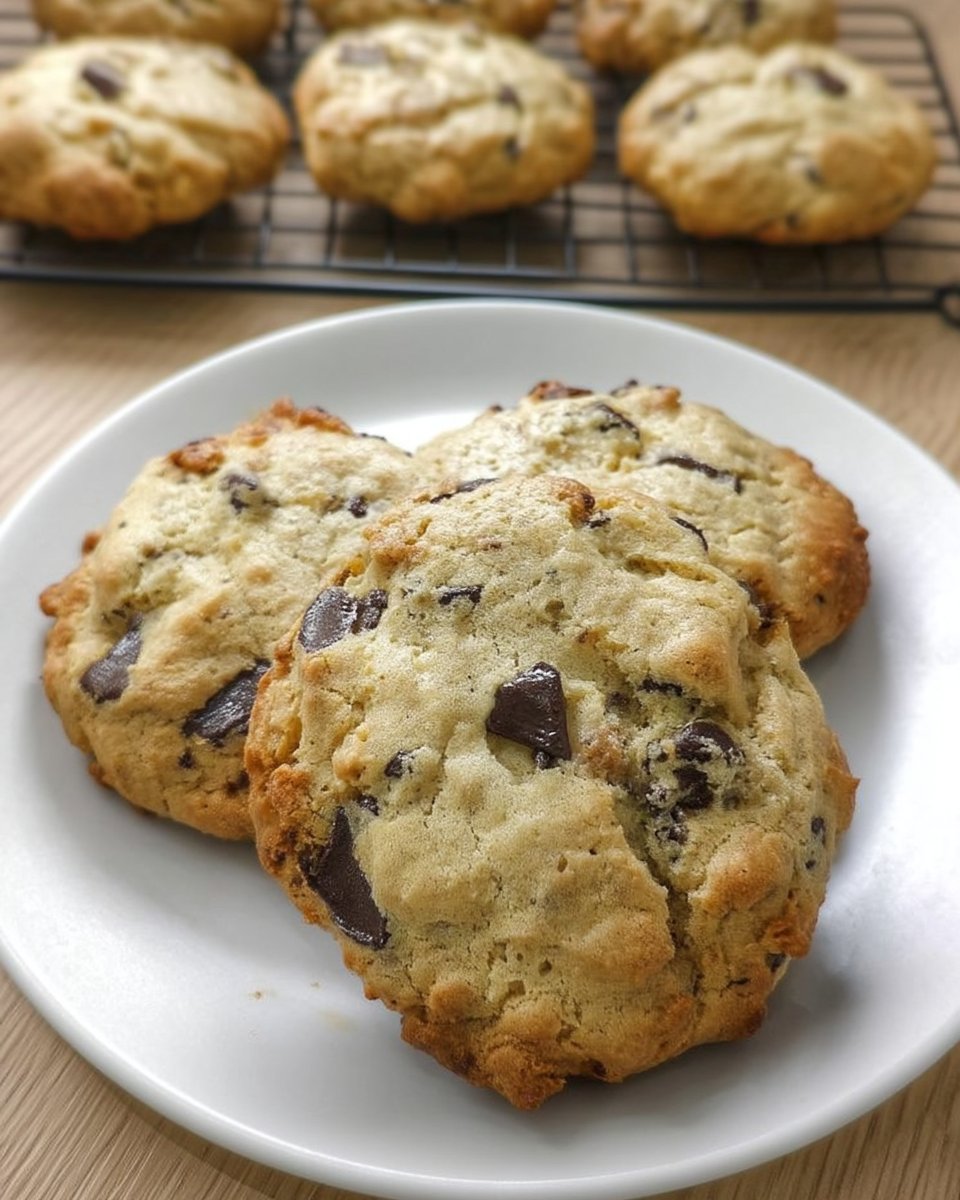
This recipe produces a substantial, structural cookie with a soft, dense center and shattered, crisp edges. We use a precise balance of leavening agents and a critical chilling period to control spread, resulting in a treat that rivals any high-street bakery. It is a study in texture, proving that careful temperature control is just as important as the ratio of butter to sugar.
The Science of Structure
There is a distinct difference between a standard homemade biscuit and one that commands attention in a bakery window. You will appreciate this recipe because it solves the common problem of excessive spreading through thermal engineering. By chilling the dough, we solidify the butter and allow the flour to fully hydrate, which means the cookie holds its shape long enough for the edges to set before the center melts.
Furthermore, the combination of dark brown sugar and granulated sugar creates a complex interaction. The molasses in the brown sugar is hygroscopic, drawing in moisture to keep the center tender, while the white sugar encourages the Maillard reaction for those golden, caramelized edges. It is a satisfying balance of history and chemistry on a single tray.
Print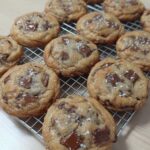
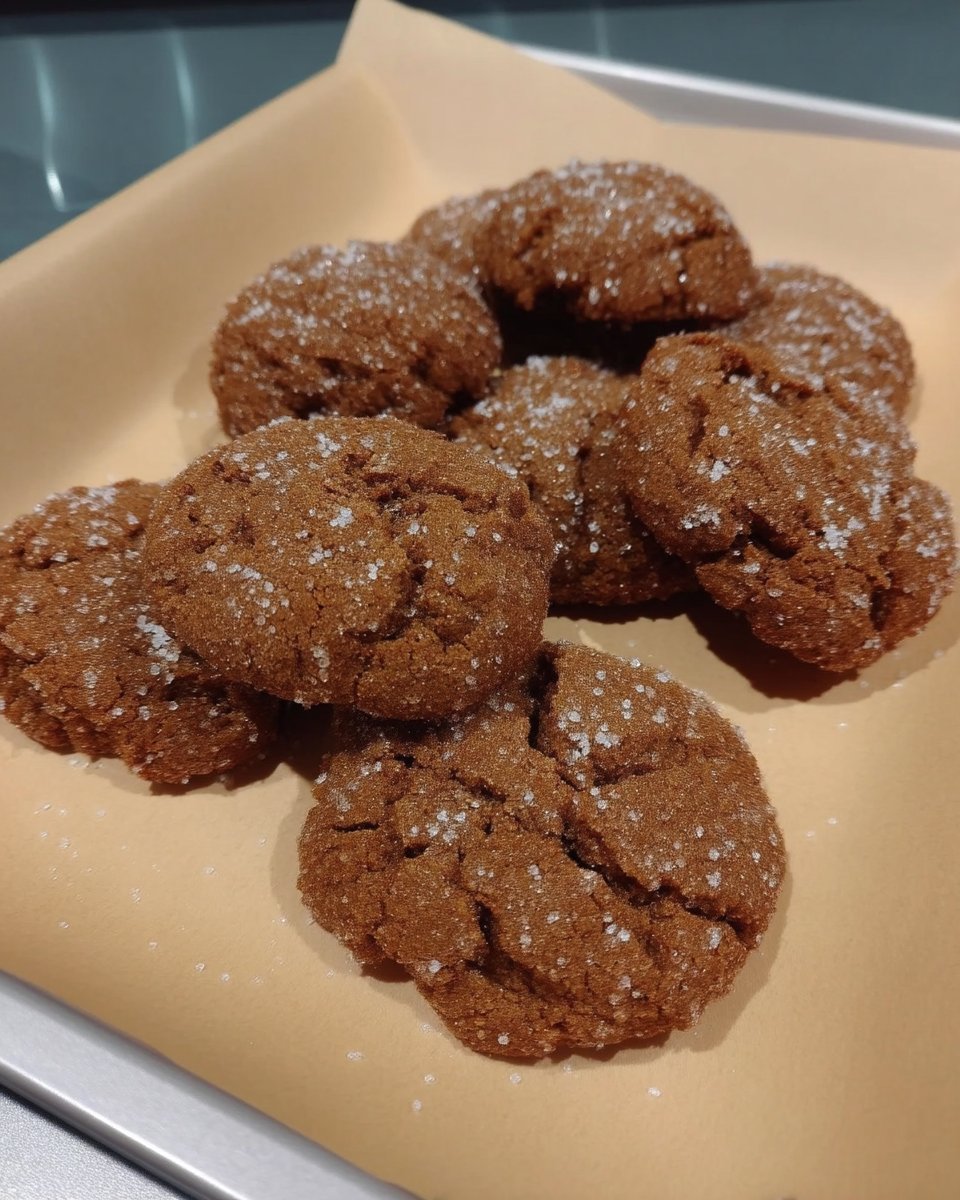
Bakery Style Chocolate Chip Cookies
- Total Time: 2 hours 25 mins
- Yield: 24 cookies
- Diet: Vegetarian
Description
Create substantial, thick chocolate chip cookies with a soft center and crisp edges using this methodical bakery-style recipe. The secret lies in a critical two-hour chilling period and a precise blend of sugars for the perfect caramelization and structure.
Ingredients
- 3 cups all-purpose flour
- 1 teaspoon baking soda
- 1 teaspoon baking powder
- 1 teaspoon salt
- 1 cup unsalted butter, room temperature
- 1/2 cup granulated sugar
- 1 1/2 cups dark brown sugar, packed
- 2 teaspoons vanilla extract
- 2 large eggs, room temperature
- 2 cups semi-sweet chocolate chips
Instructions
- Preheat your oven to 375°F (190°C) and line a heavy-gauge baking sheet with parchment paper or a silicone mat.
- In a medium bowl, whisk together the flour, baking soda, baking powder, and salt to ensure even distribution of the leavening agents.
- In a stand mixer fitted with the paddle attachment, cream the room temperature butter, granulated sugar, and dark brown sugar until the mixture is uniform and smooth.
- Add the vanilla extract and eggs, mixing until the batter is smooth and pale, then scrape down the sides of the bowl.
- Turn the mixer to low speed and gradually add the dry ingredients, mixing only until the flour is just visible to avoid over-working the gluten.
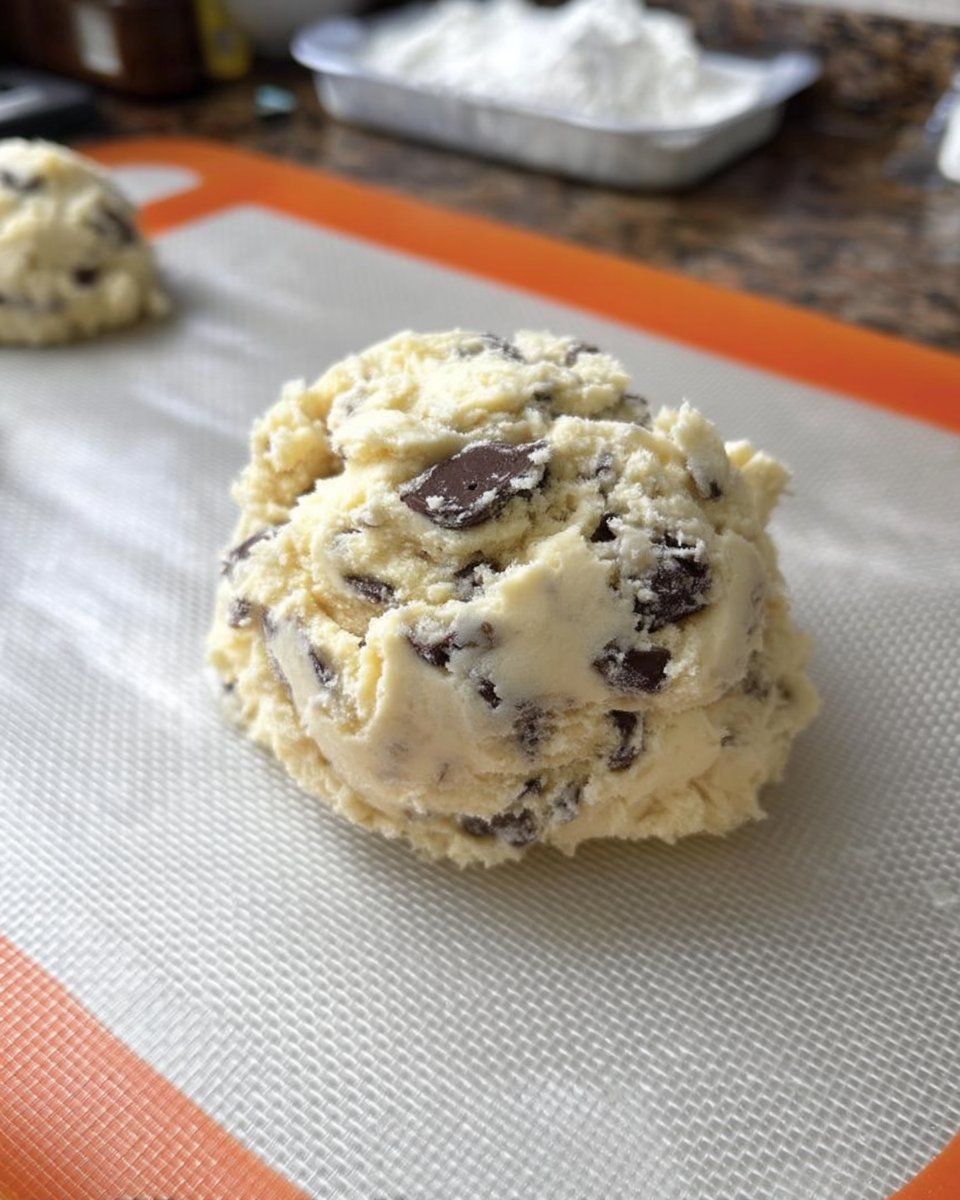
- Fold in the chocolate chips by hand, then use a large scoop to portion the dough into 3-tablespoon balls.
- Place the dough balls on a tray, cover, and refrigerate for at least 2 hours to allow the fat to solidify and the flour to hydrate.
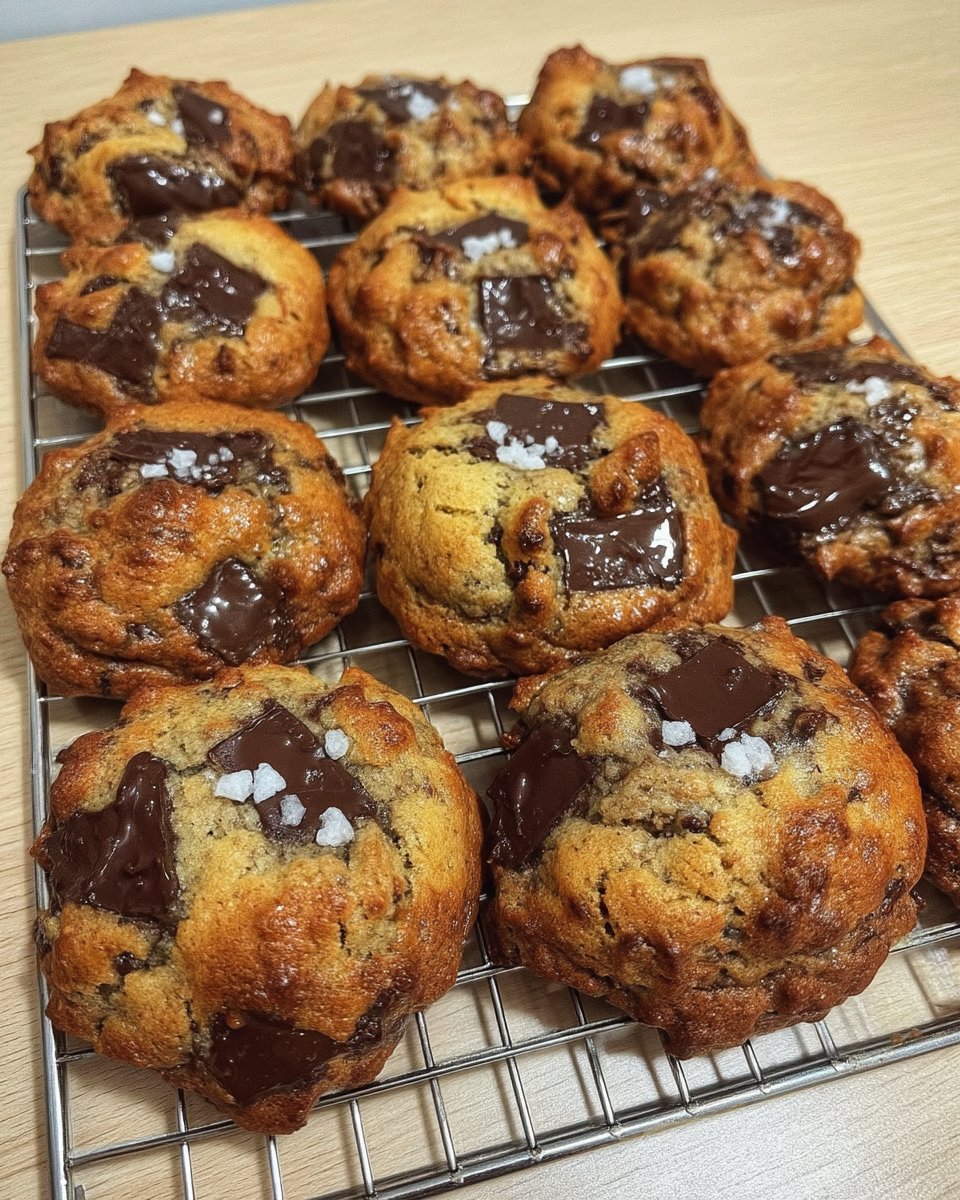
- Arrange 6 chilled dough balls on the prepared baking sheet and bake for 9-12 minutes until the edges are golden brown.
- Let the cookies cool on the baking sheet for 5 minutes before transferring them to a wire rack to set completely.
Notes
For the most consistent results, use an oven thermometer to verify your temperature, as domestic ovens often fluctuate. If you prefer an extra-gooey center, under-bake the cookies slightly and let them finish cooking on the hot tray. Chilling the dough overnight instead of just two hours will further deepen the caramel notes and improve the final texture.
- Prep Time: 15 mins
- Cook Time: 10 mins
- Category: Dessert
- Method: Baking
- Cuisine: American
Components for Proper Emulsion
To achieve the correct texture, one must respect the role of each ingredient. Precision here is paramount for the chemical reactions we intend to trigger.
- All-Purpose Flour: This provides the gluten framework. I recommend the “spoon and level” method if you lack a scale, as compacting flour will lead to a dry, tough puck rather than a tender cookie.
- Leavening Agents: We use both baking soda and baking powder. Baking soda reacts with the acidic brown sugar to provide lift and browning, while baking powder provides a secondary rise during the bake for that bakery-style dome.
- Salt: Essential for flavor balance and tightening the gluten structure.
- Unsalted Butter: Using unsalted butter allows us to control the sodium content precisely. It must be at room temperature to emulsify properly with the sugars during creaming.
- Dark Brown Sugar: I prefer dark over light for its higher molasses content, which increases acidity (activating the soda) and moisture.
- Semi-Sweet Chocolate Chips: A standard semi-sweet chip holds its shape well, providing textural contrast to the soft dough.
- Eggs: Room temperature eggs emulsify much better than cold ones, preventing the batter from curdling.
Methodical Assembly and Baking
Step 1: Prepare the Oven and Dry Goods
Start by preheating your oven to 375°F (190°C). Line a heavy-gauge baking sheet with parchment paper or a silicone mat. In a medium bowl, whisk together the flour, baking soda, baking powder, and salt. Whisking ensures the leavening agents are evenly distributed, preventing metallic hotspots or uneven rising.
Step 2: The Creaming Method
In a stand mixer fitted with the paddle attachment, cream the room temperature butter, granulated sugar, and dark brown sugar. Mix until the mixture is smooth and creamy. Unlike a sponge cake, we do not want to incorporate excessive air, so stop once the mixture is uniform. Add the vanilla extract and eggs, mixing until the batter is smooth and pale. Scrape down the sides of the bowl to maintain a homogeneous mixture.
Step 3: Incorporation of Flour
Turn the mixer to low speed. Gradually add the dry ingredients, mixing only until the flour is *just* visible. Over-mixing at this stage activates the gluten proteins too aggressively, which leads to a tough biscuit. Finish by folding in the chocolate chips by hand to preserve the dough’s texture.
Step 4: The Critical Rest
Using a large scoop (approximately 3 tablespoons), portion the dough into balls and place them on a tray. Cover and refrigerate for at least 2 hours. This resting period allows the fat to re-crystallize and the flour to absorb free water, which is the secret to a thick cookie that does not spread too thin.
Step 5: The Bake
Arrange 6 chilled dough balls on your prepared baking sheet, leaving ample space for heat circulation. Bake for 9-12 minutes. The goal is to catch them when the edges are golden brown but the centers remain pale and soft. They will continue to set on the hot tray after removal.
Step 6: The Finishing Technique
If the cookies have spread irregularly, immediately place a large circular cutter or glass over the hot cookie and gently swirl it to tuck the edges in. Allow them to cool on the sheet for 5 minutes before transferring to a wire rack.
Precision Techniques for Success
- Respect the Chill: The 2-hour chill time is not a suggestion; it is a structural requirement. If you bake warm dough, the butter will melt before the structure sets, leading to a flat, greasy result. Victorian bakers understood that patience yields better texture.
- Measuring Flour: The most common failure point is heavy flour measurement. If you scoop directly with the cup, you may add up to 25% more flour than intended. Always fluff, spoon, and level.
- Oven Thermometers: Domestic ovens often lie. A simple oven thermometer guarantees you are baking at the correct temperature for the intended spring.
- Shaping: For perfectly round cookies, try the “scooting” technique mentioned in step 6. It creates a professional finish.
For more insights on shaping and structure, refer to our guide on Efficient Cookie Methods.
Adaptations and Storage
- Freezing Dough: This dough freezes exceptionally well. Roll into balls and freeze for up to 3 months. You may bake them directly from frozen, simply adding 1-2 minutes to the bake time. This is an excellent way to have fresh biscuits on demand.
- Chocolate Types: While semi-sweet chips are standard, using chopped chocolate bars creates pools of melted chocolate layered within the dough, offering a different textural experience.
- Sugar Ratios: If you prefer a crisper cookie, you can slightly increase the white sugar and decrease the brown, though this moves away from the bakery style texture.
For other reliable dough foundations, explore our Foundation Cookie Recipes.
Serving and Presentation
Traditionally, a biscuit of this substance is best served slightly warm, perhaps 10 minutes out of the oven, when the chocolate is still fluid but the crumb has set. They pair perfectly with cold milk to balance the richness, or a robust builder’s tea if you prefer a British contrast.
For a festive presentation, stack them on a tiered stand. If you are interested in the chemistry of festive baking, see our notes on Holiday Cookie Science.
Final Notes on Technique
Mastering the bakery style chocolate chip cookie is less about a secret ingredient and more about respecting the physics of baking. By adhering to the “spoon and level” method and patience in chilling, you guarantee a result that honors the tradition of quality home baking. This recipe aligns with techniques found in other trusted kitchens, such as Stuck on Sweet, and proves that proper method yields superior results.
If you enjoyed this technical approach, you might find our Viral Cookie Analysis fascinating as we break down other popular trends.

