Victorian bakers relied on a unique byproduct of the winemaking process known as cream of tartar to achieve the specific rise and tang found in traditional biscuits. This historical technique, likely derived from the German Schneckennudeln, transformed the simple sugar cookie into the iconic snickerdoodle by creating a specific acidic environment. Modern testing confirms that this acidity is what prevents sugar crystallization, guaranteeing that these Gluten Free Snickerdoodles remain soft rather than becoming brittle.

Achieving the perfect chew in a wheat-free environment requires a methodical approach to hydration and emulsification. This recipe focuses on the structural integrity of the dough, using a chilled rest to allow alternative grains to fully absorb moisture. The result is a classic cookie with a signature crackled surface and a tender, pillowy interior that honors 19th-century baking traditions.
The Heritage of Gluten Free Snickerdoodles
The appeal of the snickerdoodle lies in its remarkable contrast between the sharp tang of the interior and the warm, aromatic crunch of the cinnamon-sugar exterior. Historically, this cookie was a triumph of chemical leavening, appearing in American cookbooks as a reliable favorite that used common pantry staples to create something extraordinary. By adapting this classic to be gluten-free, we preserve the traditional texture while making the recipe accessible to the modern home baker.
You will find that the specific ratio of cream of tartar to baking soda produces a localized carbon dioxide release, which is what causes the cookie to puff up and then collapse into those beautiful, deep crinkles. This is not just a cookie; it is a lesson in edible chemistry. The use of real butter provides a rich mouthfeel that balances the brightness of the leavening agents, while the double-coating of cinnamon sugar provides a professional finish that would make any Victorian pastry cook proud. It is a heritage bake that provides consistent results every time you fire up the oven.
Print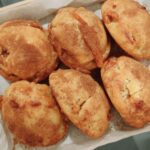
Gluten Free Snickerdoodles
- Total Time: 1 hour 30 mins
- Yield: 12 cookies
- Diet: Gluten-Free
Description
Discover the science behind the perfect gluten-free snickerdoodle, featuring a signature crackled exterior and a soft, tangy center. These cookies use a traditional cream of tartar method and a critical hydration rest to ensure a tender, non-gritty crumb.
Ingredients
- Gluten-Free Flour Blend (rice flour, potato starch, and sorghum)
- Cream of Tartar (Potassium Bitartrate)
- Baking Soda
- Unsalted Butter (softened to 65°F)
- Xanthan Gum
- Granulated Sugar
- Ground Cinnamon
- Salt
- Egg (room temperature)
- Vanilla Extract
Instructions
- Whisk together the gluten-free flour blend, xanthan gum, salt, cinnamon, baking soda, and cream of tartar in a medium bowl to evenly distribute the leavening agents.
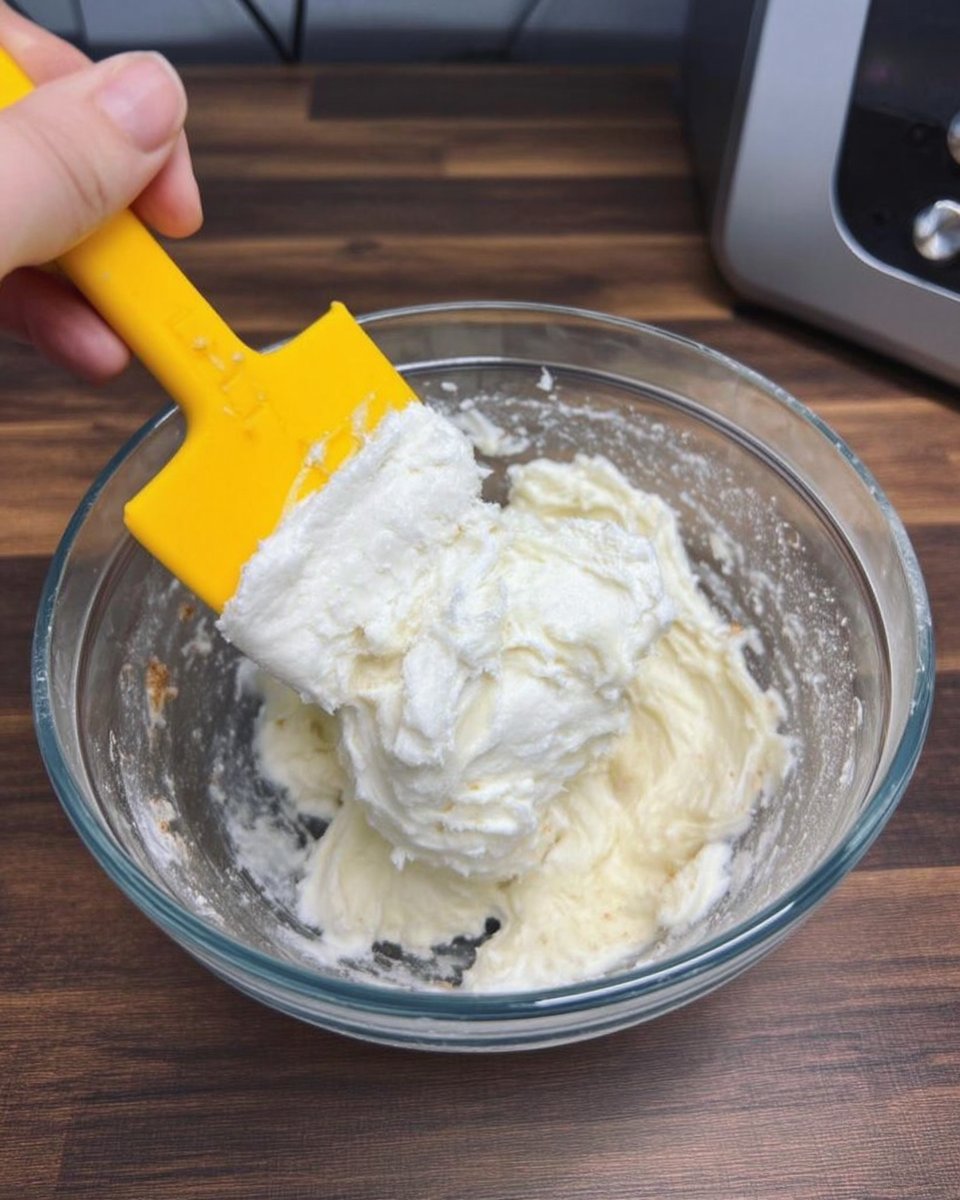
- In a stand mixer, beat the softened butter and granulated sugar on medium-high speed for at least four minutes until the mixture is pale and light in volume.
- Add the room temperature egg and vanilla extract to the bowl and beat for no more than one minute to create a stable emulsion.
- Slowly incorporate the dry ingredients into the wet mixture on the lowest speed, stopping as soon as a cohesive, sticky dough forms.
- Wrap the dough tightly in plastic wrap and chill in the refrigerator for at least one hour to allow the alternative grains to fully hydrate.
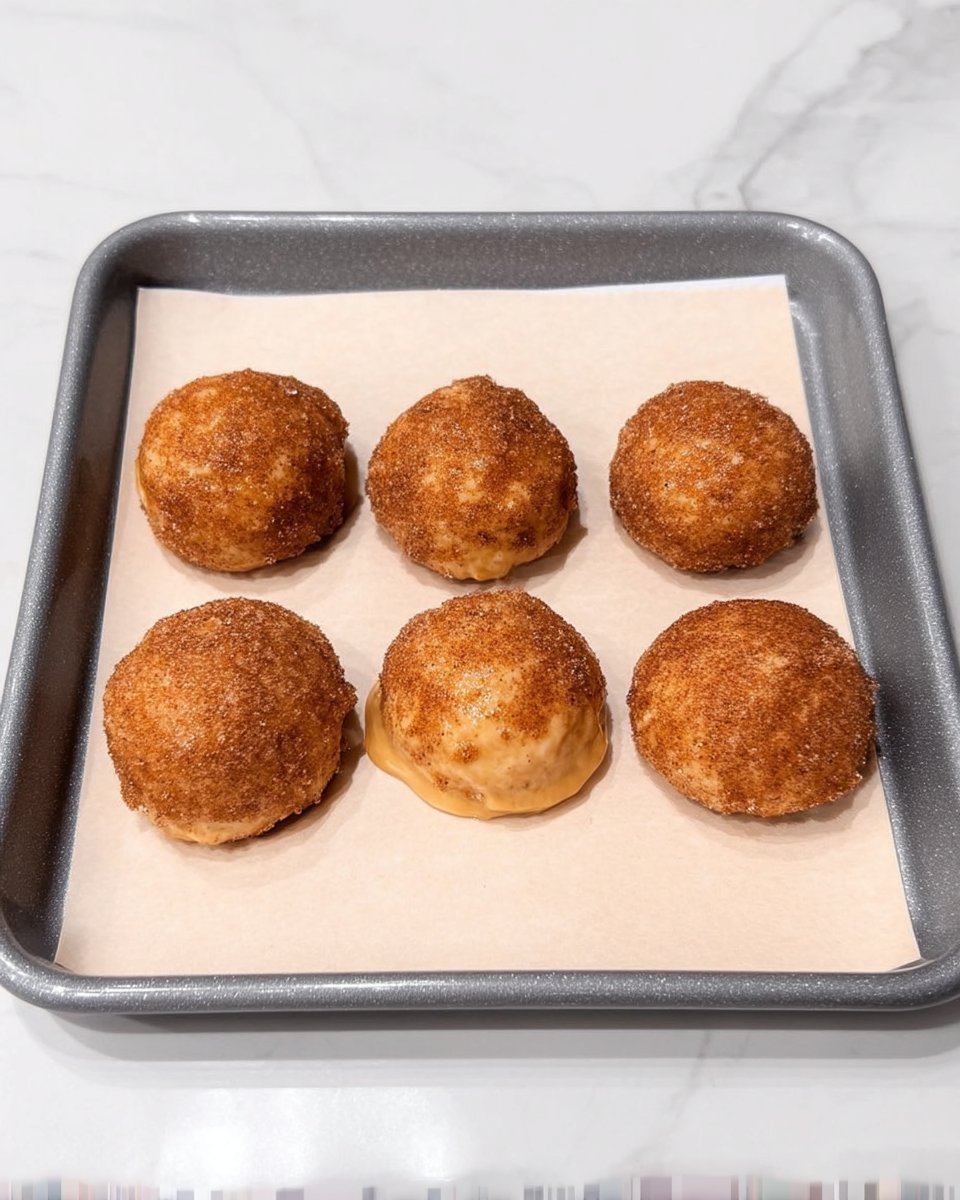
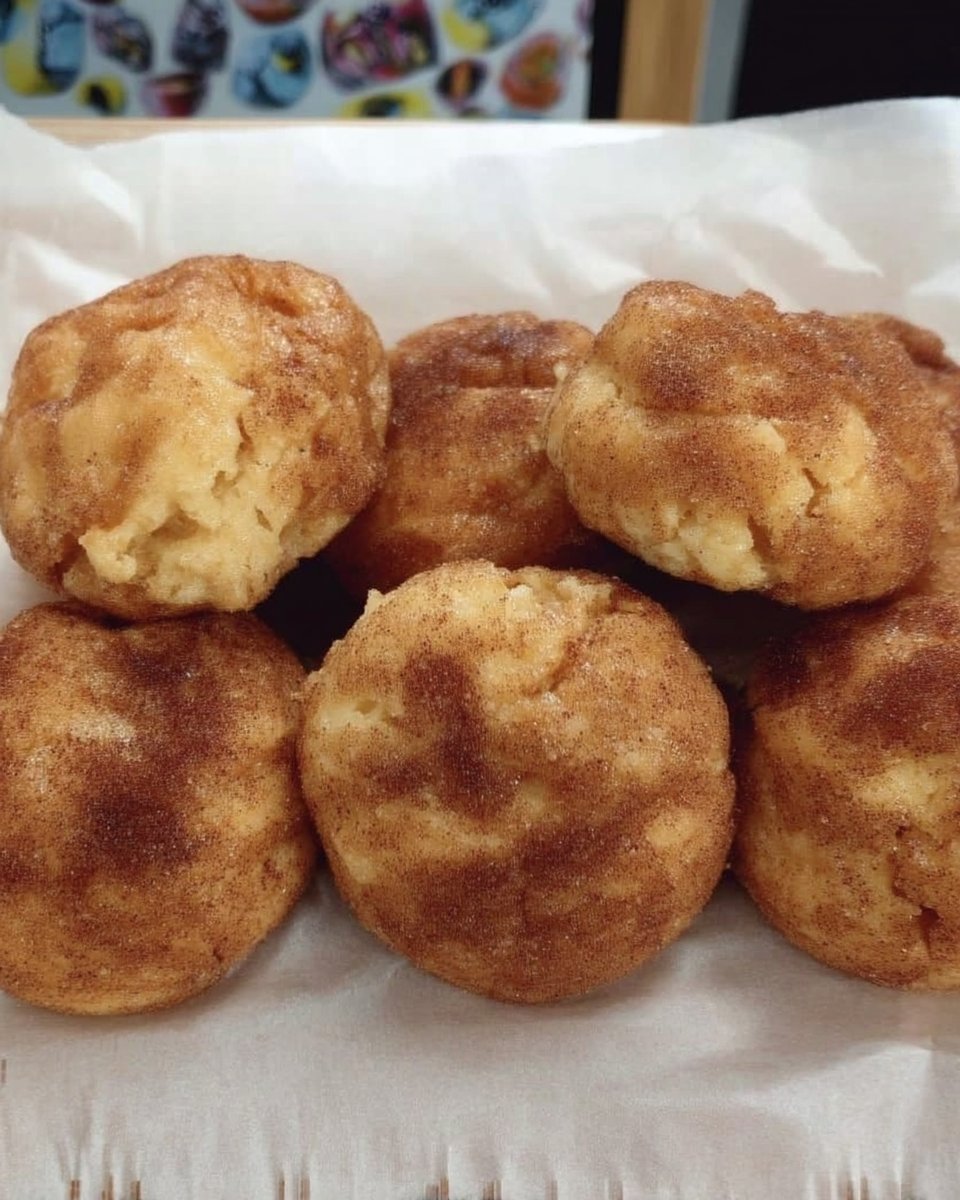
- Preheat the oven to 375°F, roll the chilled dough into 12 spheres, and double-coat each ball in a cinnamon-sugar mixture, letting them sit for five minutes between coats.
- Bake on a parchment-lined sheet for 10 minutes until the edges are set, then let them settle on the hot pan for 10 minutes before serving.
Notes
For the most consistent results, use a digital scale to weigh your gluten-free flour blend in grams rather than using volume measurements. If your flour blend already contains xanthan gum, you may omit the additional amount to prevent the texture from becoming too gummy.
- Prep Time: 20 mins
- Cook Time: 10 mins
- Category: Dessert
- Method: Baking
- Cuisine: American
The Technical Components of the Perfect Crumb
Selecting the right components is the first step in successful gluten-free baking. We prioritize quality ingredients to replicate the structural lattice normally provided by wheat proteins.
- Gluten-Free Flour Blend: A high-quality blend containing rice flour, potato starch, and sorghum is ideal. The absence of wheat means we must rely on starch gelatinization for structure.
- Cream of Tartar (Potassium Bitartrate): This is the soul of the snickerdoodle. It provides the characteristic tang and acts as the acid to activate the baking soda.
- Baking Soda: When paired with the cream of tartar, it creates the lift necessary for the ‘puff and crackle’ effect.
- Unsalted Butter: Using butter at exactly room temperature (65°F) is vital for proper aeration during the creaming stage. This creates tiny air pockets that expand in the heat.
- Xanthan Gum: This acts as the binder. If your blend lacks it, adding a small amount mimics the elasticity of gluten, preventing the cookie from crumbling.
- Cinnamon and Sugar: We use a high ratio of cinnamon to sugar for the coating to provide a bold, spicy contrast to the sweet dough.
The Proper Method for Technical Success
Step 1: Sift the Dry Components
Begin by whisking together the gluten-free flour blend, xanthan gum, salt, cinnamon, baking soda, and cream of tartar in a medium-sized bowl. Historical methods often suggest sifting three times; while modern flour is more refined, a thorough whisking helps distribute the leavening agents evenly to prevent uneven rising or ‘soda spots’ in the finished bake.
Step 2: The Creaming Stage
In your stand mixer bowl, combine the softened butter and granulated sugar. Beat on medium-high speed for a minimum of four minutes. This step is a Victorian secret proven by science; the sugar crystals cut into the fat, creating microscopic air pockets. The mixture should become pale and significantly lighter in volume, which is a sign of proper aeration.
Step 3: Emulsify the Wet Ingredients
Lower the speed and add the egg and vanilla extract. It is vital that the egg is at room temperature to prevent the butter from curdling. Beat for no more than one minute. You are looking to create a stable emulsion where the water from the egg and the fat from the butter are perfectly suspended, providing the cookie with its tender crumb.
Step 4: Incorporation
Slowly add the dry mixture to the wet ingredients. Mix on the lowest speed only until the flour disappears. Over-mixing gluten-free dough can sometimes make it too gummy due to the starches, so stop as soon as a cohesive, sticky dough forms. The dough will feel softer than a standard wheat dough, but do not be tempted to add more flour.
Step 5: The Hydration Rest
Transfer the dough to plastic wrap and seal it tightly. Chill in the refrigerator for at least one hour. This is a critical step in gluten-free baking; it allows the rice flour and starches to hydrate, which removes any gritty texture and firms up the fats for a controlled spread in the oven.
Step 6: The Double Coating Technique
Preheat the oven to 375°F. Divide the chilled dough into 12 equal portions and roll them into smooth spheres. Roll each ball in the cinnamon-sugar mixture, let them sit for five minutes, and then roll them a second time. This historical ‘double-roll’ creates a thicker crust that resists the moisture of the dough, leading to a superior crackle.
Step 7: The Precision Bake
Place the balls on a parchment-lined sheet and bake for 10 minutes. The cookies should be puffed and the edges set, but the centers should still look slightly underdone. As they cool on the hot pan for 10 minutes after removal, they will settle and develop their final chewy texture.
Jordan’s Technique Notes for Precision
To achieve professional results, one must focus on temperature control. If your kitchen is warmer than 72°F, your butter may become too soft, leading to a greasy cookie that spreads too thin. Aim for ‘cool room temperature’ butter that holds a thumbprint but does not feel oily. For those who want to master the basics of the craft, I recommend reviewing our Foundation Cookie Recipes to understand the role of fat-to-sugar ratios. Additionally, always weigh your flour in grams if possible; volume measurements for gluten-free blends are notoriously inconsistent and can lead to a dry, bready biscuit.
Historical Adaptations and Regional Differences
While the cinnamon-sugar version is the most recognized, there are regional variations that offer a different perspective on this classic. In some Dutch-influenced communities, a pinch of nutmeg or cardamom was added to the dough to provide a deeper, more complex spice profile. If you are baking for the holidays, you might enjoy our guide to Holiday Cookie Science which explores how different spices interact with heat. For a modern twist, you can replace the granulated sugar in the coating with maple sugar for a North American heritage flavor that pairs beautifully with the tangy cream of tartar.
Traditional Service and Classic Enjoyment
In the British tradition, a biscuit of this quality is best served alongside a strong black tea or a creamy coffee. The acidity of the cookie cuts through the tannins of the tea, creating a balanced palate. For a more formal presentation, you can use the techniques found in our Precision Cookie Decorating guide to create a beautiful tiered display. Serve these cookies slightly warm if possible, as the aromatics of the cinnamon are most potent when the residual heat from the oven is still present.
The Technical Truth of the Snickerdoodle
Mastering the gluten free snickerdoodle is a rewarding journey into the history of chemical leavening and starch behavior. By respecting the traditional creaming method and allowing for proper hydration, you produce a cookie that defies the common misconceptions about gluten-free baking. To continue your education in the mechanics of the oven, I invite you to study our more advanced Technical Bakes. If you found success with this recipe, please share your results with our community on Facebook, Instagram, or Pinterest. Precision in the kitchen leads to triumph at the table, and we are proud to help you achieve that standard.
