Victorian bakers identified “fairy” bakes by their diminutive size and delicate crumb, a tradition that emphasized a lighter-than-air texture achieved through mechanical aeration. This naming convention originated in the mid-19th century when small, refined treats were seen as fit for mythical creatures, contrasting with the dense, rustic fruitcakes of earlier eras. Modern science confirms what these early artisans knew: the structural integrity of such a fine crumb depends entirely on the precise suspension of air within the fat-sugar matrix.

This specific 1940s iteration of Fairy Cookies utilizes a stiff, reliable dough cut into precise triangles rather than the more common dropped mounds. The inclusion of almond extract provides a nostalgic profile often called a “princess” flavor, creating a biscuit that is both structurally sound and remarkably tender. By following these methodical steps, you will produce a batch that honors the historical precision of the home baker while benefiting from contemporary testing regarding temperature and gluten development.
The Tradition of the Delicate Crumb
One reasons these biscuits remain a staple in the technical baker’s repertoire is their remarkable balance between a crisp exterior and a melt-in-the-mouth center. Unlike modern cookies that often rely on excessive sugars to create a chewy texture, the Fairy Cookie relies on the physics of the shortbread-adjacent ratio. This method provides a sturdy canvas for frosting without becoming overly sweet or structurally fragile.
Historically, these cookies served as a bridge between the simple tea biscuit and the elaborate celebration cake. They represent a period when home bakers began to master the use of chemical leaveners like baking powder, which allowed for a lift that hand-beating alone could not achieve. When you bite into one, you are tasting a specific moment in culinary history where domestic science began to thrive in the average kitchen.
Furthermore, the triangle shape is not merely aesthetic. In the context of heat distribution, the pointed corners of the triangle crisp more rapidly than the center, providing a varied sensory experience in every bite. This contrast in textures—from the snap of the point to the soft yielding of the middle—is a hallmark of well-executed British biscuitry. It is a triumph of geometry as much as it is of flavor.
Print
Fairy Cookies
- Total Time: 38 mins
- Yield: 24 cookies
Description
These elegant 1940s-style biscuits feature a delicate almond-scented crumb and a unique triangular shape. Perfectly balanced with a light buttercream frosting, they offer a nostalgic texture that is both crisp and remarkably tender.
Ingredients
- 1 cup Unsalted Butter, softened to 65°F
- 1 cup Granulated Sugar
- 1 Large Egg
- 1 teaspoon Almond Extract
- 1 teaspoon Vanilla Extract
- 1 teaspoon Baking Powder
- 1/2 teaspoon Fine Salt
- 2 1/2 cups All-Purpose Flour
- 1/2 cup Unsalted Butter (for frosting)
- 2 cups Powdered Sugar, sifted
- Decorative sprinkles
Instructions
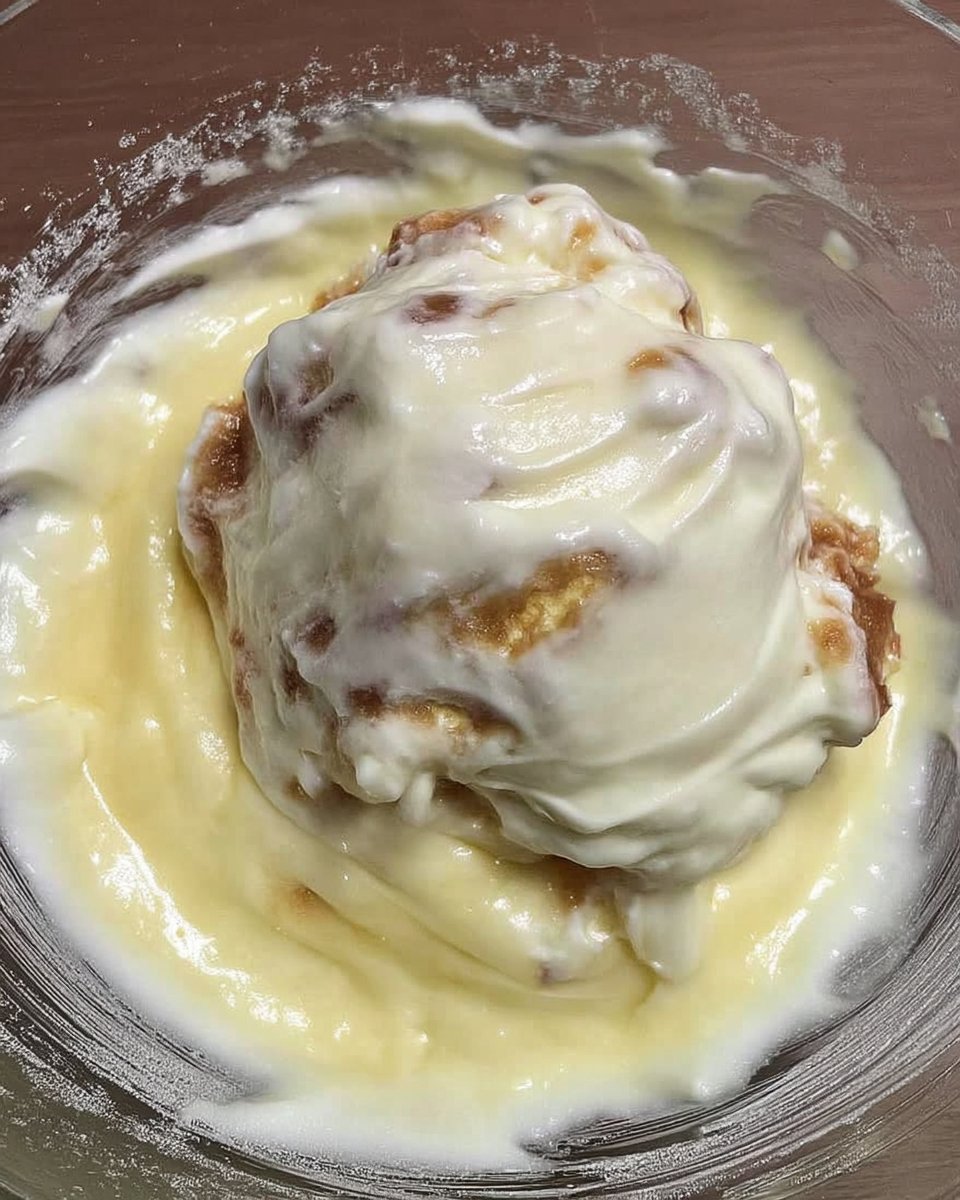
- In the bowl of a stand mixer, cream the butter and granulated sugar on medium speed for 3 to 5 minutes until the mixture is pale and ivory-colored.
- Add the egg, almond extract, and vanilla extract, beating on medium speed until the emulsion is smooth and fully incorporated.
- Mix in the baking powder and salt for 30 seconds to ensure the leavening is evenly distributed throughout the wet ingredients.
- Reduce the mixer to its lowest setting and gradually add the flour, mixing only until no dry streaks remain to maintain a tender texture.
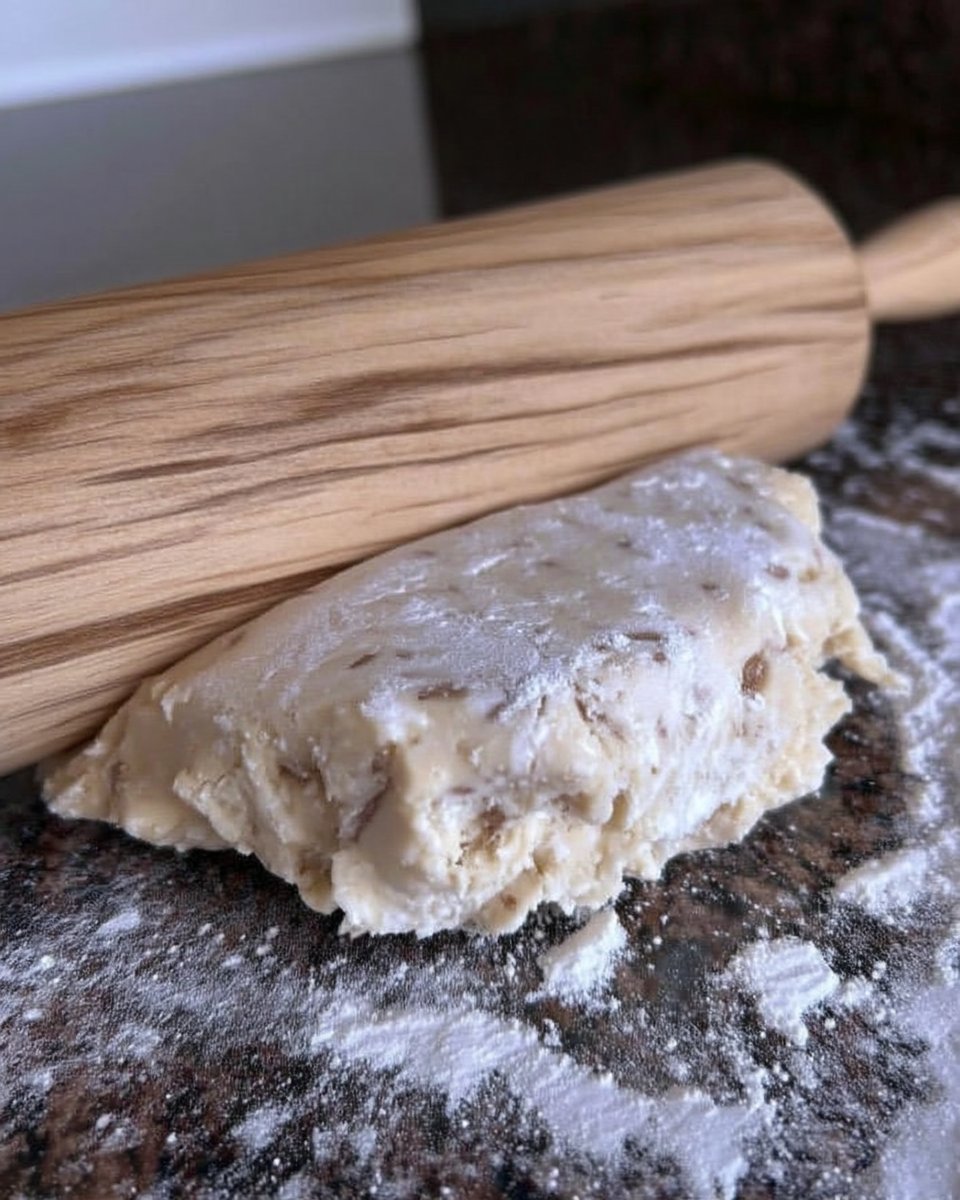
- Turn the dough onto a floured surface and roll to exactly 1/2 inch thick; use a sharp knife or pizza cutter to slice the dough into 3 1/2 inch triangles.
- Arrange triangles on a parchment-lined baking sheet and bake at 350°F (175°C) for 8 minutes until edges are barely gold and tops remain pale.
- Allow cookies to cool completely on a wire rack before preparing the frosting by beating the remaining butter with sifted powdered sugar until silky.
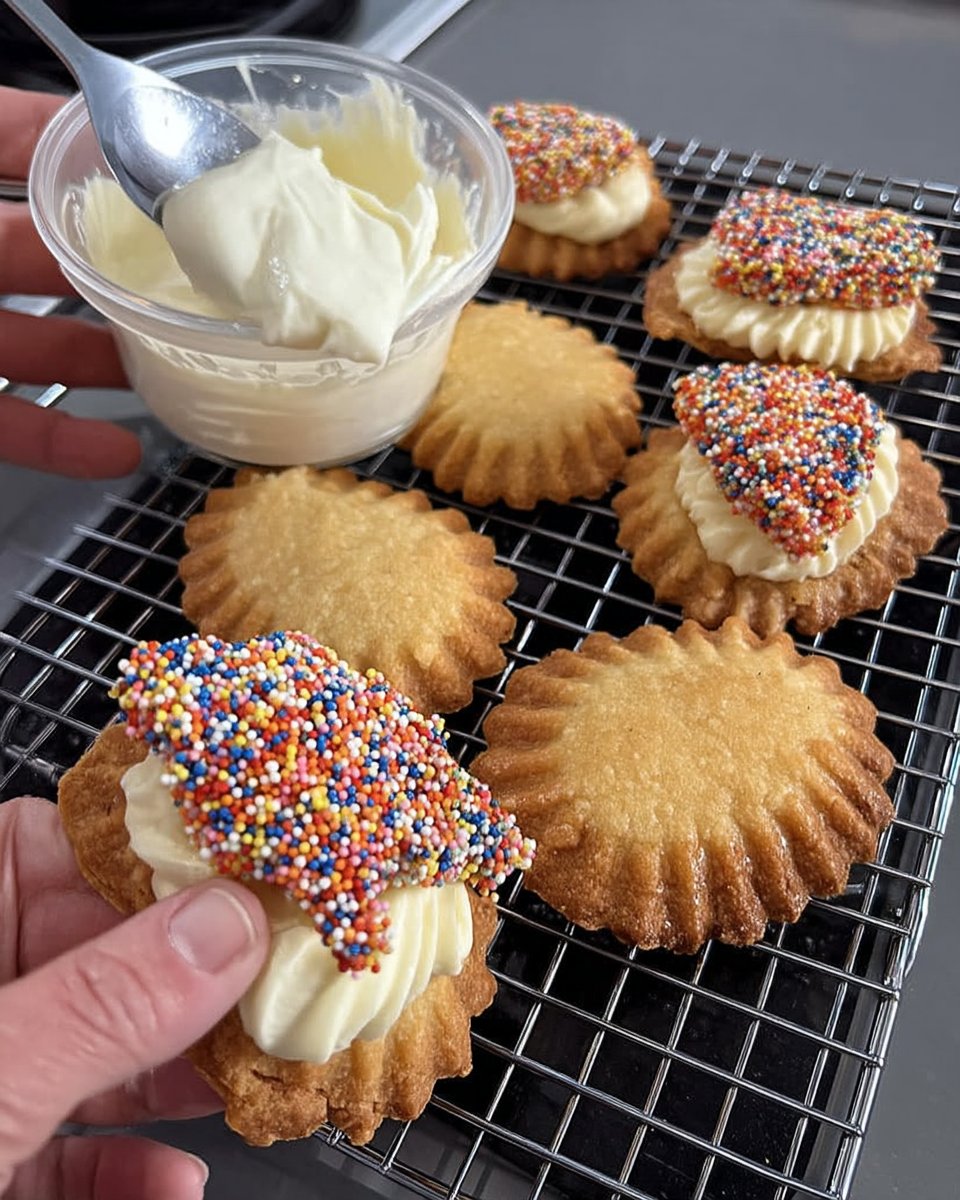
- Spread a small amount of frosting onto each cooled cookie and immediately top with sprinkles to finish.
Notes
To ensure the most precise edges, use a metal ruler to measure the 1/2 inch thickness of your dough and the 3 1/2 inch length of your triangles. If your kitchen environment is warm, you may find it helpful to place the cut dough triangles in the freezer for five minutes before baking to prevent any unnecessary spread in the oven.
- Prep Time: 30 mins
- Cook Time: 8 mins
- Category: Dessert
- Method: Baking
- Cuisine: American
Historical Ingredients and Proper Components
To achieve the specific 1940s profile, we must look at the quality and temperature of our ingredients with methodical care. Every component plays a distinct role in the final chemistry of the dough.
- Unsalted Butter: Use butter at exactly 65°F (18°C). This temperature allows the fat to remain solid enough to hold air during creaming, yet soft enough to incorporate the sugar crystals. In the Victorian era, this was achieved by leaving butter in a cool larder; today, we use a digital thermometer for precision.
- Granulated Sugar: Standard fine sugar provides the abrasive edges needed to cut through the butter during aeration. This creates the tiny air pockets that the baking powder will later expand.
- Large Egg: The egg acts as the primary emulsifier. It binds the fats and liquids, providing the lecithin necessary for a smooth, homogenous dough that won’t separate during the bake.
- Almond and Vanilla Extracts: The combination of these two extracts mimics the “Princess Bakery Emulsion” popular in mid-century American and British bakeries. The almond provides a floral high note, while the vanilla offers a grounding, woody base.
- Baking Powder: Unlike the volatile pearlash of the early 1800s, modern baking powder provides a dual-acting lift. It reacts first when moistened and again when heated, ensuring the fairy-like lightness.
- All-Purpose Flour: A flour with a protein content of around 10-11% is ideal. This provides enough structure to hold the 1/2 inch height without becoming tough. If you are in the UK, a blend of plain flour and a touch of strong bread flour can replicate this American standard.
- Fine Salt: Salt is the silent conductor of flavor. It suppresses bitterness and highlights the sweetness of the butter and the floral notes of the almond.
The Proper Method for Fairy Biscuits
Step 1: Aerate the Fat and Sugar
In the bowl of a stand mixer, combine the room-temperature butter and granulated sugar. Beat on medium speed for approximately 3 to 5 minutes. You are looking for a visible change in color—the mixture should turn from a dense yellow to a pale, ivory cream. This process, known as creaming, is the foundation of the cookie’s lift. Historically, this was done by hand with a wooden spoon for up to thirty minutes; modern motors allow us to achieve this mechanical aeration with significantly more consistency.
Step 2: Emulsify the Liquids
Add the egg and both the almond and vanilla extracts to the creamed mixture. Continue beating on medium speed until the egg is fully incorporated and the mixture appears smooth. If the batter looks curdled, it is likely because the egg was too cold; simply continue beating until the friction of the paddle brings the temperature up and the emulsion stabilizes. This step is critical for a uniform crumb.
Step 3: Incorporate the Leavening and Salt
Add the baking powder and salt directly into the wet mixture. Mix for 30 seconds to ensure even distribution before the bulk of the flour is added. By adding the leavener at this stage, you guarantee that every square inch of the dough will have the same rising potential, preventing lopsided cookies or uneven textures.
Step 4: Fold in the Flour
Reduce the mixer speed to its lowest setting and gradually add the flour. Mix only until the dough just comes together and no streaks of dry flour remain. Over-mixing at this stage will develop the gluten, transforming a tender fairy cookie into a tough, bread-like biscuit. In historical kitchens, this was often finished by hand using a large metal spoon to fold the flour in with a light touch.
Step 5: Roll and Shape with Precision
Turn the dough out onto a lightly floured surface. Using a rolling pin, flatten the dough until it is exactly 1/2 inch thick. Use a ruler to verify this height; precision here ensures that the baking time provided remains accurate. Using a sharp knife or a pizza cutter, slice the dough into triangles approximately 3 1/2 inches long. This shape maximizes the edge-to-center ratio, which is vital for the traditional texture.
Step 6: Execute the Bake
Place the triangles on a parchment-lined baking sheet, leaving at least an inch of space between them. Bake at 350°F (175°C) for 8 minutes. The edges should be just beginning to show a hint of gold, while the tops remain pale. Do not over-bake; the cookies will continue to set on the hot tray once removed from the oven. Allow them to cool completely on a wire rack before attempting to frost.
Step 7: Prepare the Buttercream Frosting
Beat the remaining butter until it is perfectly smooth and free of lumps. Gradually sift in the powdered sugar, beating on low speed initially to avoid a sugar cloud, then increasing to medium-high until the frosting is light and spreadable. The goal is a silk-like consistency that will hold the decorative sprinkles.
Step 8: Assembly and Finish
Apply approximately one to two teaspoons of frosting to each cooled cookie. Spread it evenly to the edges of the triangle. Immediately top with sprinkles while the frosting is still wet to ensure they adhere. The result should be a clean, geometric treat that looks as professional as it tastes.
Jordan’s Technique Notes for Success
Achieving the perfect fairy-like crumb requires an understanding of how temperature affects dough behavior. If your kitchen is particularly warm, the dough may become too soft to handle after rolling. If this occurs, place the cut triangles in the refrigerator for 10 minutes prior to baking. This chilling period firms up the butter, which helps the cookies maintain their sharp triangular edges in the oven. For those interested in the logistical side of large-batch baking, mastering efficient cookie methods can help maintain this precision even when doubling the recipe.
Another technical secret lies in the extract choice. While the recipe calls for standard extracts, many professional bakers in the 1940s used a “Princess Emulsion.” This is a water-based flavoring that doesn’t bake out as easily as alcohol-based extracts. If you find your cookies lose their floral punch after baking, consider making the switch. For a related exploration of texture and flavor preservation, you might find the concept of fairy toast cookies an interesting comparison in how simple ingredients can be transformed through technique.
Regional Differences and Tested Adaptations
While the 1940s American version is the standard here, this recipe shares much of its DNA with the British Shrewsbury biscuit. To lean into that heritage, you can omit the frosting and add the zest of one lemon and a half-cup of dried currants to the dough. This creates a more sophisticated, less sweet biscuit that pairs excellently with a sharp Earl Grey tea. If you’re looking to adapt this for different times of the year, our guide on holiday cookie science provides data on how adding spices like cinnamon or ginger can affect the moisture content and spread of the dough.
Another historical variation involves the use of “Baker’s Ammonia” (ammonium carbonate) instead of baking powder. This was the traditional leavener for very thin, crisp cookies before modern baking powder became widely available. While it provides an incredibly light and crisp texture, it is only suitable for small, thin bakes like these where the ammonia gas can fully escape during the baking process. If you experiment with this, be prepared for a strong scent during the bake, though it disappears completely once the cookies are cool.
Traditional Service and Classic Enjoyment
To honor the 1940s heritage of this recipe, these cookies are best served on a tiered tray or a simple porcelain plate. The geometric triangle shape makes them particularly striking when arranged in a circular pattern, with the points facing outward. This was a common presentation for afternoon tea, where the visual appeal was as important as the flavor. If you are serving these at a formal gathering, you can refine your presentation skills by studying precision cookie decorating to ensure your frosting lines are as sharp as the cookie edges.
Pair these cookies with a beverage that complements the almond notes. A light Oolong tea or a standard English Breakfast tea with a splash of milk works beautifully. For a more modern approach, they serve as an excellent accompaniment to a vanilla bean latte. The crispness of the cookie provides a necessary textural contrast to the creamy foam of the coffee, making for a sophisticated mid-afternoon break.
The Technical Truth of the Fairy Cookie
Mastering the Fairy Cookie is a testament to the power of the creaming method and the importance of geometric precision in baking. By treating these simple ingredients with the respect they deserve—monitoring temperatures, measuring thicknesses, and timing the bake to the minute—you produce a result that is far greater than the sum of its parts. This recipe is a perfect example of how historical wisdom, when viewed through the lens of modern food science, remains entirely relevant in the contemporary kitchen. To continue building your repertoire of classic bakes, I suggest exploring our foundation cookie recipes to see how these principles apply to other traditional biscuits. We would love to see your technical triumphs; please share your results with us on Facebook, Instagram, or Pinterest.

